As you start planning your holiday decor, consider ditching the store-bought decorations and creating your own unique pieces instead. You'll be amazed at how a few simple materials can come together to create a one-of-a-kind atmosphere that reflects your personal style. From natural elements like pinecones and wood slices to upcycled materials and handmade fabric ornaments, the possibilities are endless. But where do you even begin? With so many creative ideas out there, it can be overwhelming to decide which DIY project to tackle first.
Rustic Wood Slice Ornaments

Transform your Christmas tree into a winter wonderland with rustic wood slice ornaments that exude a cozy, natural charm.
You can create these ornaments by slicing branches into thin rounds, then sanding them to smooth out any rough edges.
To add a personal touch, try wood burning festive designs or patterns onto the slices.
You can also add rustic charms, like tiny pinecones or artificial snowflakes, to give your ornaments an extra layer of depth.
Once you've added your desired embellishments, simply thread a piece of twine or ribbon through a hole in the top of each slice and hang them on your tree.
The result is a unique, earthy take on traditional ornaments that will add a touch of rustic elegance to your holiday decor.
Upcycled Glass Bottle Decor
You'll start by preparing your glass bottles, making sure they're clean, dry, and free of labels – a vital step in ensuring your decorations turn out flawless.
Next, you'll release your creativity with decorative painting ideas, from subtle snowflakes to bold, bright stripes.
Bottle Preparation Tips
Several upcycled glass bottles await their festive makeover, and making it a priority to ready them thoroughly is vital to release their decorative potential.
You'll want to give them a good cleaning, removing any labels and residue with soap and warm water. For tough labels, try soaking them in hot soapy water or using a label remover.
Rinse thoroughly and dry with a soft cloth to prevent water spots. Consider the unique shape of each bottle, as varying silhouettes can add visual interest to your decor.
Look for bottles with interesting curves, flared necks, or unusual sizes to add depth to your arrangement. With your bottles clean and dry, you're ready to tap your creativity and turn them into stunning Christmas decorations.
Decorative Painting Ideas
With your sparkling clean bottles ready, it's time to set free your inner artist and adorn them with festive flair.
Grab your paints and get creative! Transform your bottles into a Winter Wonderland by painting snowflakes, pinecones, or festive trees.
Use metallic paint to add a touch of luxury or glitter paint for extra sparkle. Try creating Festive Patterns like stripes, polka dots, or chevrons in bold red and green hues.
You can also add a personal touch by painting a special message or the year on the bottle. Whatever design you choose, make sure it's one that spreads holiday cheer!
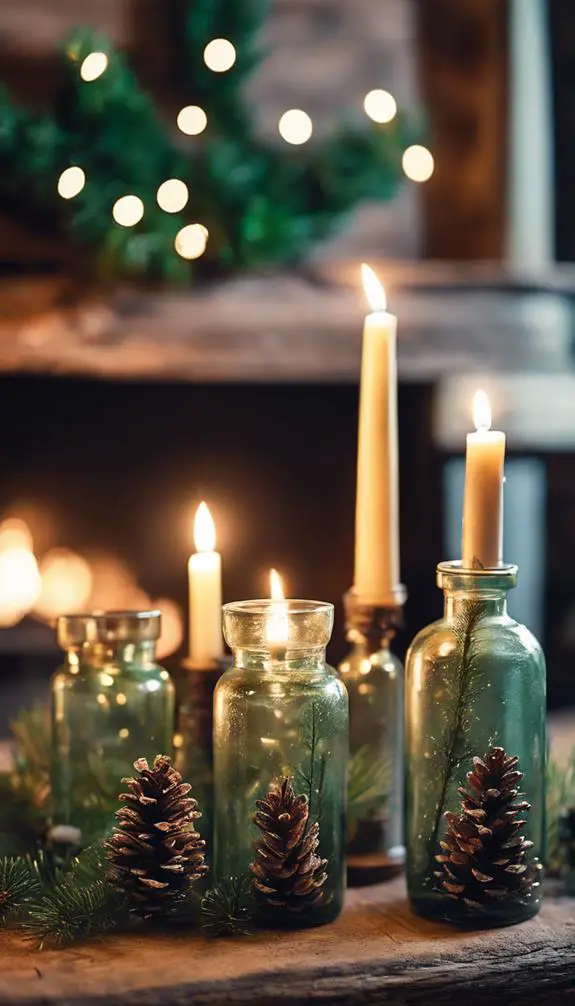
Twinkling Light Effects
Five twinkling lights can transform your upcycled glass bottle into a dazzling winter wonderland centerpiece.
Simply thread string lights or fairy lights through the bottle's neck, creating a mesmerizing glow. You can wrap the lights around the bottle's curves or create a whimsical pattern to add visual interest.
To take it up a notch, fill the bottle with water, glitter, or small ornaments to refract the light and create a kaleidoscope effect.
Place the bottle on a mantel, side table, or windowsill to add a touch of magic to your holiday decor. With just a few minutes of effort, you'll have a sparkling, eco-friendly decoration that's sure to impress your friends and family.
Pinecone Garland Ideas
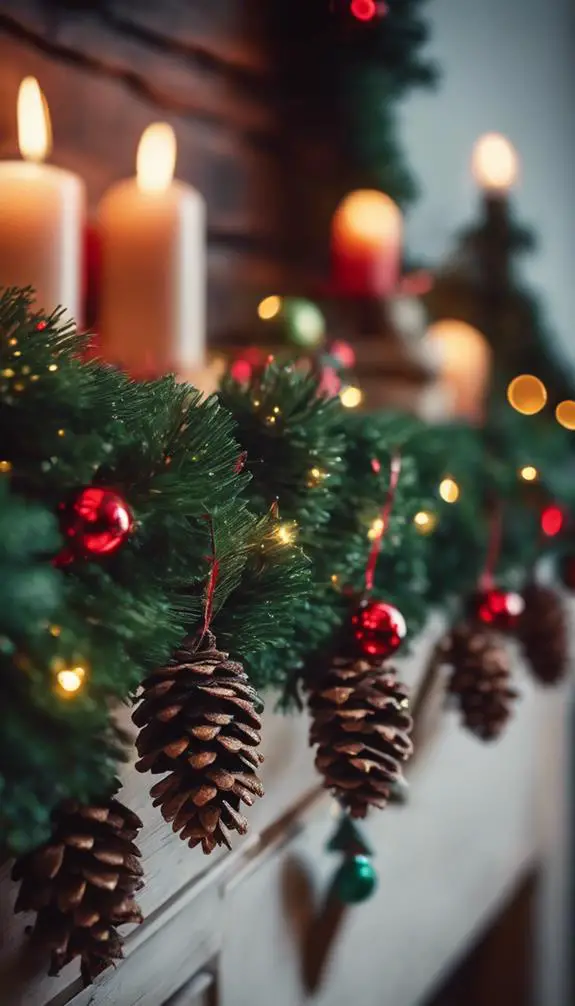
You're about to create a stunning pinecone garland that'll add a touch of rustic charm to your holiday decor.
Start by collecting an assortment of pinecones in varying shapes and sizes, then get creative with decorating ideas like spray painting, glittering, or wrapping them with twine or ribbon.
From there, you can craft nature-inspired garland styles that range from whimsical to elegant, perfect for adorning your mantel, staircase, or Christmas tree.
Pinecone Decorating Ideas
Several handfuls of pinecones can instantly evoke the warm, cozy essence of Christmas, and transforming them into a beautiful garland is a simple yet impactful DIY project.
You can get creative by adding a personal touch to your pinecones. Try transforming them into pinecone birds by gluing on small twigs for wings and a tiny beak made from a pine needle.
Alternatively, create pinecone flowers by attaching artificial petals made from felt or paper around the pinecone's center. You can also add some sparkle by drizzling glue and sprinkling glitter or painting them with metallic paint.
With a little imagination, your pinecones can become a stunning centerpiece or mantel decoration that exudes rustic charm and festive flair.
Nature-Inspired Garland Styles
Now that you've added a personal touch to your pinecones, it's time to string them together into a stunning nature-inspired garland.
For a forest-fresh look, alternate pinecones with bunches of dried forest flowers, like baby's breath or ferns, to create a whimsical, woodsy vibe.
To add some botanical beauty, incorporate eucalyptus leaves or sprigs of rosemary into your garland.
You can also use floral wire to attach small pinecones to a length of twine or ribbon, creating a more rustic, homespun look.
Experiment with different textures and colors to create a one-of-a-kind garland that reflects your personal style.
DIY Paper Snowflake Decor

How intricately can you weave magic into your Christmas decor with a simple piece of paper?
With paper crafting, you can create exquisite DIY paper snowflake decor that adds a touch of winter wonder to your home.
Start by printing out snowflake templates or designing your own unique patterns. Fold and cut out the intricate designs, then unfold to reveal your delicate snowflake.
Hang them from the ceiling or windows using thread or string, creating a mesmerizing winter wonderland effect.
You can also add a personal touch by using colored paper or adding glitter and rhinestones.
With a few simple steps, you'll have a beautiful, one-of-a-kind DIY paper snowflake decor that will be the envy of all your friends and family.
Recycled Book Page Art
You'll love transforming old book pages into stunning Christmas decorations.
Try turning them into intricate paper snowflake designs, or roll and shape them into beautiful book page wreaths that add a touch of vintage charm to your mantel.
You can also decoupage vintage pages onto ornaments, creating one-of-a-kind treasures that will become holiday heirlooms.
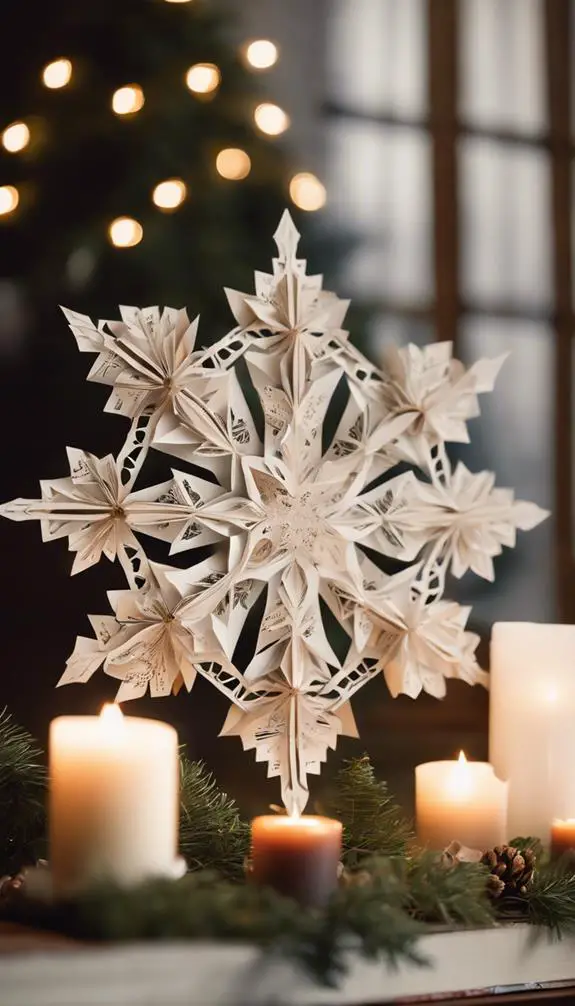
Paper Snowflake Designs
Transforming old book pages into delicate paper snowflakes is a brilliant way to breathe new life into discarded literature, and it's an eco-friendly alternative to traditional paper crafts.
You'll need a pair of scissors, a pencil, and a ruler to get started. Begin by folding your book page into a triangle or square, depending on the design you want to achieve.
Draw a pattern onto the folded paper, making sure to include delicate patterns and intricate details. Cut out the design, and gently unfold your paper to reveal a beautiful, lacy snowflake.
Add a touch of elegance with frosted edges, created by dusting the paper with a mixture of water and glitter. Hang your snowflake in a window or on the wall to catch the light and add a touch of magic to your holiday decor.
Book Page Wreaths
With a few simple materials and some creative flair, anyone can craft a stunning book page wreath that's both eco-friendly and visually striking.
You'll need a wire or foam wreath form, vintage book pages, a hot glue gun, and some floral wire.
Start by decoupaging the book pages onto the wreath form, overlapping them to create a layered look.
Once you've covered the entire surface, use floral wire to attach a loop for hanging.
To add some texture, roll up individual pages to create loose, paper flowers and attach them to the wreath using hot glue.
You can also add some festive ribbons or bows to complete the look.
This paper wreath is a beautiful, one-of-a-kind decoration that's sure to impress your holiday guests.
Vintage Page Ornaments
From the worn covers of vintage novels to the yellowed pages of forgotten poetry, recycled book page art offers a treasure trove of creative possibilities for crafty individuals.
You can transform these pages into unique vintage page ornaments that radiate a nostalgic charm. Simply cut out intricate shapes, words, or phrases from the pages, and decoupage them onto glass balls or ceramic shapes.
Add a touch of vintage charm by distressing the edges or adding a Sepia-toned finish. Hang them on your tree or use them as gift tags to infuse your holiday decor with the essence of book art.
With a little creativity, you'll create one-of-a-kind ornaments that tell a story and evoke a sense of nostalgia.
Handprint Christmas Trees

Three tiny handprints can become a festive Christmas tree in just a few simple steps.
Start by gathering green finger paint, paper, and a smock to protect your child's clothes. Have your little one dip their hand in the paint and place their hand on the paper to create the tree's base.
Add two smaller handprints above the first, slightly overlapping each other, to form the tree's body. Finish with a small trunk and any additional decorations you like.
This project encourages child creativity and makes a unique, personalized decoration for your home. You can also add a photo of your child next to the tree to make it an extra-special keepsake.
Mason Jar Vase Fillers
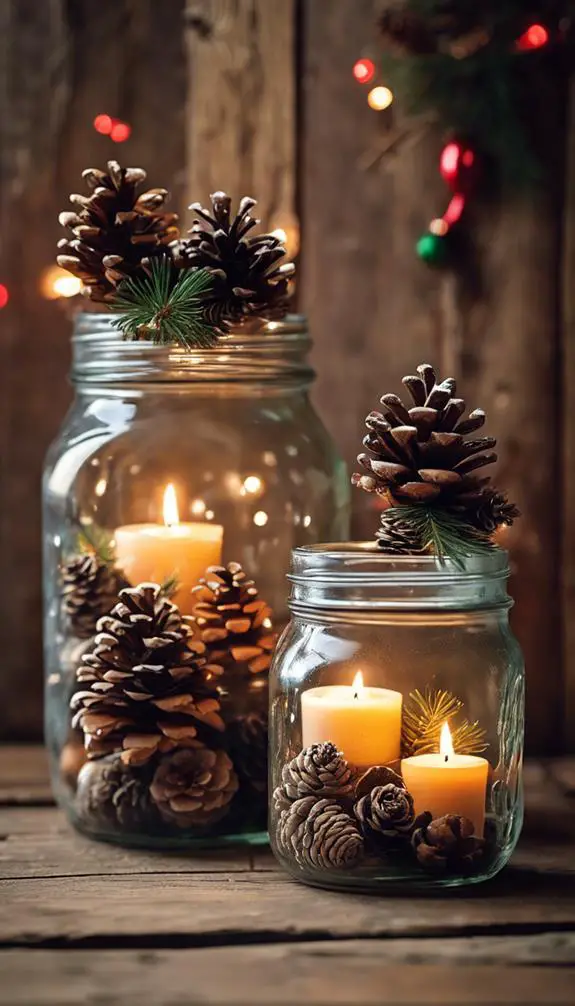
Imagination knows no bounds when it comes to transforming humble mason jars into stunning Christmas decorations.
You can create a beautiful winter wonderland scene by filling your mason jar with fresh flowers, such as eucalyptus, baby's breath, or even red roses, and adding some seasonal greens like fir sprigs or holly.
Add some candles, pinecones, or ornaments to give it a festive touch.
You can also fill the jar with cranberries, holly berries, or candy canes for a pop of color.
Get creative and experiment with different combinations to create a unique centerpiece for your holiday table.
With a little imagination, your mason jar vase fillers will be the talk of the town this Christmas season!
Natural Dried Fruit Wreath

You'll start by selecting the perfect fruits for your wreath, considering factors like color, texture, and durability to guarantee your creation looks stunning throughout the season.
Next, you'll need to dry your fruits to perfection, a process that requires careful attention to timing, temperature, and humidity control to prevent spoilage.
Fruit Selection Tips
A stunning natural dried fruit wreath begins with a thoughtful selection of fruits that will add texture, color, and fragrance to your DIY Christmas decoration.
When choosing fresh fruit, consider winter citrus varieties like oranges, lemons, and grapefruits for their vibrant colors and invigorating scents.
Apples and pears add a natural sweetness, while cranberries and apricots provide a pop of color.
Don't forget to select fruits in varying sizes and shapes to create visual interest.
You'll also want to think about the fruit's natural drying time, as some fruits dry faster than others.
Drying Process Essentials
With your fruit selection in hand, it's time to coax out their natural beauty through the drying process.
You've got two options: air drying or oven drying.
For air drying, simply thread your fruit onto a wire or twine, making sure they don't touch each other, and hang them in a warm, dry, dark place.
It'll take 2-4 weeks for the fruit to fully dry.
Oven drying is faster, taking only a few hours, but requires more attention.
Preheat your oven to its lowest temperature setting, and place the fruit on a baking sheet lined with parchment paper.
Check on them every hour, rotating the sheet to guarantee even drying.
Felt Ball Ornament Tutorial
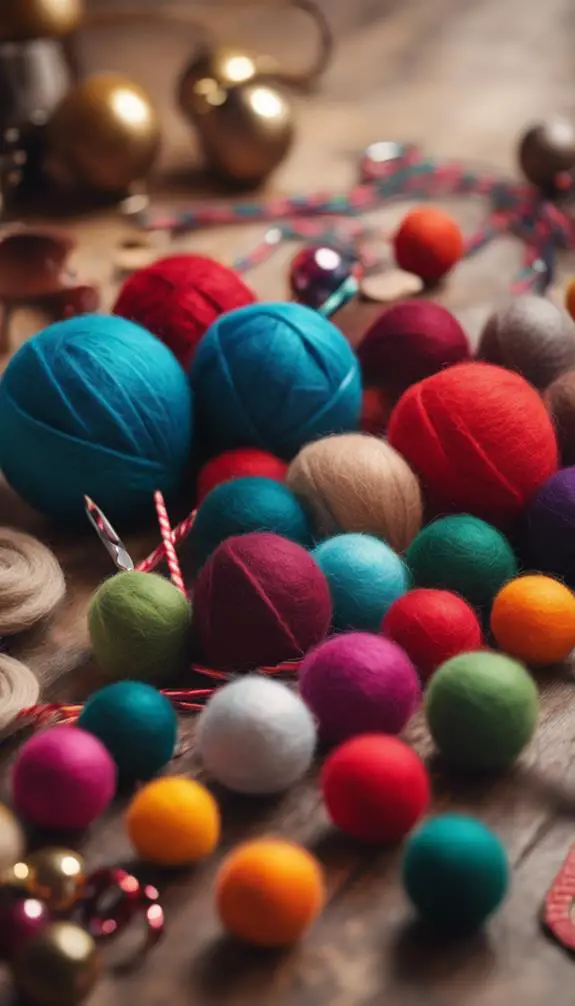
Get ready to release your creativity and add a touch of handmade charm to your Christmas tree with these adorable felt ball ornaments.
You'll need a variety of felt colors and textures to create a unique and eye-catching look. Experiment with different felt color schemes, like monochromatic, complementary, or analogous, to create a cohesive aesthetic.
Mix and match different felt textures, such as smooth, velvety, or woolly, to add depth and interest to your ornaments.
Use a Styrofoam ball as the base and wrap it with layers of felt, securing each layer with a hot glue gun.
Once complete, hang your felt ball ornaments on the tree or use them as gift toppers for a personalized touch.
Vintage Window Display
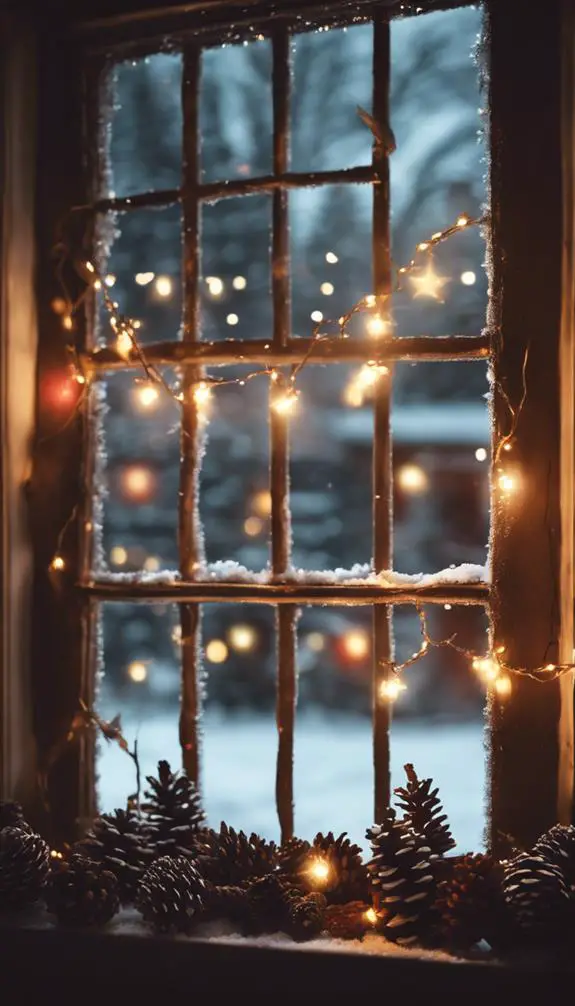
You're probably no stranger to scouring thrift stores and antique shops for unique treasures to repurpose as Christmas decorations.
A vintage window can be a stunning centerpiece for your holiday display. Hang it on a wall or prop it up on a mantel, and get creative with your window styling.
Fill the panes with evergreen branches, holly, or frosted glass ornaments for a winter wonderland feel.
Add some vintage charm by draping garlands or swags across the frame. You can also attach small decorations like pinecones, ribbons, or bows to the window's edges for extra texture and visual interest.
With a little imagination, a vintage window can become a one-of-a-kind holiday showstopper.
Twine Wrapped Candle Holders
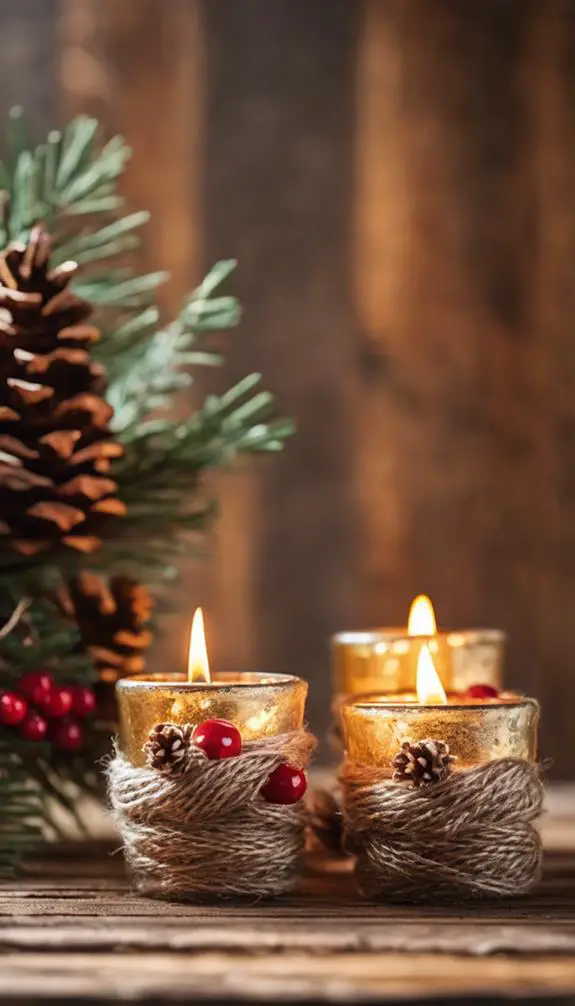
Often, the simplest DIY projects yield the most striking results, and twine wrapped candle holders are a perfect example.
You'll need a few basic materials: candles, twine, scissors, and a hot glue gun.
Wrap the twine around the candle holder, overlapping the strands to create a seamless look. Secure the twine with a dab of hot glue.
Add a few twine accents around the rim for a rustic touch. Place the candle in the holder, and you've got a beautiful centerpiece that's perfect for your holiday table.
The twine adds a cozy, homespun feel that pairs perfectly with evergreen branches, pinecones, or holly. Use them as a candle centerpiece and enjoy the warm, inviting ambiance they bring to your holiday gathering.
Snow Globe Inspired Decor
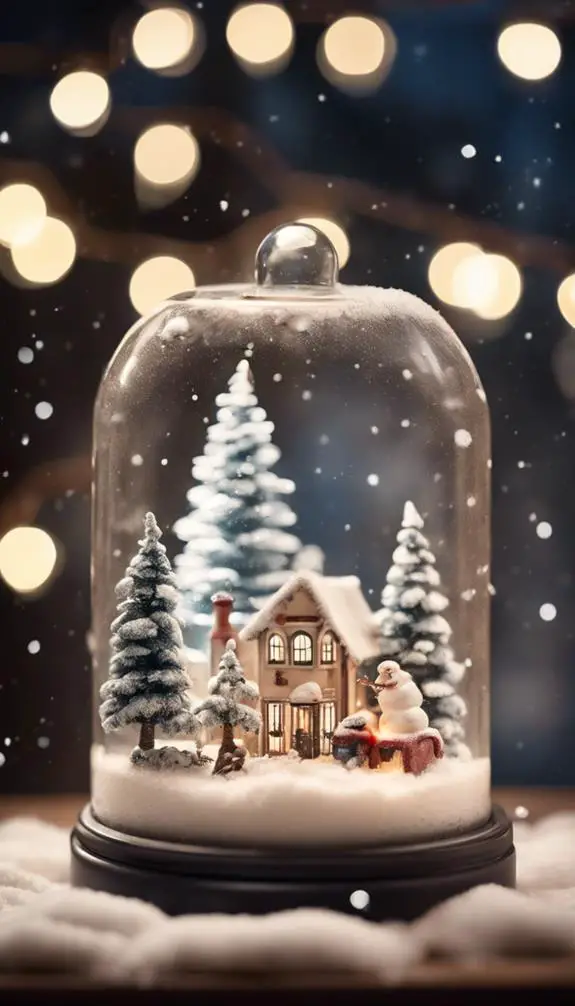
As you're adding warmth and coziness to your holiday table with twine wrapped candle holders, why not create a whimsical winter wonderland scene with snow globe inspired decor?
Create a frosty village on a wooden board or a large plate by arranging small ceramic houses, pinecones, and tiny snowmen.
Add a sprinkle of glittering snowflakes and some artificial snow around the village to create a snowy effect.
You can also add some small figurines, like reindeer or penguins, to bring the scene to life.
To complete the look, place a large glass cloche or a bell jar over the scene to give it a snow globe-inspired feel.
This whimsical centerpiece will transport your guests to a magical winter wonderland.
Photo Display Ornaments

Transform your favorite holiday memories into a beautiful display of love and joy with photo display ornaments.
You can create personalized ornaments that capture the essence of your special moments. Print your favorite photos and attach them to clear glass or acrylic ornaments using a decoupage medium or a hot glue gun.
Add a ribbon or twine to hang them on the tree. For a more rustic look, use reclaimed wood or burlap as the base of your ornament.
You can also add captions or quotes to make it more personal. These photo display ideas will make your Christmas tree truly one-of-a-kind.
With a little creativity, you'll have a beautiful and sentimental keepsake to treasure for years to come.
Burlap and Ribbon Banners
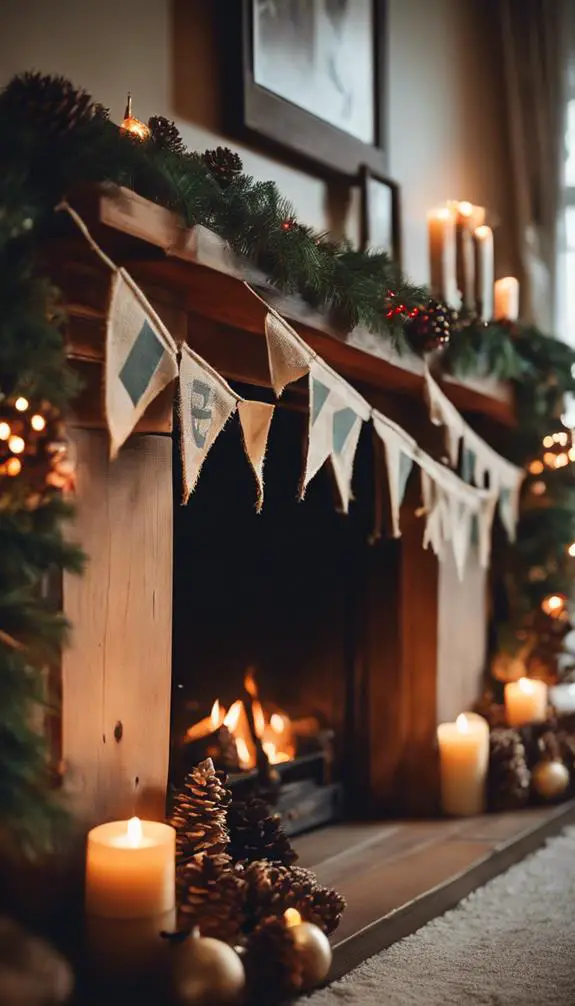
While unwrapping gifts or sipping hot cocoa, you'll love gazing at a charming burlap and ribbon banner that adds a touch of rustic elegance to your holiday decor.
To create this Burlap beauty, start by cutting burlap into triangles or rectangles, depending on the desired shape.
Then, string the pieces together with rustic twine or jute, leaving space for your ribbon embellishments.
Use a hot glue gun to attach festive ribbons in red, green, or gold, adding a pop of color and texture.
For a more rustic look, fray the burlap edges or add a few loose threads.
Hang your banner above the mantel or along a staircase to infuse your space with Rustic charm and cozy warmth.
Yarn Ball Christmas Tree
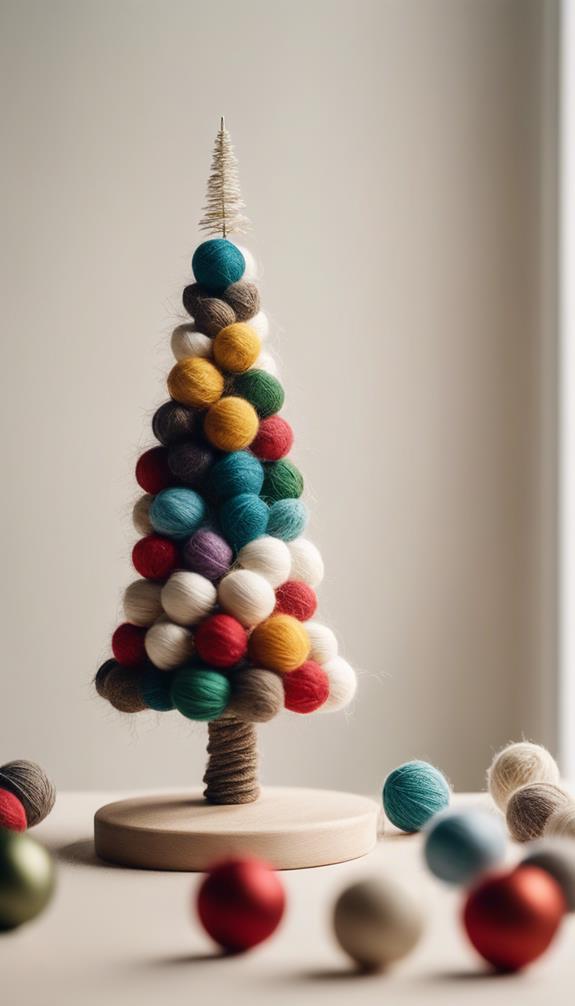
Frequently, the most magical Christmas decorations are those that evoke a sense of whimsy and wonder.
Your Yarn Ball Christmas Tree is sure to bring a touch of magic to your holiday decor.
To create this eye-catching tree, you'll need Styrofoam balls in various sizes, yarn in a range of colors, and a hot glue gun.
Use yarn wrapping techniques to cover each ball in a different colorful texture, from soft pastels to bold brights.
Then, arrange the balls in a tree shape on a wooden dowel or cardboard cone, securing them with hot glue.
Finish with a star or angel on top, and your whimsical Yarn Ball Christmas Tree is ready to delight.
Frequently Asked Questions
Can I Use Artificial Snow in My DIY Winter Wonderland Decorations?
You can totally use artificial snow to create a magical winter wonderland scene, capturing the essence of frosty landscapes with varied snow textures, from soft and powdery to icy and crunchy, adding a realistic touch to your DIY decor.
How Do I Prevent DIY Decorations From Looking Cheap or Tacky?
To elevate your creations, you'll want to focus on material choices that exude quality, like rich fabrics, natural elements, or metallic accents, and strike an aesthetic balance by mixing textures, scales, and colors to create a cohesive, sophisticated look.
Are DIY Decorations Suitable for Outdoor Use in Harsh Weather?
When creating outdoor decorations, you'll want to prioritize weather resistance by selecting materials that can withstand harsh conditions, like waterproof fabrics, rust-resistant metals, or durable plastics, ensuring your masterpieces remain vibrant and intact, no matter the weather.
Can I Involve My Kids in Making DIY Christmas Decorations?
You can spark creativity and create lasting memories by involving your kids in kid-friendly crafts that become treasured DIY Christmas decorations, fostering family bonding and holiday magic through shared creative experiences.
How Do I Store DIY Decorations to Keep Them Intact for Next Year?
You'll want to protect your treasured creations, so grab some sturdy storage bins and a label maker to organize and identify each decoration, ensuring they'll remain intact and ready for next year's festive display.
Conclusion
You've transformed your space into a winter wonderland with these eco-friendly and creative DIY Christmas decorations. Your rustic wood slice ornaments add a touch of the outdoors, while upcycled glass bottles shimmer with candlelight. Pinecone garlands and natural dried fruit wreaths evoke a sense of rustic charm. Paper snowflakes dance in the air, and recycled book page art tells a story. Your handmade felt ball ornaments and yarn ball Christmas tree are tributes to your creativity. Now, sit back and bask in the warm glow of your handmade holiday magic.