You're about to set out on a riveting adventure, crafting a miniature world that sparks imagination and wonder. As you gather natural materials and decide on a theme, you'll begin to envision the tiny inhabitants that will call your DIY fairy house home. But before you can welcome them, you'll need to construct a sturdy base, build walls and a roof, and add doors and windows that invite curiosity. With the foundation set, you'll be poised to add the finishing touches that bring this enchanted domain to life – but how will you choose to bring magic to this miniature space?
Gathering Essential Materials
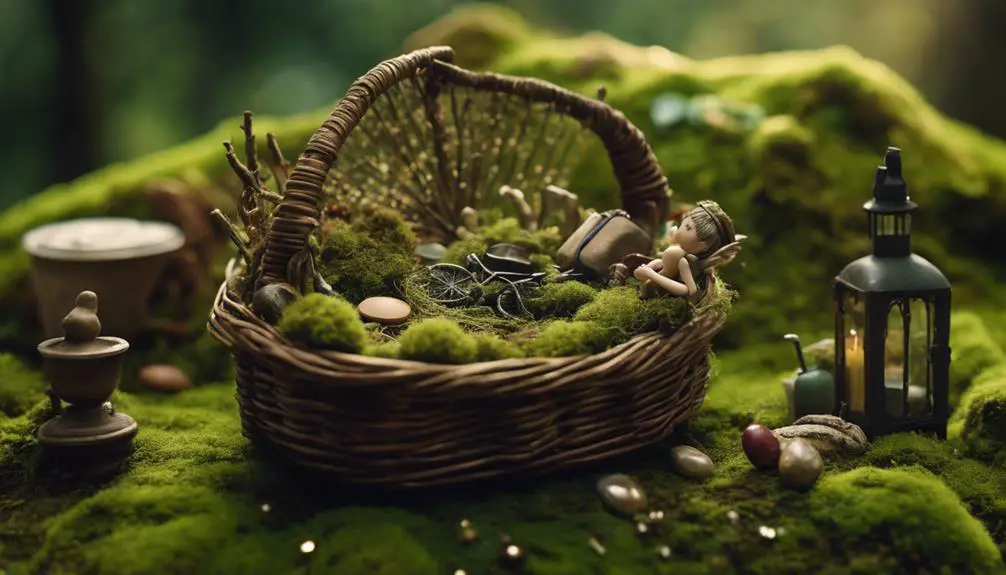
Gather a variety of materials, including twigs, moss, pebbles, and miniature decorative items, to bring your fairy house to life.
These essential materials will help you create a whimsical fairy habitat that's teeming with character.
For the base of your miniature landscape, you'll need a sturdy foundation like a wooden or ceramic base, or even a natural element like a log or stone.
To add texture and depth, collect twigs, branches, and other natural materials to create the framework of your fairy house.
Moss and other foliage will help bring a touch of greenery to your design, while pebbles and small rocks can be used to create pathways or decorative accents.
Don't forget to scour thrift stores or craft shops for miniature decorative items like tiny furniture, doors, or accessories that will add a touch of magic to your fairy habitat.
With these materials at your fingertips, you'll be well on your way to crafting a one-of-a-kind fairy house that's sure to delight.
Choosing a Fairy House Theme
As you begin designing your miniature fairy habitat, you'll want to decide on a theme that will guide your creative decisions and bring your tiny world to life.
A theme will help you visualize the overall aesthetic, from the colors and textures to the accessories and details.
Consider what inspires you – do you envision a whimsical forest, a mystical moonlit scene, or a vibrant fairy garden? Perhaps you're drawn to a specific color palette or architectural style.
Whatever your vision, choose a theme that sparks your imagination and creativity.
Your theme will also influence the type of materials and embellishments you'll use.
For instance, a fairy garden theme might call for more natural elements like twigs, moss, and pebbles, while a whimsy-inspired theme might incorporate bright colors, glitter, and unusual textures.
By selecting a theme, you'll be able to make intentional design choices that will bring cohesion and magic to your fairy house.
Take your time, and let your imagination run wild – the possibilities are endless!
Preparing the Base Structure
Now that you've chosen your fairy house theme, it's time to focus on preparing the base structure.
You'll need to select a suitable base material, considering factors like durability, weight, and aesthetics.
As you move forward, you'll also need to think about the structural design, assembly, and bonding techniques that will bring your miniature masterpiece to life.
Base Material Selection
Choose a base material that complements your fairy house design, considering factors like durability, texture, and size, as you select from natural options like logs, rocks, or driftwood, or opt for man-made materials such as ceramic, wood, or resin.
Natural materials can add an organic, whimsical touch to your fairy house, while man-made materials provide a more controlled, uniform look.
When working with natural materials, consider collecting bark chunks or twig segments to create a unique, textured base.
You can arrange these pieces to form a sturdy foundation or use them to create a mosaic pattern.
For a more rustic look, try using logs or driftwood, which can be sanded and shaped to fit your design.
If you prefer a more polished appearance, ceramic or resin bases can provide a sleek, modern aesthetic.
Whatever material you choose, make sure it's sturdy enough to support your fairy house and can withstand outdoor elements if you plan to display it outside.
Structural Design Considerations
With your base material selected, you'll need to prepare it for construction by determining the structural design that will support your fairy house, examining factors like weight distribution, stability, and drainage to guarantee a sturdy foundation.
This is vital, as a well-designed base will secure your fairy house can withstand environmental elements and last for a long time.
When calculating the load, ponder the weight of the structure, including the materials, decorations, and any additional features.
This will help you determine the foundation type that's suitable for your project. For instance, a shallow foundation may be sufficient for a small, lightweight fairy house, while a deeper foundation may be needed for a larger, heavier structure.
You'll also need to think about the type of foundation that will work best for your base material.
For example, if you're using a natural material like wood or stone, you may want to ponder a foundation that allows for drainage and airflow to prevent moisture buildup.
Assembly and Bonding
You'll begin constructing your fairy house's base structure by assembling the individual components, carefully aligning and bonding them to create a sturdy foundation that meets the design considerations you've established. This vital step requires attention to detail and a solid understanding of fairy bonding techniques.
Start by applying a thin layer of adhesive to the connecting surfaces, ensuring a strong bond between the components.
When choosing an adhesive, consider the type of materials you're working with and the environmental conditions your fairy house will be exposed to. For example, a waterproof adhesive is ideal for outdoor fairy houses, while a gentle, non-toxic adhesive is better suited for indoor creations.
Some popular adhesive types for fairy bonding include hot glue, epoxy, and acrylic adhesive.
Once you've applied the adhesive, carefully align the components and hold them in place until the bond is secure. Use clamps or weights to maintain pressure, if necessary.
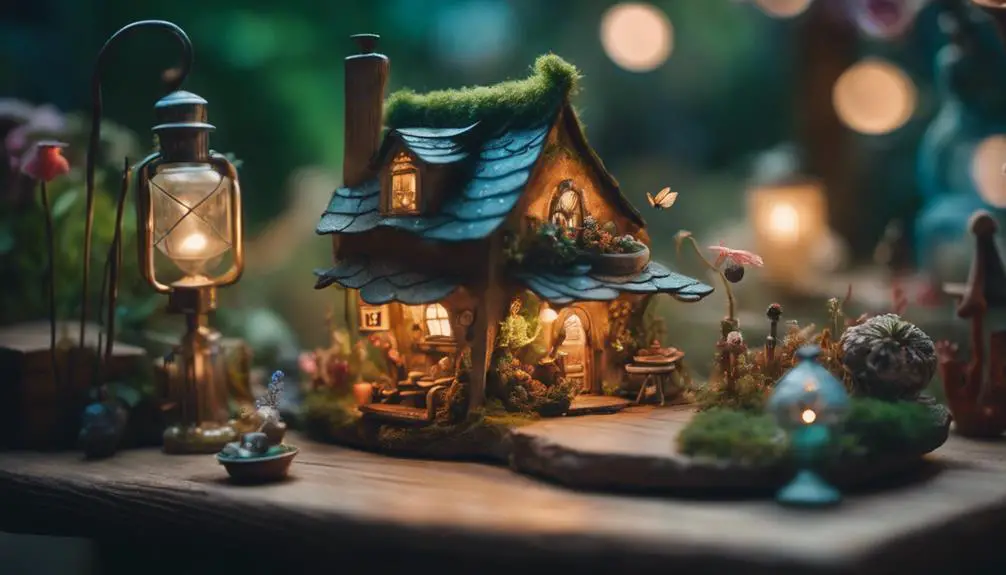
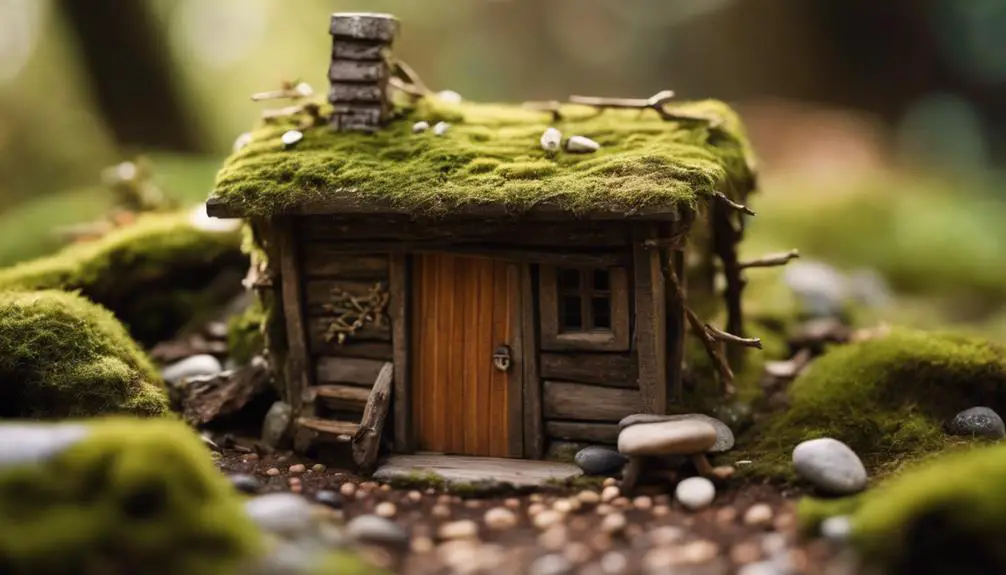
Building the Walls and Roof
Now that you've prepared the base structure, it's time to bring your fairy house to life with walls and a roof.
You'll start by constructing the walls, which will involve cutting and shaping the materials to fit your design, and then assembling them into sturdy, upright structures.
As you build the walls, you'll also want to ponder the roof design elements, such as the pitch, shape, and materials, to guarantee a cohesive and enchanting final product.
Wall Construction Basics
To guarantee a sturdy and visually appealing fairy house, start by constructing the walls and roof using materials that provide adequate support and can withstand outdoor elements.
You'll want to ponder framing options that suit your design. For instance, you can use a simple wooden frame or get creative with twigs, branches, or even recycled materials.
When it comes to wall textures, the possibilities are endless. You can opt for smooth, painted walls or add some natural charm with rough-hewn wood, stone, or moss.
Ponder combining different textures to create a unique, whimsical look.
When building your walls, make sure to use a level to verify they're straight and even.
You can use a hot glue gun or a strong adhesive to attach the walls to the frame. Don't forget to add some reinforcement, like wire mesh or chicken wire, to provide extra support and protection from the elements.
By following these basics, you'll be well on your way to creating a fairy house that's both sturdy and enchanting.
With a solid foundation, you can let your imagination run wild and add the finishing touches that'll make your fairy house truly magical.
Roof Design Elements
With the walls constructed, turn your attention to crafting a roof that's both functional and visually stunning, as it's the crowning glory of your fairy house that will protect its inhabitants from the elements.
You'll want to choose a design that complements the style of your walls while adding an extra layer of whimsy. Consider using Fairy Tiles, which come in a variety of colors and shapes, to create a unique and eye-catching pattern.
Alternatively, you can opt for Miniature Shingles, which mimic the look of traditional roofing materials but on a smaller scale.
When deciding on the layout, think about the overall aesthetic you want to achieve. Do you want a symmetrical design or something more free-form?
Will you add any embellishments, like tiny chimneys or skylights, to enhance the roof's visual appeal?
Take your time, and don't be afraid to experiment – the roof is a vital element in bringing your fairy house to life.
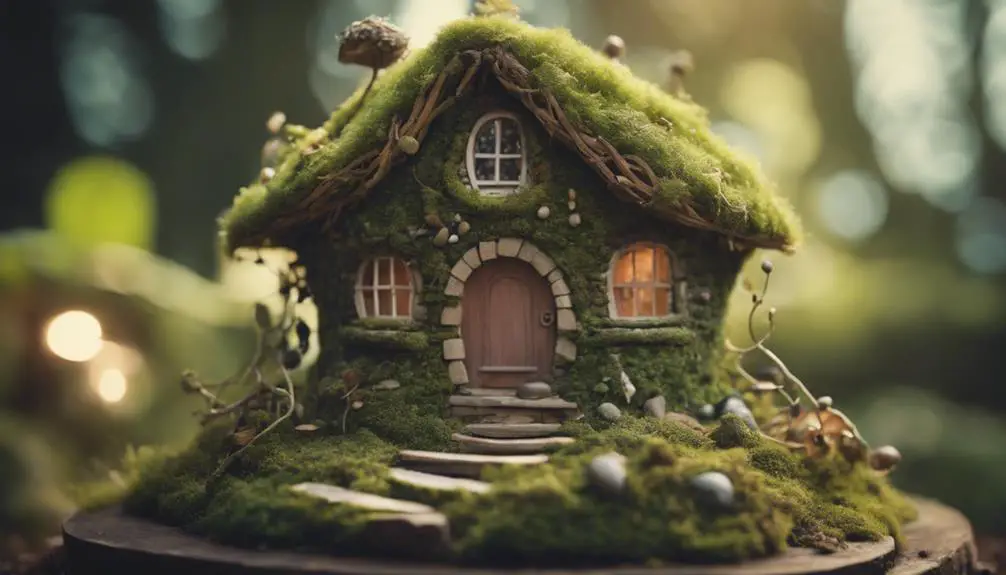
Adding Doors and Windows
You'll create a charming entrance for your fairy house by crafting tiny doors and windows that not only add visual interest but also invite imagination and exploration.
The fairy entrance is where magic begins, and whimsy portals will transport your tiny inhabitants to a world of wonder.
To craft doors, cut small rectangles from wood, cardstock, or even seashells. Add hinges made from twisted wire or tiny pieces of tape, and attach a miniature doorknob or handle.
For windows, use small pieces of transparent plastic or glass, and frame them with delicate wood or twigs. You can also add shutters made from small pieces of wood or paper.
To add an extra touch, use a small paintbrush to paint intricate details, like door hinges or windowpanes. Remember to keep your designs delicate and proportional to the size of your fairy house.
With these tiny details, you'll create an enchanting abode that sparks imagination and inspires creativity.
Decorating the Exterior

Now that you've added doors and windows to your fairy house, it's time to think about the exterior design.
You'll want to choose a color scheme that sets the tone for your miniature abode – will it be soft and whimsical or bold and vibrant?
As you start decorating, consider adding whimsical accents, nature-inspired details, and other elements that will bring your fairy house to life.
Exterior Color Scheme
Select a palette of soft, muted hues or vibrant, bold colors to adorn the exterior of your fairy house, depending on the whimsical ambiance you aim to create.
Consider fairy colors like pale pink, lavender, and mint green to evoke a delicate, ethereal quality. Alternatively, opt for whimsy hues like bright coral, turquoise, and sunshine yellow to create a playful, mischievous atmosphere.
You can also experiment with earthy tones like sage, moss, and sand to bring a sense of natural wonder to your fairy house.
When choosing your colors, think about the overall aesthetic you want to achieve. Do you want your fairy house to blend seamlessly into its surroundings, or do you want it to stand out as a vibrant, eye-catching focal point?
Consider the colors of the surrounding environment, as well as the colors you'll be using for the interior decor, to confirm a cohesive look.
Don't be afraid to get creative and try out unique color combinations – after all, this is a fairy house, where magic and whimsy reign supreme!
Whimsical Accents Added
With your exterior color scheme in place, it's time to add the finishing touches that will transform your fairy house into a whimsical wonderland, as intricately crafted details and playful accents bring the entire structure to life.
To create a sense of enchantment, strategically place fairy figurines around the exterior, perhaps peeking out from behind a window or perched on a tiny balcony. These tiny inhabitants will add a touch of magic to your miniature abode.
Next, incorporate miniature flowers and foliage to create a lush, verdant atmosphere. You can use artificial flowers or even create your own using paper, fabric, or clay.
Tuck them into tiny nooks and crannies, or create a miniature garden around the base of the house. These delicate accents will add texture and visual interest to your fairy house.
Don't be afraid to get creative and experiment with different materials and designs – the more whimsical, the better! As you add these finishing touches, your fairy house will begin to take on a life of its own, becoming a truly one-of-a-kind masterpiece.
Nature-Inspired Details
You'll further enhance your fairy house's exterior by incorporating nature-inspired details that evoke a sense of organic harmony, such as twigs, pebbles, or moss, which can be used to create a unique and enchanting facade.
To add some texture, consider using twig textures to create a rustic, earthy look. You can arrange the twigs in a pattern or simply glue them onto the exterior walls to create a natural, whimsical effect.
For a touch of color, incorporate leaf patterns into your design. You can use artificial leaves or create your own using paper or fabric. Arrange the leaves in a pattern or create a leafy border around the windows and doors.
To add some dimension, use small pebbles or stones to create a mosaic pattern on the exterior walls. You can also use moss to create a lush, green roof or add some greenery around the base of the house.
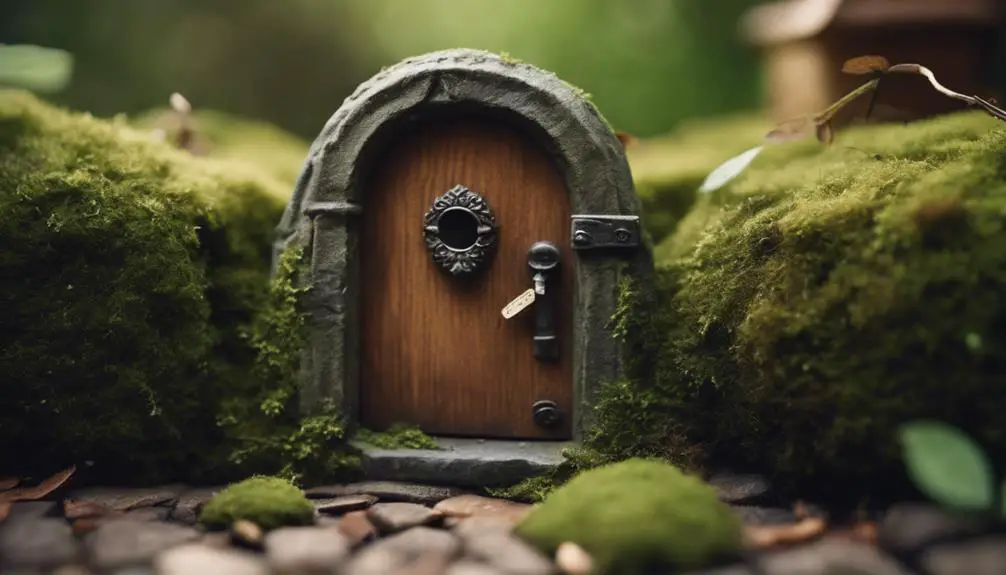
Creating a Whimsical Doorway
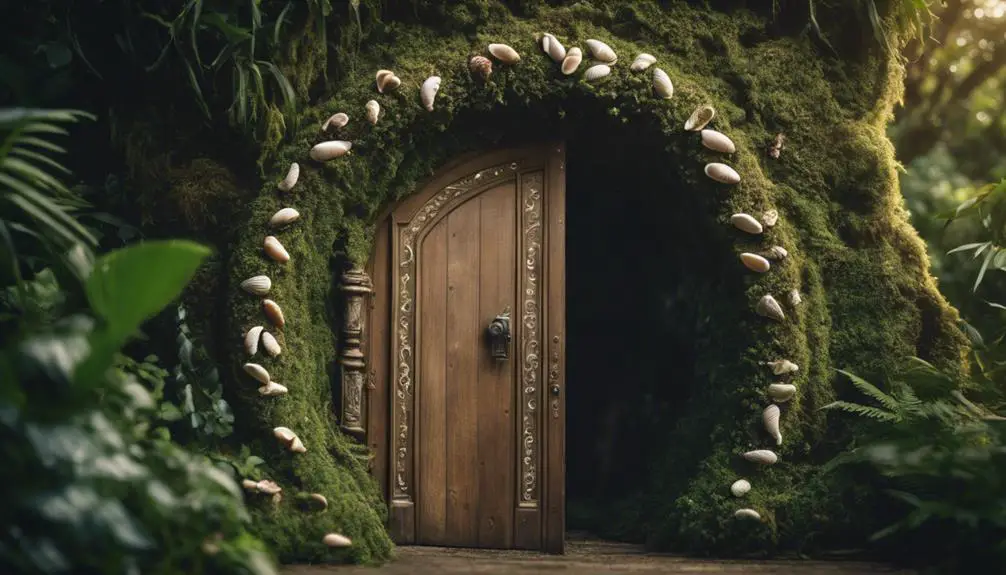
Now that your fairy house's basic structure is built, add a touch of magic by crafting a whimsical doorway that invites tiny visitors to enter.
The fairy entrance is a vital detail that sets the tone for the entire miniature world. To create a doorway that's both functional and visually appealing, start by selecting a suitable material, such as twigs, moss, or even seashells.
You can arrange these materials in a pattern that resembles a miniature archway or a delicate frame.
Add some whimsy symbols to give your doorway an extra layer of enchantment. Consider incorporating tiny stars, moons, or flowers made from paper, clay, or fabric.
You can attach these symbols using a hot glue gun or a strong adhesive. For an added touch of magic, consider adding a miniature door handle or a delicate knocker in the shape of a fairy, a mushroom, or a leaf.
Remember to keep your design balanced and harmonious, ensuring that the doorway complements the overall aesthetic of your fairy house.
With a little creativity, your whimsical doorway will become a focal point of your miniature wonderland.
Adding a Miniature Pathway
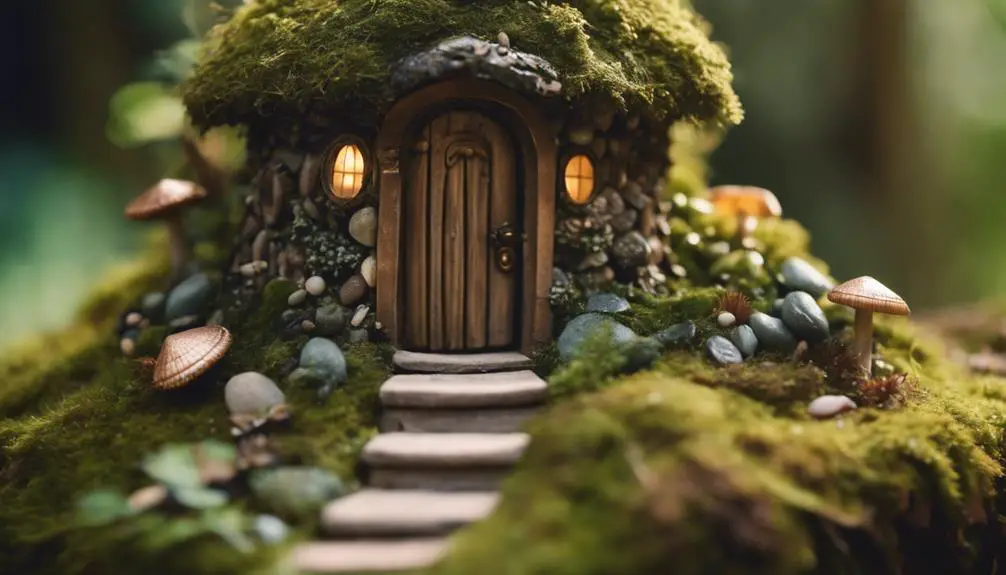
As you envision the fairy house's surroundings, a miniature pathway emerges as a crucial element, guiding visitors through the whimsical landscape and drawing attention to the enchanting details of your tiny abode.
To create an engaging pathway, you'll need to choose the right materials. Consider using small rocks, pebbles, or even seashells to create a natural, earthy look. You can also experiment with miniature stone pavers, moss, or even small tiles to add texture and visual interest.
To add an extra layer of whimsy, experiment with pebble patterns. You can create a simple, meandering path or get more intricate with a spiral design. Don't be afraid to mix and match different pathway materials to create a unique look that reflects your fairy house's personality.
Remember to keep your pathway proportional to the size of your fairy house, and don't be afraid to add small details like tiny stepping stones or miniature lanterns to guide visitors along the way. With a little creativity, your miniature pathway will become a standout feature of your DIY fairy house.
Incorporating Natural Elements
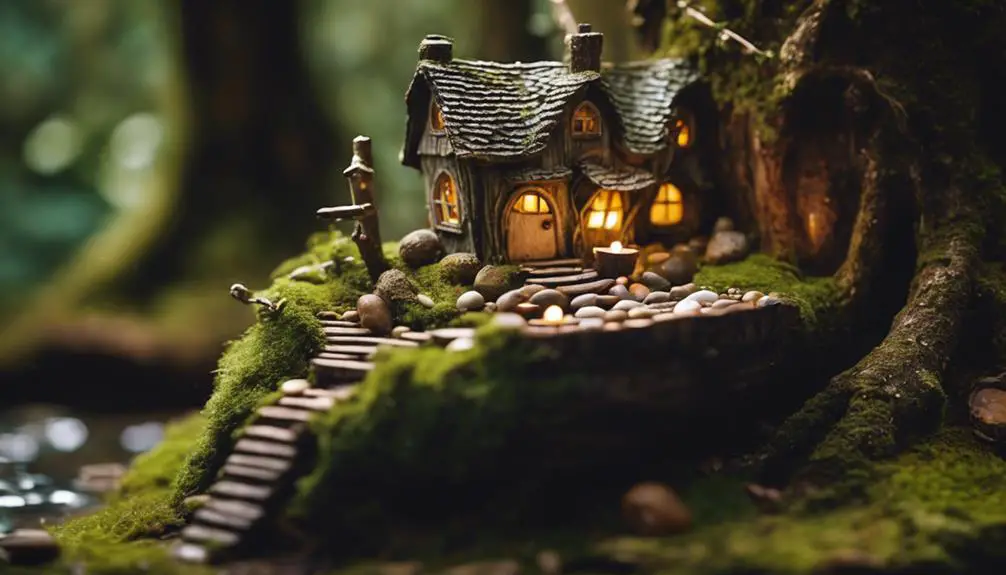
With your miniature pathway in place, the surrounding landscape beckons, and incorporating natural elements is a great way to further blur the lines between your fairy house and its environment.
As you venture into the world of natural elements, you'll find that forest floors offer a wealth of inspiration. Collect small twigs, leaves, and pinecones to create a whimsical forest floor around your fairy house. You can arrange these elements to resemble a miniature forest, complete with tiny trees and hidden nooks.
River rocks are another natural element that can add depth and texture to your fairy house landscape. Use them to create a meandering stream or a small pond, adding visual interest to your miniature world.
You can also use river rocks to create a boundary between different areas of your fairy house landscape, separating the forest floor from the meadow or the garden.
Making Miniature Furniture
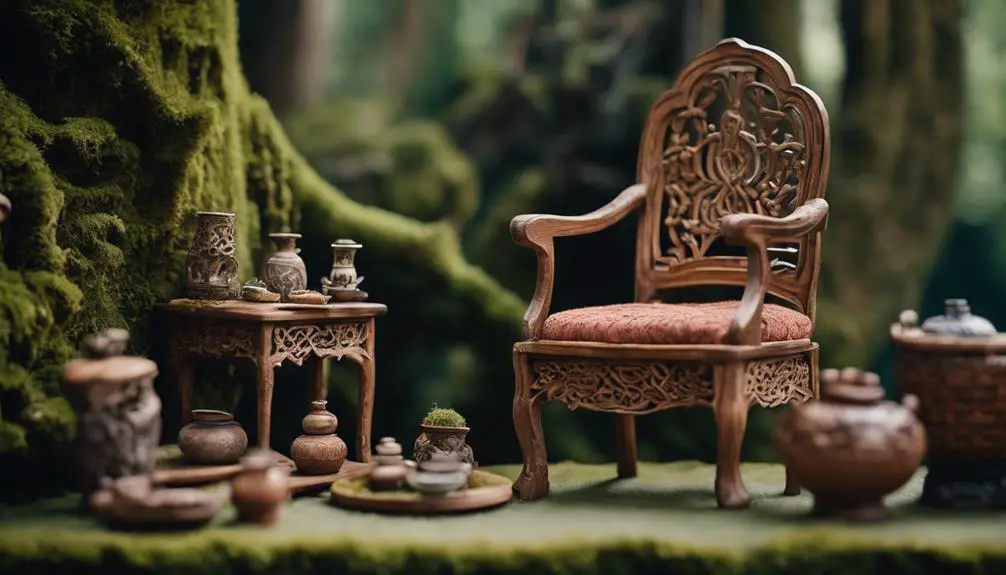
You'll bring your fairy house to life by crafting miniature furniture that fits your tiny inhabitants' needs, from delicate tables and chairs to intricately designed beds and shelves.
To achieve the perfect scale, consider furniture scaling: reduce the size of real-world pieces by 1:12 or 1:24 to create a believable miniature world. For instance, a human-sized chair would become 1-2 inches tall in your fairy house.
Focus on miniature craftsmanship to create intricate details that will make your furniture pieces stand out. Use materials like wood, clay, or paper to craft unique and delicate designs.
Add textures, patterns, and colors to give your furniture personality. For example, you can add tiny carvings to a wooden table or create a mosaic pattern on a clay vase.
Don't be afraid to experiment and try new techniques to achieve the desired look. With patience and attention to detail, your miniature furniture will become the star of your fairy house, inviting your tiny inhabitants to live, work, and play in their new home.
Adding Lighting and Accessories
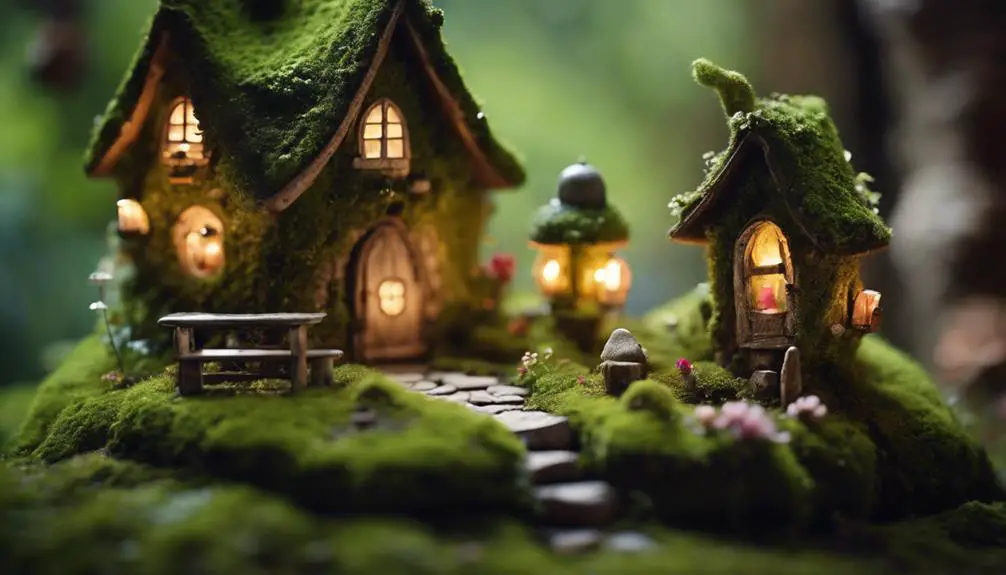
Transform your fairy house into a warm and inviting space by incorporating tiny lighting fixtures and accessories that reflect the unique character of your miniature world.
You can add a touch of magic with fairy lights, carefully stringing them around windows, doors, or along the roof. This will create a soft, ethereal glow that will make your fairy house feel cozy and inviting.
To add some extra sparkle, incorporate Sparkle accents, such as glittering gemstones or iridescent sequins, into your design. You can use them to create a dazzling pathway, adorn the furniture, or even create a sparkling chandelier.
When selecting accessories, think about the fairy house's theme and the type of fairy that might inhabit it.
For example, if your fairy house is a whimsical woodland retreat, you might add tiny pinecones, acorns, or dried flowers to create a natural, earthy feel. Alternatively, if your fairy house is a luxurious palace, you might opt for more opulent accessories, such as tiny crystals or delicate filigree.
Whatever you choose, remember to have fun and let your imagination run wild!
Finishing Touches and Details
Now it's time to focus on the tiny details that will bring your fairy house to life, from delicate door handles to intricate window frames.
You'll want to add whimsy accents that evoke a sense of magic and wonder. Consider adding tiny shutters, a mailbox, or a door knocker in the shape of a fairy or a flower.
For an added touch of fairy decor, create a miniature garden around the house with tiny plants, moss, and small pebbles.
Don't forget to add some personality to your fairy house with unique details like a tiny wind chime, a miniature bird's nest, or a small, delicate bridge.
You can also use natural materials like twigs, leaves, and flowers to create a sense of organic charm.
Remember, the key to creating a truly enchanting fairy house is to focus on the small details that will bring it to life.
With a little creativity and imagination, you can create a fairy house that's truly one-of-a-kind.
Displaying Your Fairy House
With your fairy house complete, place it on a pedestal, shelf, or mantle where it can be admired from all angles, and consider grouping it with other whimsical decorations to create a miniature fairy garden scene.
This will allow you to showcase your tiny abode in a way that highlights its intricate details and charms.
To add an extra layer of magic, create a fairy vignette by arranging small accessories like tiny furniture, flowers, or moss around the house.
You can also experiment with shadow displays by placing the house near a light source, casting a warm glow on the surrounding area.
This will create a sense of depth and dimension, making your fairy house feel even more enchanting.
Don't be afraid to get creative with your display – the more imaginative, the better!
You can also rotate the house periodically to change the view and keep the display fresh and exciting.
Frequently Asked Questions
Can I Use Recycled Materials to Build a Fairy House?
You can definitely repurpose recycled materials to build a unique structure, embracing creative material sourcing and repurposing to craft a one-of-a-kind fairy house that showcases your innovative spirit and eco-friendly mindset.
How Do I Keep My Fairy House From Getting Damaged Outdoors?
When exposing your outdoor creation to the elements, you'll want to guarantee weather resistance by applying waterproof coatings and sealants. Additionally, incorporate pest control measures, like copper mesh and moth-repellent plants, to safeguard your miniature masterpiece from unwanted critters.
Can I Add Water Features to My Fairy House Design?
When incorporating water features, you'll want to ponder mini ponds or fountain ideas that complement your design. For a whimsical touch, add a small, shallow pool or a self-contained fountain with a tiny pump to create a soothing atmosphere.
Are There Any Safety Precautions for Fairy Houses With Candles?
When using candles in your design, you'll want to prioritize safety; opt for flameless alternatives or fairy lighting with protective casings to prevent fires and guarantee a magical ambiance without the risk of hazard.
Can I Make a Fairy House With My Young Children's Help?
You can definitely involve your kids in creating a fairy house, encouraging their imagination and creative freedom. Assign them small tasks, like gathering materials or decorating, and provide guidance while letting them take the reins.
Conclusion
You've brought your DIY fairy house to life!
With every detail meticulously crafted, your miniature masterpiece is now ready to transport tiny inhabitants to a world of wonder.
Stand back and admire your handiwork, taking pride in the textures, colors, and whimsy that make this tiny abode truly special.
As you display your fairy house, remember to tend to it occasionally, ensuring the moss stays lush and the magic remains alive.