You're about to undertake a DIY project that will elevate your space with style and sophistication: building floating shelves. As you prepare to get started, you're likely wondering what it takes to create these sleek, modern fixtures. From selecting the right materials to mastering the assembly process, there are a few vital steps to follow. You'll need to prep your wall, cut your shelf boards to size, and attach the brackets with precision. But before you can admire your handiwork, you'll need to tackle the most critical part: ensuring your shelves are secure and level.
Gather Essential Materials

Pick out the necessary tools and materials from your workshop or hardware store to guarantee you have everything you need before diving into the project.
You'll need a combination of power tools, such as a drill, jigsaw, and sander, as well as materials like wood, brackets, and screws.
For material sourcing, consider the type of wood you want to use, taking into account factors like durability, aesthetic, and budget. You may opt for MDF, plywood, or solid wood, depending on your desired look and functionality.
When it comes to budget planning, set a realistic budget and stick to it. Calculate the cost of materials, tools, and any additional hardware you may need. Don't forget to factor in any potential mistakes or setbacks that may arise during the project.
With a clear plan and the right materials, you'll be well on your way to creating sleek and functional floating shelves that elevate your space.
Prepare the Wall Surface
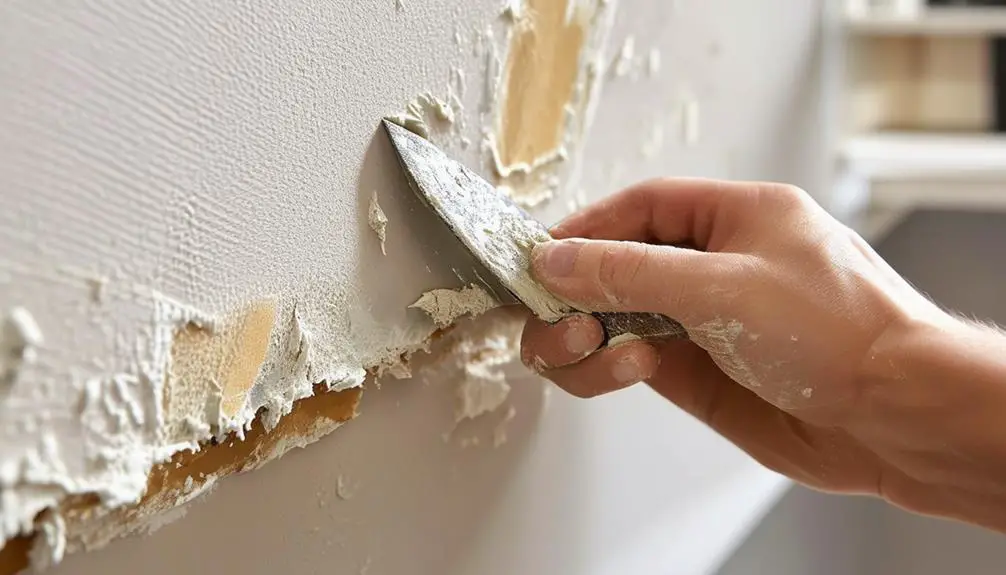
As you prepare the wall surface for your floating shelves, you'll need to guarantee it's free from dirt, grime, and old adhesive residue.
Next, inspect the wall for any cracks, holes, or water damage that could affect the stability of your shelves.
Clean the Wall Area
Cleaning the wall area thoroughly is essential to guarantee a strong bond between the wall and the floating shelf's hidden brackets.
You'll want to remove any dirt, grime, or old adhesive residue that might be lingering on the surface. Start by dusting the area with a soft-bristled brush or a vacuum cleaner to remove any loose particles. Next, mix a solution of mild soap and warm water, and gently scrub the wall with a soft cloth or sponge. Rinse the area thoroughly with clean water, and let it dry completely before proceeding.
During wall preparation, pay attention to any areas with peeling paint or wallpaper.
You may need to scrape off the old finish or sand the surface to create a smooth, even surface. Additionally, if you're installing shelves in a humid or damp environment, consider applying a coat of primer or sealant to the wall area before installing the brackets.
Check for Wall Damage
With the wall area clean, you'll need to inspect the surface for any cracks, holes, or weak spots that could compromise the stability of your floating shelves.
Even the smallest wall cracks can cause your shelves to sag or fall, so it's vital to identify and address any damage before proceeding. Use a bright light source to illuminate the area, and run your hand over the wall to feel for any imperfections.
Check for signs of water damage, such as discoloration or peeling paint, which can indicate hidden structural issues.
Also, be mindful of hidden wires or pipes behind the wall, as drilling into these can cause electrical or plumbing issues. Use a stud finder or knock gently on the wall to detect any hidden obstacles.
If you find any damage, consider consulting a professional to repair the wall before installing your shelves. Remember, a sturdy wall is essential for supporting the weight of your floating shelves, so take the time to inspect the surface thoroughly.
Mark the Wall Studs
You'll need to locate and mark the wall studs to guarantee your floating shelves are anchored securely, as these vertical wooden beams provide the necessary support for your shelves.
To do this, you'll need a stud finder, a handy tool that detects the wood behind the drywall. Hold the stud finder flat against the wall and move it slowly from side to side, following the manufacturer's instructions. When the stud finder beeps or lights up, you've found a stud. Mark the spot with a pencil, and repeat the process to find multiple studs.
Once you've located the studs, use a level to draw a straight line along the wall, indicating the stud's position. This line will serve as a guide for installing your wall anchors.
Choose the Right Wood
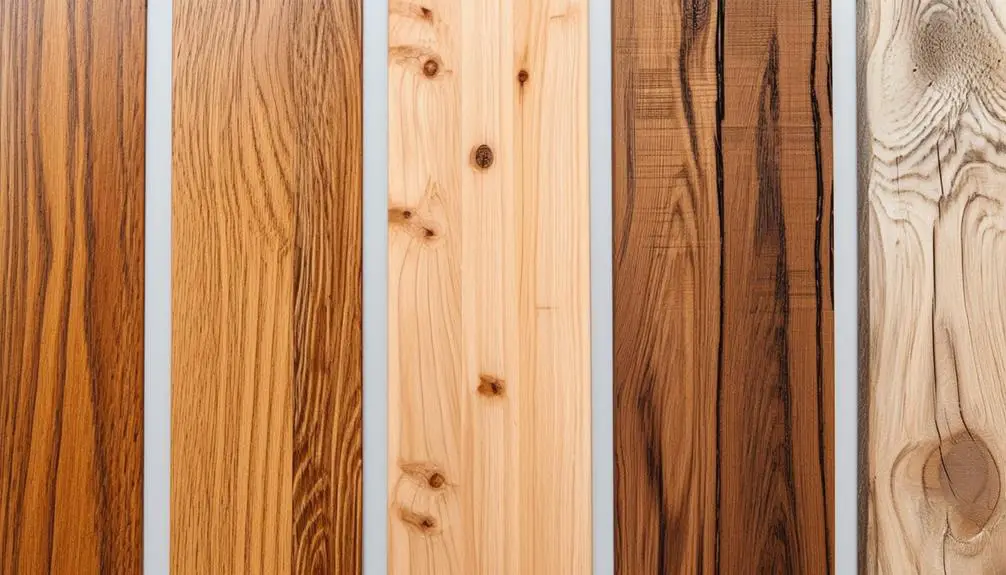
When choosing the right wood for your DIY floating shelves, you'll need to ponder the type of wood that suits your project's requirements.
You'll want to think about the wood's grain pattern, as it can affect the shelf's appearance and durability.
Wood Type Considerations
Selecting the right wood type for your DIY floating shelves is essential, as different species vary markedly in density, grain pattern, and color, directly impacting the aesthetic and functional outcome of your project.
You'll want to weigh wood density, which affects the shelf's weight capacity and stability. Denser woods like oak, maple, and cherry are ideal for heavy loads, while less dense woods like pine or fir might be better suited for lighter decorative items.
Wood hardness is another pivotal factor to examine. Hardwoods like walnut, teak, and ash are more resistant to scratches and dents, making them perfect for high-traffic areas or families with young children.
Softer woods like cedar or cypress, on the other hand, might be more prone to damage.
When choosing your wood type, think about the intended use of your shelves and the overall look you want to achieve.
Do you need a durable, scratch-resistant surface or a rustic, distressed finish?
Wood Grain Patterns
As you choose the right wood for your DIY floating shelves, consider the wood grain pattern, which can greatly impact the visual appeal and character of your final product, with different patterns evoking unique emotions and styles.
Wood grain history suggests that various patterns emerge from the unique growth patterns of trees, influenced by factors like climate, soil, and genetics.
You can opt for a single, consistent grain pattern or experiment with grain pattern mixing to create a unique, eye-catching design.
Straight grain patterns, like those found in oak and maple, exude a sense of cleanliness and simplicity.
On the other hand, curved or wavy patterns, commonly seen in ash and elm, add a touch of elegance and sophistication.
If you want to make a bold statement, consider using woods with irregular or figured grain patterns, like walnut or cherry.
These unique patterns can add depth and visual interest to your DIY floating shelves.
Moisture Resistance Matters
You'll want to balance the visual appeal of your chosen wood grain pattern with the practical concern of moisture resistance, since certain types of wood are more prone to warping, cracking, or discoloration when exposed to humidity or water.
When selecting wood for your DIY floating shelves, verifying the moisture resistance of each type is crucial. Some woods, like cedar and redwood, have natural oils that provide a degree of moisture resistance. Others, like pine and fir, are more susceptible to water damage risk and require additional protection.
To minimize the risk of water damage, weigh the option of applying a moisture barrier to your wood shelves. This can be a waterproof coating, a layer of varnish, or even a specialized membrane designed to prevent moisture intrusion.
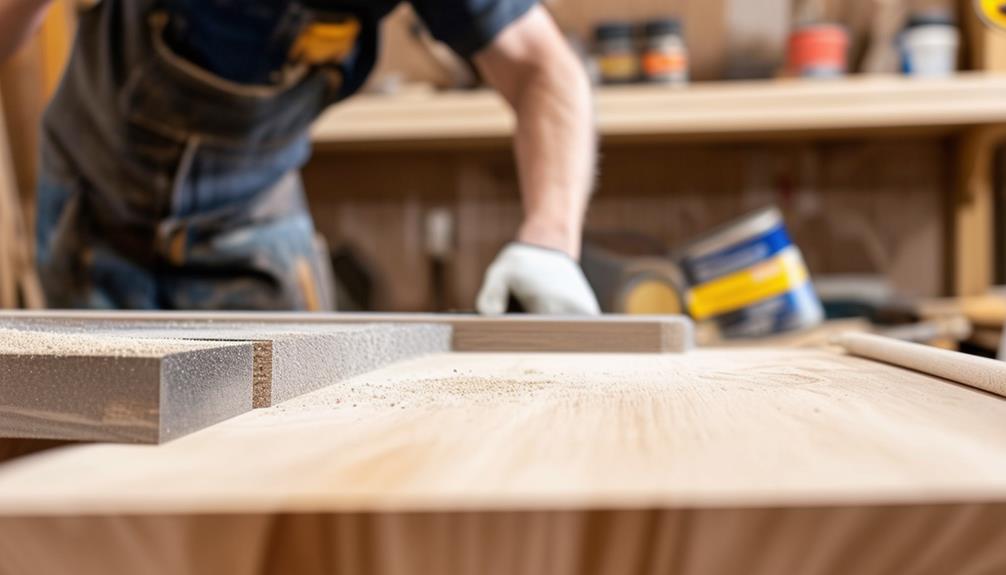
Cut the Shelf Boards
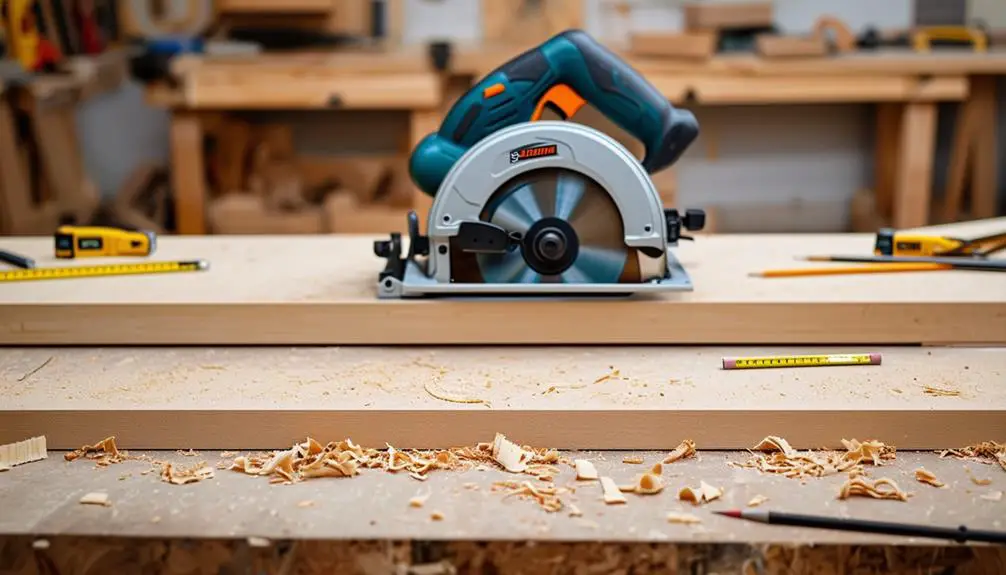
Carefully measure and mark the shelf board material to guarantee accurate cuts, taking into account the desired shelf width and any necessary notches or grooves.
When cutting, you'll want to use a combination of cutting techniques to achieve precision and efficiency. For instance, use a circular saw for straight cuts and a jigsaw for curved or irregular cuts.
Consider the board sizes you're working with, as larger boards may require more precise measurements and specialized cutting tools.
To verify accurate cuts, use a carpenter's square to mark straight lines and a compass to mark curved lines.
When cutting, maintain a steady hand and keep the saw blade straight, applying gentle to moderate pressure.
For more intricate cuts, use a coping saw or a bandsaw to achieve the desired shape.
Remember to sand the cut edges to smooth out any rough spots and remove any splinters.
Assemble the Shelf Frame
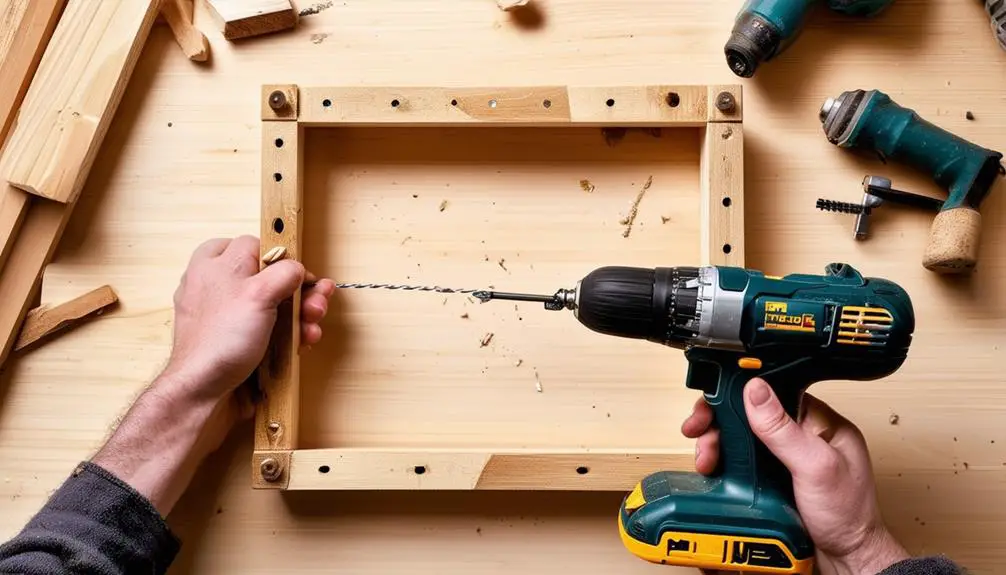
With your shelf boards cut to size, it's time to construct the frame that will support them, using the wall anchors and shelf bracket components to create a sturdy base.
Begin by attaching the wall anchors to the wall, ensuring they're level and spaced evenly apart.
Next, assemble the shelf bracket components according to the manufacturer's instructions. Typically, this involves screwing the brackets together to form an 'L' shape, which will provide the frame's structural integrity.
When assembling the frame, pay close attention to the frame design, as it directly impacts shelf stability.
A well-designed frame should be able to support the weight of the shelf boards and any items you plan to display.
Make sure the brackets are securely attached to the wall anchors, and that the frame is square and level.
If you're using adjustable shelf brackets, now's the time to adjust them to the desired height.
With the frame assembled, you'll have a solid foundation for your floating shelves.
Attach the Shelf Boards
Now that your shelf frame is assembled, you'll need to attach the shelf boards to create a solid surface.
To do this, you'll need to prepare the boards by sanding and cutting them to size, align them precisely with the frame's brackets, and then fasten them securely using screws or another suitable fastening method.
Shelf Board Preparation
You'll need to cut your shelf boards to the desired length using a circular saw or a miter saw, verifying a precise cut to fit your shelf design.
Make sure to wear protective gear, including safety glasses and a dust mask, to avoid any potential hazards.
Once cut, it is vital to sand your shelf boards to smooth out any rough edges or splinters.
Use a belt sander or an orbital sander with a fine-grit sandpaper to achieve a silky finish.
This step is vital in preparing your boards for staining.
If you choose to stain your boards, now is the time to do so.
Select a stain that complements your shelf design and follows the manufacturer's instructions for application and drying times.
Verify the stain is fully dry before moving on to the next step.
After staining, lightly sand the boards again to remove any excess stain and create a uniform finish.
Your shelf boards are now ready to be attached to the wall cleats, providing a sturdy and stylish floating shelf.
Shelf Board Alignment
Once your shelf boards are properly sanded and stained, align them with the wall cleats, verifying the boards' edges are flush and the surfaces are even. This vital step requires attention to detail to achieve a seamless floating shelf installation.
To confirm proper shelf alignment, use a level to verify the wall cleats are straight, and then place the shelf boards on top. Pay attention to the boards' orientation, making sure the decorative edges (if any) face the correct direction.
Effective board placement strategies involve working from the center outwards to maintain even spacing and symmetry.
Start by placing the center shelf board, then work your way outwards, using a combination square to confirm the boards are properly aligned.
Shelf alignment tips include using a clamp to hold the boards in place while you check their alignment, and using a pencil to mark the boards' position on the wall cleats.
Shelf Board Fastening
With the shelf boards properly aligned, use 2.5-inch wood screws to secure them to the wall cleats, certifying the screws are countersunk to maintain a flush surface. This will create a sleek, seamless look.
Make sure to space the screws evenly, about 6-8 inches apart, to provide adequate support for the shelf.
To achieve an invisible fastening system, use hidden screws or invisible brackets specifically designed for floating shelves. These innovative fastening solutions allow you to attach the shelf boards without visible screws or brackets, creating a clean, minimalist aesthetic.
When using hidden screws, verify they're countersunk and filled with a wood filler to maintain a smooth surface.
As you attach the shelf boards, apply gentle pressure to guarantee they're securely fastened to the wall cleats.
Double-check that the shelves are level and plumb before moving on to the next step.
Sand and Finish the Shelves
Sand the shelves to smooth out any rough spots or splinters, using progressively finer grits of sandpaper to achieve a silky surface for finishing. Start with a coarse grit, such as 80, to remove any imperfections, and then move to a finer grit, like 120, for a smoother finish. Finally, use a high-grit sandpaper, such as 220, to give your shelves a polished look.
When sanding, use a sanding block to keep your sandpaper flat and prevent uneven scratches. You can also use an orbital sander or a belt sander for more efficient sanding. Always sand with the wood grain to avoid scratches.
After sanding, wipe down the shelves with a tack cloth to remove any dust or debris.
For finishing techniques, consider using a wood stain or a polyurethane coating to enhance the natural beauty of your shelves. Apply the finish according to the manufacturer's instructions, and allow it to dry completely before handling the shelves.
With a smooth, evenly finished surface, your DIY floating shelves are now ready for installation.
Create a Leveling System

To guarantee precise alignment and prevent your shelves from tilting, you'll need to create a leveling system that accounts for any imperfections in the wall or unevenness in the shelf itself. This system will verify that your floating shelves are perfectly horizontal and plumb.
To achieve this, you'll need to invest in a set of leveling tools, such as a laser level, a spirit level, or a combination of both. These tools will allow you to make precision adjustments to the shelf's position, certifying that it's perfectly level and even.
Start by attaching the leveling tools to the shelf, following the manufacturer's instructions. Next, place the shelf against the wall, and use the leveling tools to make any necessary adjustments.
You may need to shim the shelf or adjust the wall anchors to achieve perfect levelness. With the shelf in place, double-check its position using your leveling tools to verify that it's perfectly aligned.
Mark the Wall for Installation
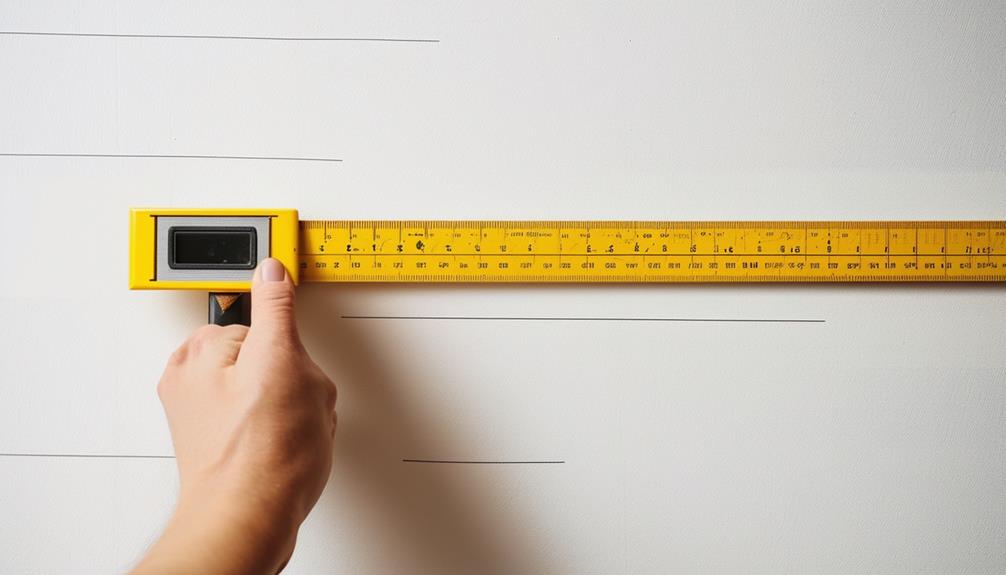
You'll need to identify the stud locations behind the wall, as well as the spot where you want to install the shelves, and mark them accurately using a pencil or a marker.
This step is vital to guarantee that your shelves are securely attached to the wall.
Measure the wall carefully, taking note of any electrical outlets, switches, or other obstacles that may affect the placement of your shelves.
Use a level to verify level alignment, certifying that your marks are straight and even.
Record the wall measurements to determine the ideal placement of your shelves.
Next, use a stud finder to locate the wall studs.
Mark their locations with a small 'X' or a vertical line.
These will serve as your anchor points for the shelves.
Make sure to mark the spot where you want to install the shelves, taking into account the wall measurements and stud locations.
Double-check your marks to verify they're accurate and level.
With your marks in place, you're ready to move on to the next step: drilling pilot holes carefully.
Drill Pilot Holes Carefully
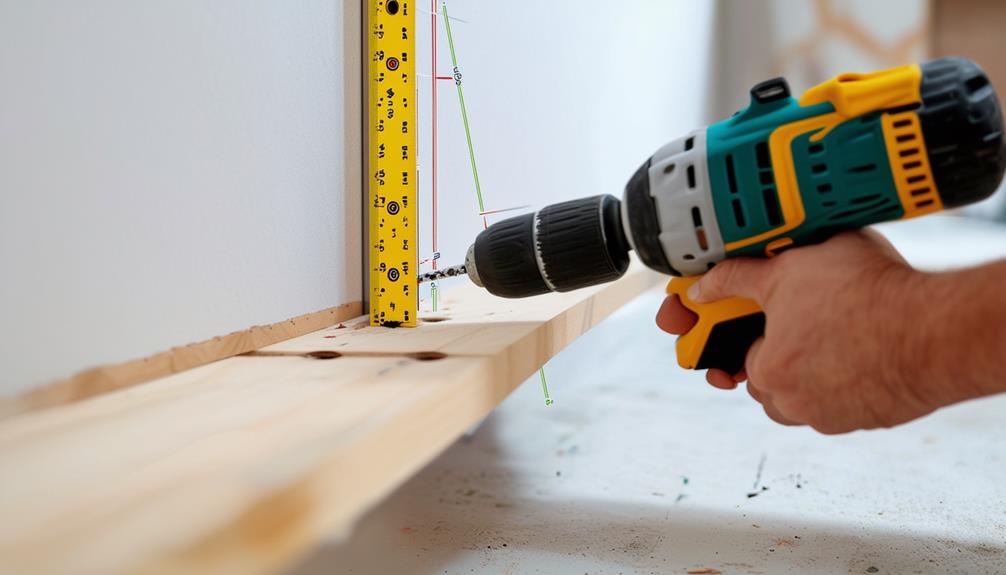
Carefully positioning your drill at a 90-degree angle to the wall, make sure the bit is aligned with the marks you made earlier, as accurate placement of pilot holes is necessary for secure shelf installation.
Drill safety tips are paramount at this stage, so wear protective gear, including safety glasses and a dust mask. Hold the drill firmly, but not too tightly, to maintain control and avoid pilot hole mistakes.
Drill slowly and steadily, applying gentle to moderate pressure.
To guarantee success, avoid applying too much pressure, which can cause the drill bit to slip or the wall to crack. If you're using a cordless drill, verify the battery is fully charged to maintain consistent power.
As you drill, keep the bit straight and level to prevent the hole from becoming misaligned. Don't rush this process, as precise pilot holes are key for secure shelf installation.
Take your time, and you'll be rewarded with a sturdy and level shelf that will hold your desired weight.
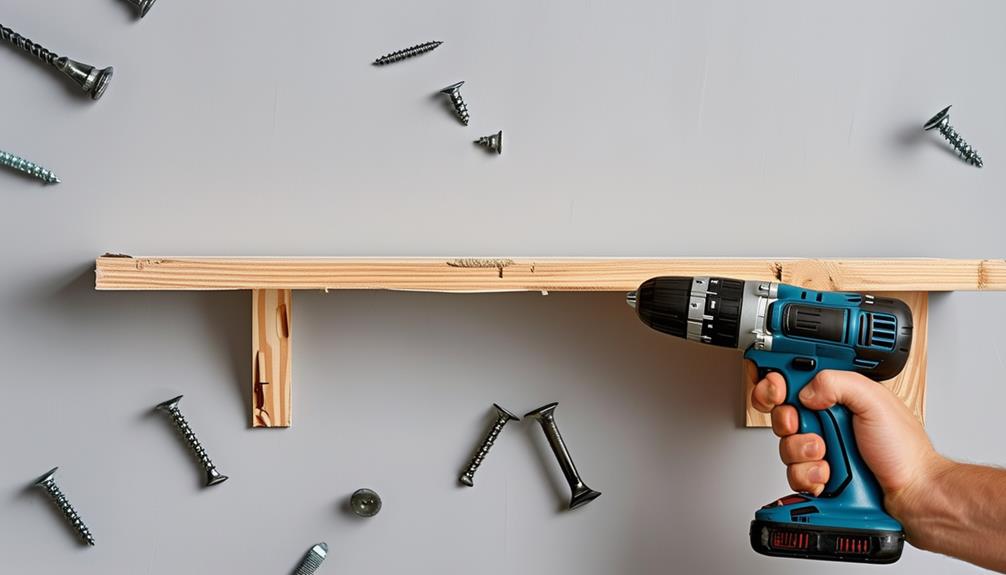
Install the Shelves Securely

With your pilot holes precisely drilled, insert the wall anchors into the holes, making sure they're seated snugly against the wall.
Next, hold the shelf against the wall, verifying it's level and aligned with the anchors. Use a pencil to mark the screw holes on the shelf, then remove the shelf and drill pilot holes for the screws.
Now, place the shelf back against the wall and screw it into the anchors, making sure they're securely fastened.
To guarantee maximum shelf stability, tighten the screws firmly, but avoid overtightening, which can damage the wall or strip the screws.
Double-check that the shelf is level and plumb, as any deviation can compromise its stability.
With the shelf securely in place, you can now add your decorative items, confident that they'll remain safely supported.
Add Decorative Trim (Optional)
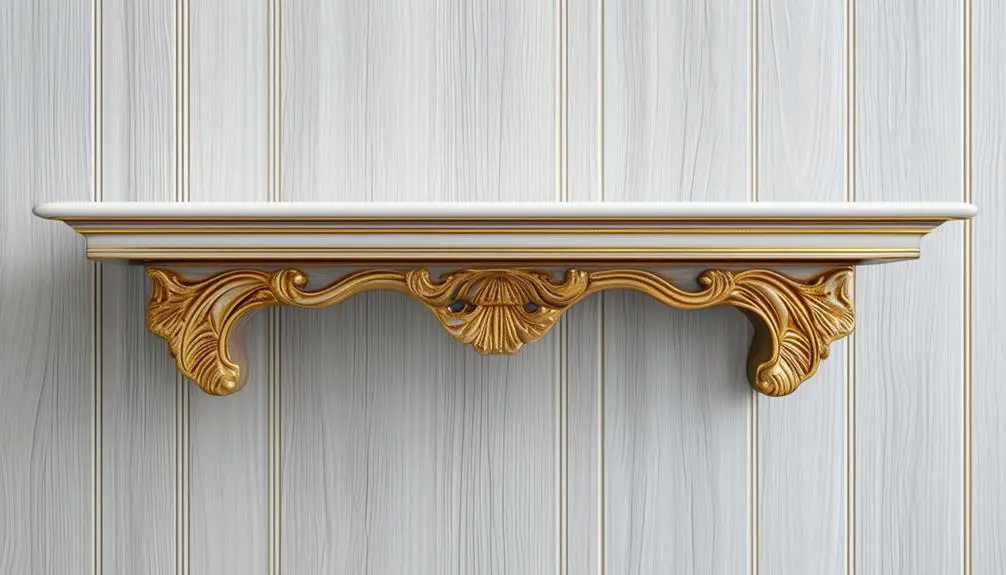
If desired, add a decorative trim to conceal the shelf's attachment mechanism, creating a sleek, polished look. This step is optional, but it can elevate the overall aesthetic of your floating shelves. Choose from various trim styles, such as ornate, minimalist, or rustic, to match your interior design. For a seamless look, select a trim that complements the color and material of your shelves.
Measure the edges of your shelves to determine the necessary length of trim. Cut the trim to size using a miter saw or a utility knife. Apply a thin layer of adhesive, such as wood glue or hot glue, to the back of the trim and attach it to the shelf's edge. Use clamps or weights to hold the trim in place until the adhesive sets.
Explore molding options to add an extra layer of sophistication. You can use crown molding, base molding, or decorative molding to create a unique look. Guarantee the molding is proportional to the shelf's size and style. With the trim in place, your floating shelves will exude a professional, high-end appearance that's perfect for showcasing your favorite decorative pieces.
Add Your Favorite Decorations
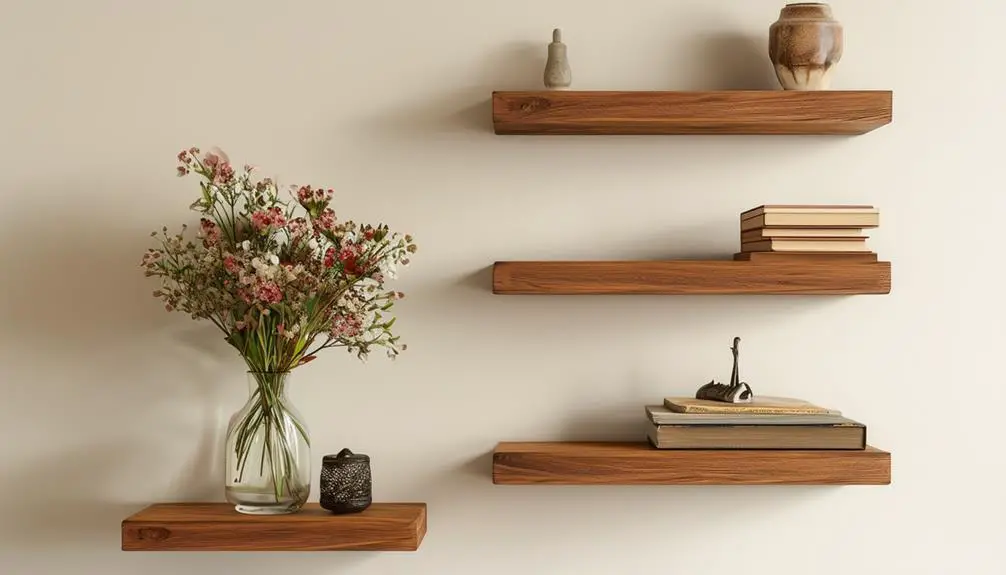
How will you showcase your personal style through the decorative pieces you'll be placing on your newly installed floating shelves? This is your chance to add a touch of personality to your space.
Start by selecting your favorite vases, decorative accents, and other ornaments that reflect your unique taste. Consider the color scheme, texture, and shape of the items to verify they complement the shelves and the surrounding decor.
When arranging the decorations, think about creating a visually appealing balance. You can group similar items together or scatter them across the shelves to create a sense of movement.
Don't overcrowd the shelves, as this can make the space look cluttered. Instead, leave some breathing room between the decorative pieces to create a sense of harmony.
Frequently Asked Questions
Can I Use MDF Instead of Solid Wood for the Shelves?
You can opt for MDF, but consider its durability limitations; while it's cost-effective, MDF may not withstand heavy loads or moisture. However, its smooth surface can enhance aesthetics, making it a viable choice if you're willing to compromise on strength.
How Do I Prevent the Shelves From Sagging Over Time?
To maintain structural integrity, you'll want to prioritize shelf reinforcement, ensuring your design distributes weight evenly; use brackets, supports, or a reinforced backpanel to prevent sagging, and consider adding a French cleat for extra stability.
Are Floating Shelves Suitable for Holding Heavy Objects?
When considering any shelving system, you'll want to guarantee it can handle the load capacity you need, taking into account weight distribution and the object's center of gravity to prevent failure or damage.
Can I Install Floating Shelves in a Rented Space?
Before installing anything, you'll need to review your rent restrictions and obtain landlord approval, ensuring you're not violating any terms, and making sure you're allowed to make modifications to the space.
How Do I Clean and Maintain the Floating Shelves?
To maintain your shelves, you'll want to establish a regular dusting frequency, ideally every 1-2 weeks, and consider adding shelf liners to prevent scratches and make cleaning a breeze, ensuring your space stays tidy and stylish.
Conclusion
Now that you've completed the DIY floating shelves project, step back and admire your handiwork.
Verify all screws and brackets are securely fastened, and the shelves are level.
Double-check that the finish is even and the decorative trim is properly attached.
With proper installation and maintenance, your floating shelves will remain sturdy and stylish for years to come, providing a unique display space for your favorite decorations.