As you start prepping your home for the spookiest night of the year, you're likely wondering how to create a hauntingly beautiful atmosphere without breaking the bank. With a little creativity and some DIY magic, you can transform your space into a haunted haven that'll leave your guests shivering with delight. From eerie candlelit pumpkin displays to spider web doorways and ghostly garlands, the possibilities are endless. But where do you even begin?
Summary
- Create creepy ambiance with candlelit pumpkin displays, lantern-lit pathways, and cobweb-covered chandeliers and fixtures.
- Use black cotton cobwebs, synthetic webbing, and fake spiders to create spooky doorways and eerie elegance with garlands and banners.
- Transform your space with haunted house silhouettes, vintage apothecary jar displays, and mummy-wrapped porch columns.
- Craft creepy creatures and props, such as DIY paper mache monsters, skull and crossbone decorations, and eerie eyes and peeking creatures.
- Get creative with unique materials like cardboard, scissors, glue, and string to bring your DIY Halloween decoration ideas to life.
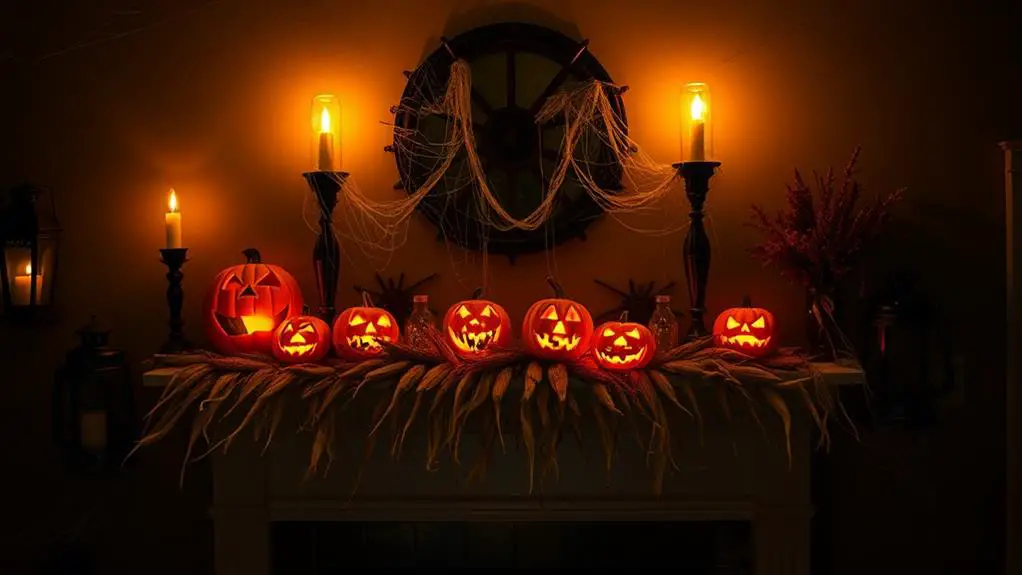
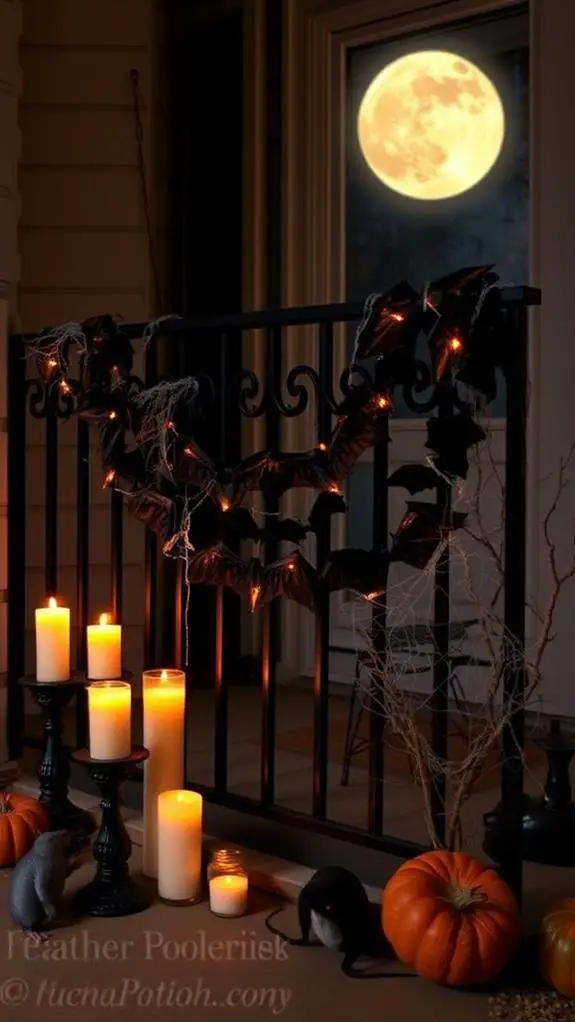
Creepy Candlelit Pumpkin Displays
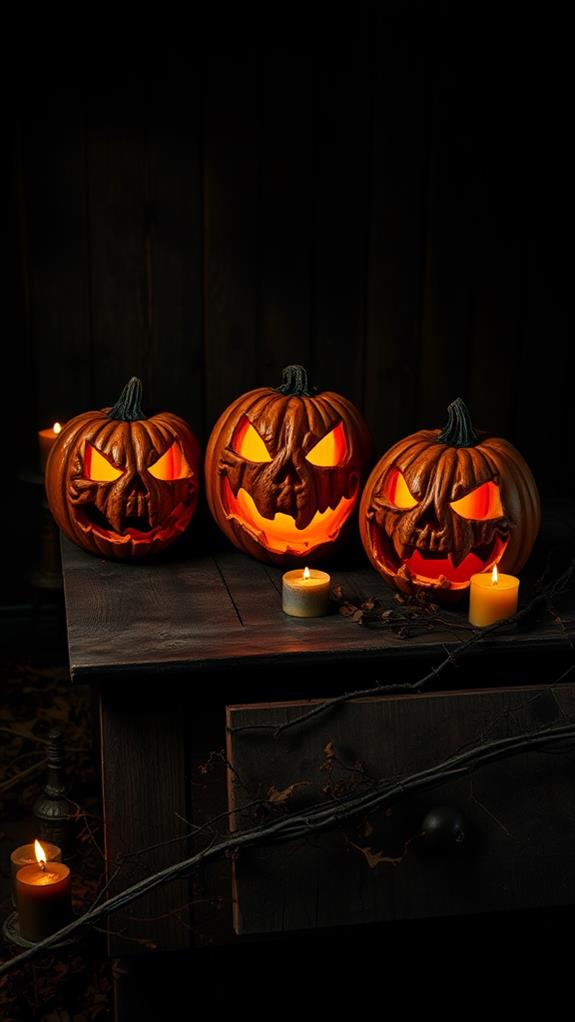
You're about to create a hauntingly beautiful centerpiece that'll set the tone for a spook-tacular Halloween gathering: a creepy candlelit pumpkin display.
Begin by selecting a few pumpkins in varying sizes and carving unique designs into each one. Keep the designs simple, yet eerie, to create an ominous ambiance.
Next, arrange the pumpkins in a decorative pattern on a large platter or tray. Place tea lights or votive candles inside each pumpkin, carefully positioning them to create an eerie glow.
Spooky Spider Web Doorways
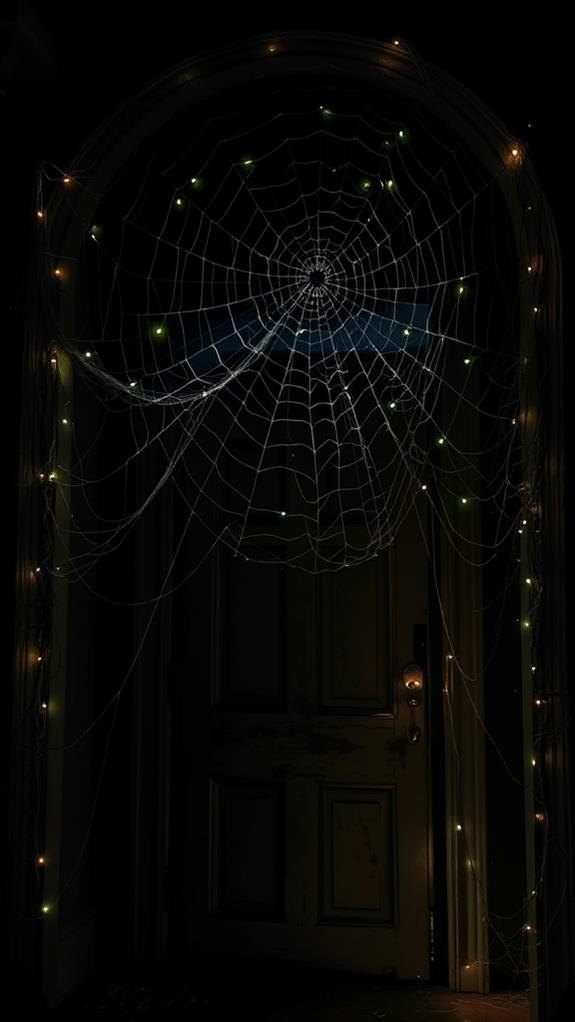
Several eerie entranceways await your creative touch as you transform doorways into Spooky Spider Web Doorways.
Begin by draping black cotton cobwebs or synthetic webbing over the doorway, creating intricate Web Patterns with a hot glue gun or staples.
Add a touch of realism with fake spiders or giant Spider Silhouettes cut from black cardstock. For an eerie glow, string fairy lights or LED candles behind the webbing.
To create a sense of depth, layer the webbing, allowing some areas to be more dense than others.
Finish the look with a giant spider perched atop the doorway, its beady eyes watching as guests enter.
With these simple steps, you'll create a haunting entrance that'll leave trick-or-treaters trembling with delight.
Ghostly Garlands and Banners
Hang eerie elegance from your walls and along your staircase with Ghostly Garlands and Banners that set the tone for a hauntingly beautiful Halloween.
To create these Festive Frights, gather black and purple crepe paper, scissors, glue, and string.
Cut out bat silhouettes, spider webs, and other spooky shapes from the crepe paper. Glue them onto a long piece of string or twine, spacing them out to create a dramatic effect.
Drape your Spooky Swags along banisters, mantels, or across walls to add an air of mystery. For a more dramatic look, layer multiple garlands or add some fake cobwebs for an eerie touch.
With these Ghostly Garlands and Banners, you'll set the mood for a howling good time.
Mummy Wrapped Porch Columns
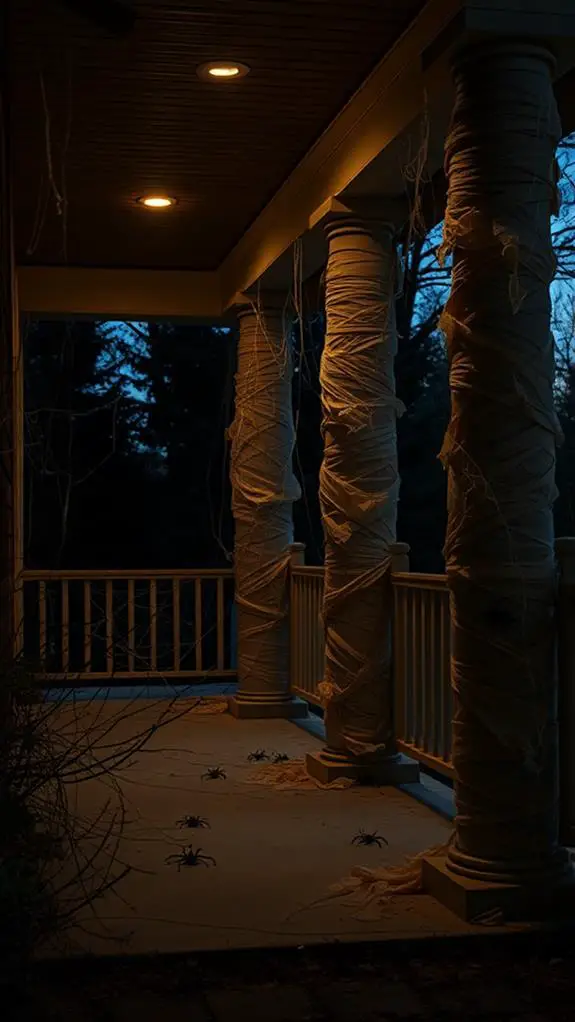
You're about to give your porch a spooky makeover with mummy wrapped columns that'll make your neighbors shriek with envy!
To start, you'll need to master the wrapping technique, which involves strategically placing strips of gauze or toilet paper to create a tight, uneven wrap.
As you wrap, think about how you can transform your columns into eerie, ancient relics by adding fake spiders, cobwebs, or other creepy crawlies.
Wrapping Techniques Explained
Gauzy strips of fabric transform your porch columns into eerie Egyptian sentinels as you master the art of mummy wrapping.
To begin, decide on your wrapping technique: fabric wrapping or twine wrapping.
For fabric wrapping, cut strips of cheesecloth or gauze, and start wrapping your column from the bottom up, overlapping each strip slightly as you go. Secure with a pin or tape.
For twine wrapping, wrap the twine around the column in a crisscross pattern, overlapping the twine as you go.
You can also combine both techniques for a more dramatic effect. As you wrap, adjust the tension to achieve a taut, mummy-like appearance.
Column Transformation Tips
Three key elements will elevate your mummy-wrapped porch columns from eerie to breathtaking: strategic lighting, clever accessorizing, and a dash of creative flair.
Wrap your columns with toilet paper or gauze to create a mummy-like effect, securing it with tape or a hot glue gun. Add column wraps in black or orange to create a bold, contrasting look.
For a dramatic touch, top your columns with column toppers shaped like spiders, bats, or other Halloween-themed decorations. Strategically place string lights or lanterns around the columns to cast an eerie glow.
Haunted House Silhouette Cutouts
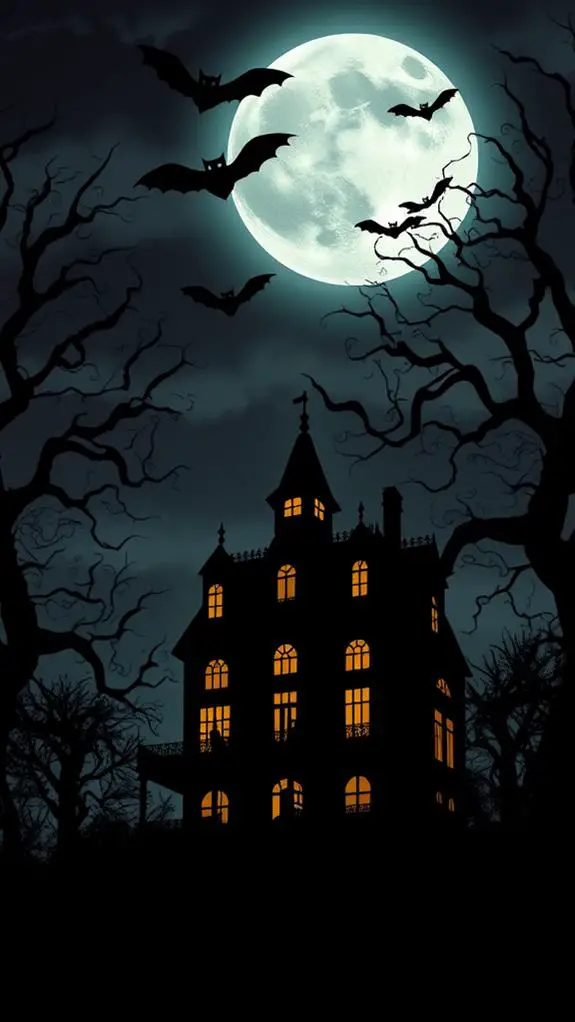
Haunted house silhouette cutouts cast an eerie spell on your Halloween decorations, transforming any window or wall into a spooky spectacle.
To create your own haunted landscapes, you'll need black cardstock or foam board, scissors, and a hot glue gun.
Sketch out spooky profiles of haunted houses, bats, and trees on the cardstock, then cut them out carefully. Use the hot glue gun to attach the cutouts to a piece of cardboard or foam board, creating a layered effect.
Place the cutouts in a window or against a wall, and backlight them with a flashlight or string lights to create an ominous glow.
You can also add additional details, such as cotton cobwebs or fake spiders, to enhance the spooky atmosphere.
Graveyard Fence and Gate Decor

As you conjure up a spooky graveyard scene, a dilapidated fence and gate become essential elements in setting the tone for a howling good time.
To create a hauntingly authentic fence, attach weathered wooden planks or cardboard strips to a freestanding frame. Add creepy charm with fence toppers shaped like skulls, bones, or spider webs.
For a gate that's eerily inviting, hang a crooked wooden door adorned with gate ornaments like rusty hinges, old locks, or a "Beware" sign. You can also add some eerie lighting to create an ominous glow.
With these details, your graveyard fence and gate will transport your guests to a haunted domain, setting the stage for a spook-tacular Halloween celebration.
Bat Wing and Rat Decorations
You'll create a haunting atmosphere with bat wing designs, starting with cardboard or foam templates that you'll shape and paint to resemble the wings of these flying creatures.
Next, you'll craft rat silhouette cuts from black cardstock or construction paper, arranging them in eerie poses on walls or windows.
Bat Wing Designs
Frequently, the spookiest of Halloween decorations rely on the eerie presence of bats, and with a few clever DIY tricks, you can create your own bat wing designs to send shivers down the spines of trick-or-treaters and party guests alike.
To get started, experiment with bat shape variations, such as pointed, rounded, or angular wings.
You can also play with wing pattern ideas, like stripes, polka dots, or a subtle gradient effect.
Cut out your design from black cardstock or foam, and attach a string or fishing line to hang them from the ceiling or a window.
For an added eerie effect, use a flashlight to cast a silhouette on the wall or floor.
With these simple steps, you'll be flying high with your own bat wing designs in no time!
Rat Silhouette Cuts
By the time the sun sets on Halloween night, your bat wing designs will have set the tone for a spooky atmosphere, but to take it to the next level, why not add some creepy rat silhouette cuts to the mix?
To create these, you'll need black cardstock or paper and scissors.
Cut out rat shapes, focusing on the habitat they'd inhabit, like sewer grates or crumbling walls.
Use a flashlight to cast shadow shapes on your walls or windows, adding an eerie ambiance.
Place the silhouettes strategically around your space to create a haunting scene.
You can also add glowing eyes for an extra spine-tingling effect.
Creepy Critter Displays
Your creepy critter displays are about to take flight with the addition of bat wing and rat decorations.
You'll create a haunting atmosphere by combining these frightful fauna elements with creepy insects and other eerie creatures.
Start by crafting bat wing decorations using black cardboard or foam. Cut out the wing shapes and attach them to a wire or string to create a 3D effect.
Next, add rat decorations made from paper mache or clay. Place them in corners or on shelves to create a sense of unease.
To take it to the next level, incorporate creepy insects like spiders, snakes, or beetles made from paper, foam, or even recycled materials.
Hang them from the ceiling or place them around your critter displays to create a spine-tingling ambiance.
Vintage Apothecary Jar Displays
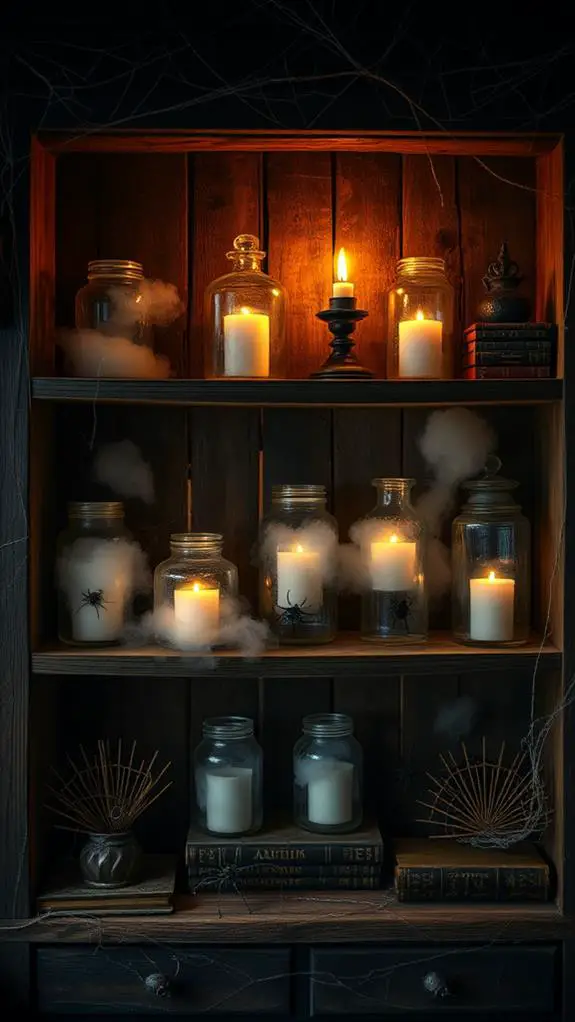
With the spooky season approaching, transform your home into a haunted apothecary by creating a mesmerizing display of vintage apothecary jar decorations.
Scour thrift stores and flea markets for unique vintage finds, such as old jars with ornate labels or mysterious containers with worn wooden lids.
Once you've gathered your materials, start decorating by adding apothecary labels to the jars, complete with creepy ingredients like "Bat's Wing" or "Wolf's Bane."
Fill the jars with dry ice for a spooky smoke effect or add some fake spiders, snakes, or other creepy crawlies for an extra scare.
Arrange the jars on a shelf or mantle, and voilà! You've created a hauntingly beautiful apothecary display that's sure to impress your Halloween guests.
DIY Paper Mache Monsters
You'll start by creating the body shapes of your monsters using balloons, newspaper, and tape – get creative with the forms and sizes to make each one unique!
Next, you'll apply layers of paper mache, allowing each layer to dry before adding the next, until your monsters have a sturdy, textured exterior.
Monster Body Shapes
Create a monstrous silhouette by crafting the body shapes of your DIY paper mache monsters.
You'll need cardboard, scissors, and a pencil to get started.
Sketch the creature contours you want to bring to life, considering the size and pose of your monster.
Cut out the body shapes, including the head, torso, arms, and legs.
Use these as templates to create multiple layers of cardboard, building up the dimensions of your monster.
As you layer, refine the shape, adding details like horns, claws, or fins.
Your monster silhouettes will start to take form, ready to be transformed into terrifying paper mache creations.
Paper Mache Process
Tear strips of newspaper, approximately one to two inches wide, to prepare for the paper mache process.
You'll need a lot, so don't be shy!
Dip each strip into a mixture of water and white glue, coating both sides evenly.
Wrap the strips around your monster body shape, overlapping them to guarantee coverage.
Apply multiple layers, allowing each to dry before adding the next.
Be patient, as this process can take time.
Don't worry if you make paper mache mistakes – they're easy to fix!
If you find the paper mache too thick, you can always sand it down.
Experiment with different mache material options, like paper towel rolls or cardboard, to add texture and interest.
As you work, you'll start to see your monster take shape.
Decorative Finishing Touches
Your paper mache monster is now a sturdy, three-dimensional form, begging for a splash of color and personality.
It's time to add those decorative finishing touches that'll bring it to life.
Start by applying a base coat of paint to set the tone for your monster's skin.
Then, get creative with faux finishes like mottling, streaking, or marbling to add depth and visual interest.
Add some texture accents like scales, fur, or warts using materials like fabric, yarn, or paper scraps.
You can also use modeling paste or thick paint to create raised features like bumps, ridges, or horns.
Lantern Lit Pathways and Patios

Frequently, the most magical aspect of Halloween decor lies in its ability to transform outdoor spaces, and lantern-lit pathways and patios are a surefire way to cast a spell of enchantment on trick-or-treaters and party guests alike.
To create a warm and inviting porch ambiance, you'll need lanterns in autumnal hues like orange, yellow, and red. Place them along your walkway, up the stairs, or around your patio to create a magical glow.
For an extra touch, add some battery-operated candles or fairy lights to create a soft, ethereal ambiance. As the sun sets, your lantern-lit pathway will come alive, casting an enchanting spell on all who enter.
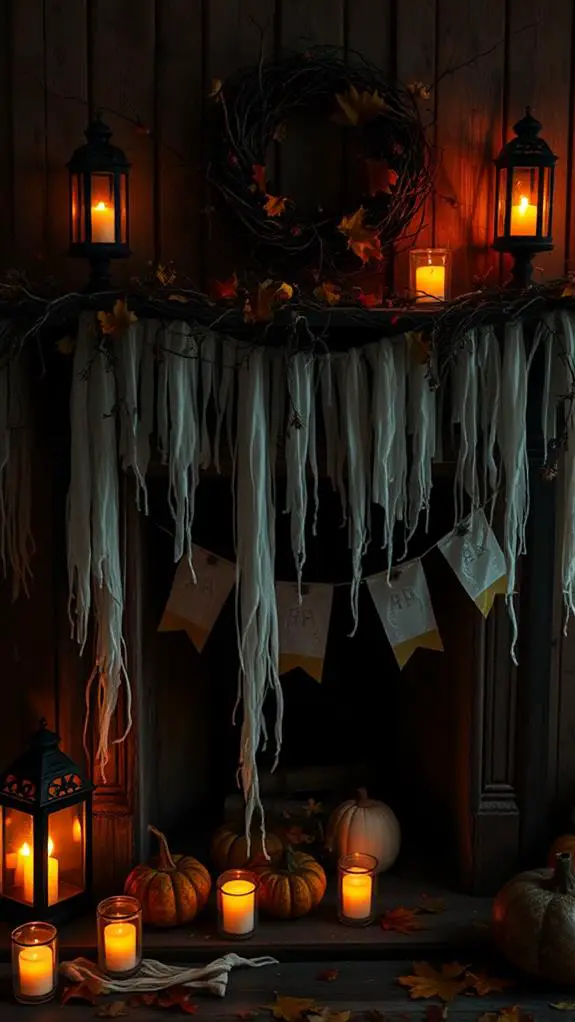
Cobweb Covered Chandeliers and Fixtures
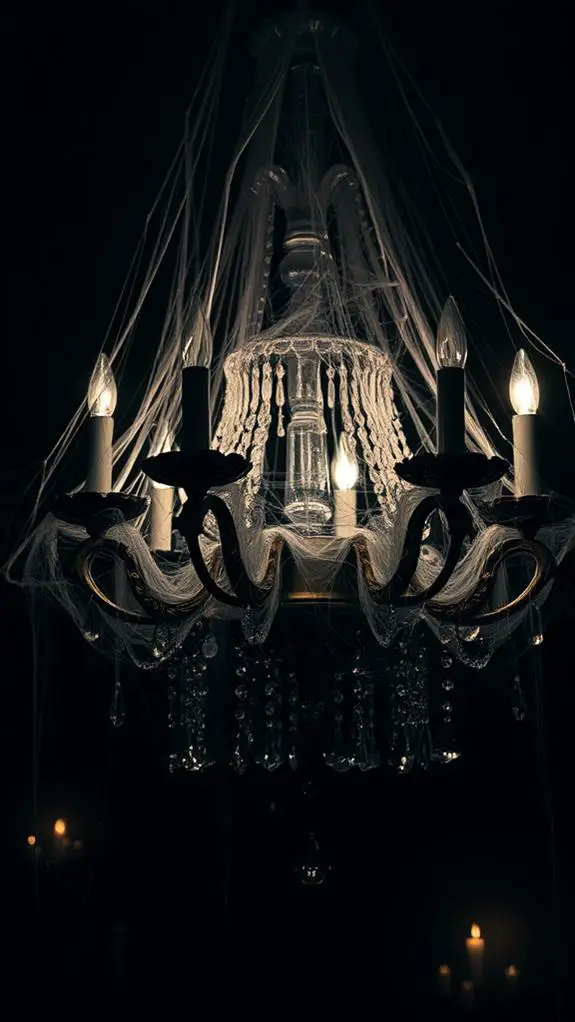
As darkness descends on All Hallows' Eve, it's time to spin a web of mystery and intrigue around your lighting fixtures.
To create a haunting ambiance, start by draping dusty, black cotton cobwebs around your chandeliers and fixtures.
You can use a hot glue gun to attach the fabric to the fixture, creating a tangled, eerie effect.
Next, add some faux spiders for an extra scare.
You can make your own using black pipe cleaners and beads or purchase them at a craft store.
Hang them from the center of the web, and watch as they seem to crawl across the fixture.
Skull and Crossbone Decorations
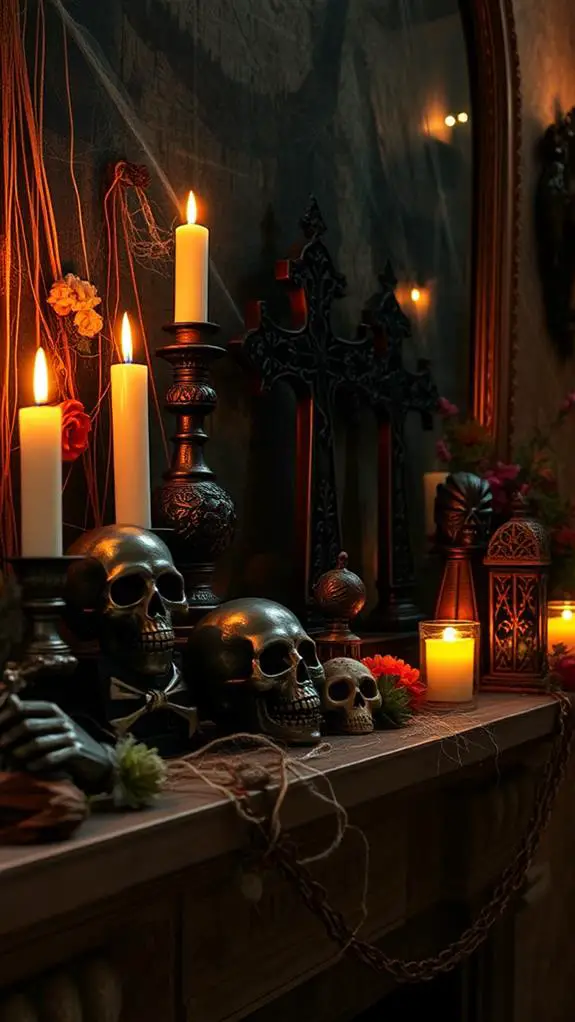
Death's calling card, the skull and crossbone, is a timeless Halloween symbol that can add a touch of macabre whimsy to your decor.
You can create a striking centerpiece by grouping sugar skulls or paper mache skulls on a decorative platter or vase, surrounded by dry ice for a spooky mist effect.
Add some Bone ornaments in the shape of fingers, toes, or vertebrae to create a dramatic display.
Paint or decorate the skulls in bold colors or metallic finishes to add an edgy touch.
For a more rustic look, hang skull-shaped decorations from twigs or branches to create a haunting mobile.
Whatever your style, skull and crossbone decorations are sure to cast a spell on your Halloween guests.
Eerie Eyes and Peeking Creatures
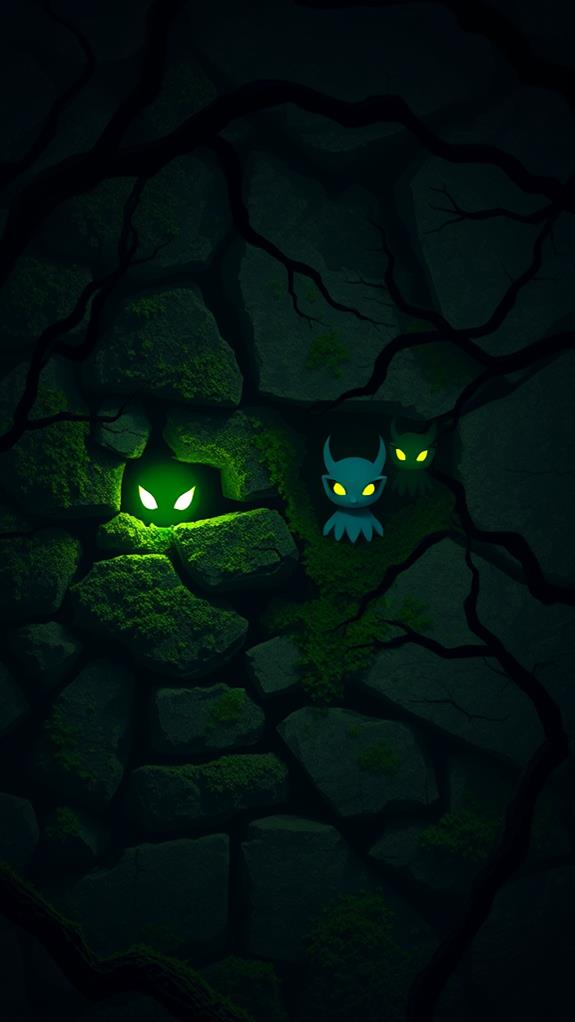
Beyond the graveyard gates, eerie eyes and peeking creatures lurk in the shadows, awaiting their cue to send shivers down your guests' spines.
Create an unsettling atmosphere by crafting glowing gazes and shadowy stares using LED tea lights, ping-pong balls, and black paint.
Paint the balls black, then use a hot glue gun to attach them to a wire or stick. Add LED tea lights inside the balls to create an eerie glow.
Place them in hidden spots around your party area, like bushes or trees, to make it seem like creatures are watching your guests.
You can also use cardboard cutouts or paper mache to create peeking creatures, like ghosts or monsters, to add an extra layer of spookiness.
FAQs
How Do I Store Halloween Decorations to Prevent Damage?
When storing seasonal decorations, you'll prevent damage by using sturdy storage bins and decoration labels. First, categorize items by type, then wrap fragile pieces in paper or cloth. Next, label each bin with its contents and store them in a dry, climate-controlled area.
Can I Use Real Candles in Outdoor Decorations?
When deciding on outdoor decoration lighting, you're wise to reconsider using real candles, as they pose a significant Outdoor Safety risk. Instead, opt for Flame Alternatives like LED candles, battery-operated tea lights, or solar-powered lanterns to guarantee a spooky yet safe ambiance.
What's the Best Way to Hang Heavy Decorations Securely?
To hang heavy decorations securely, you'll want to use sturdy wire clips to distribute the weight evenly, and consider suction hooks for smooth surfaces, ensuring a firm grip that'll keep your decor in place all season long.
Are There Any DIY Decoration Ideas for Small Spaces?
You're looking for DIY decor ideas that won't overwhelm small spaces. Create Space Savers by repurposing tiny terrariums, jars, or containers into Mini Masterpieces, like a mini graveyard or a witch's potion station, to add a touch of spooky charm without sacrificing floor space.
Can I Make Halloween Decorations With My Kids Involved?
You can create lifelong memories by involving your kids in kid-friendly crafts, fostering family bonding through projects like paper plate bats, pom-pom spiders, and handprint ghosts, teaching them skills while making Halloween decorations together.
Conclusion
You've transformed your home into a haunted haven, and now it's time to revel in the spooky atmosphere! Take a step back and admire your handiwork – the creepy candlelit pumpkins, spider web doorways, and ghostly garlands all come together to create an eerie ambiance. As the sun sets, your lantern-lit pathways and patios will guide trick-or-treaters through a maze of mummy-wrapped columns and haunted house silhouettes. Get ready for a howling good time as your guests shiver with delight!