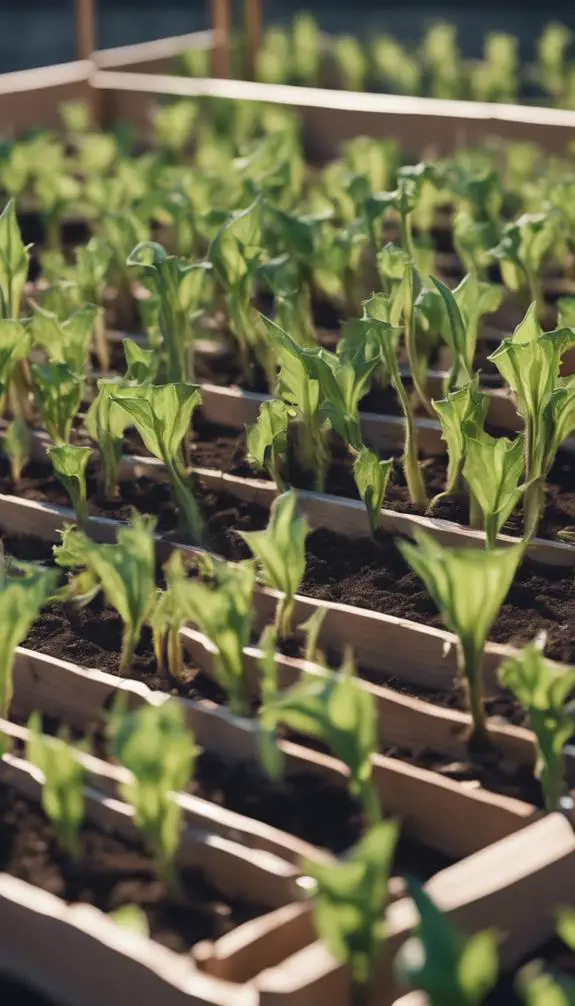
As you prepare to grow okra in your raised bed, you're likely wondering what it takes to coax these heat-loving plants into producing a bountiful harvest. You've heard that okra can be finicky, but with the right approach, you'll be snacking on crispy, flavorful pods in no time. First, you'll need to choose a variety that can thrive in your local climate, and then it's time to focus on soil preparation and sowing seeds at the ideal depth and spacing. But that's just the beginning – what's next will make all the difference between a mediocre crop and a truly impressive one.
Summary
- Select a disease-resistant and heat-tolerant okra variety suitable for your climate and raised bed conditions.
- Prepare the raised bed soil by testing its pH and adjusting it to a slightly acidic to neutral range of 6.0 to 7.0.
- Sow okra seeds 1 inch deep and 12-18 inches apart in rows that are 3 feet apart, and maintain consistent moisture levels.
- Provide support for okra plants using stakes or trellises, and fertilize with a balanced diet of nutrients to promote fruiting and flowering.
- Monitor the raised bed regularly for signs of pests, diseases, and nutrient deficiencies, and take action promptly to prevent damage.
Choosing the Right Okra Variety

When selecting okra varieties for your raised bed, consider the specific growing conditions and desired traits.
If you're looking for disease resistance, choose varieties with built-in protection against common okra diseases like verticillium and fusarium wilt. For warmer climates, opt for heat-tolerant okra seeds that thrive in high temperatures.
Heirloom varieties like 'Red Burgundy' and 'Clemson Spineless' offer unique characteristics and flavors, while hybrid varieties like 'Cajun Delight' provide improved yields and disease resistance.
Consider the maturation period, too – some okra varieties take as little as 50 days to harvest, while others may take up to 70 days.
Preparing the Raised Bed Soil

You'll need to assess your raised bed's soil condition to create an ideal environment for okra growth.
Start by collecting a soil sample and sending it to a lab for analysis, which will provide valuable insights into the soil's pH, nutrient levels, and structure.
Soil Testing Essentials
Test your raised bed soil to tap its full potential for growing okra.
You'll want to understand the composition of your soil layers, including the topsoil, subsoil, and any underlying layers. This will help you identify any nutrient deficiencies or imbalances that could impact okra growth.
A soil test will reveal the nutrient balance, including levels of nitrogen, phosphorus, and potassium. You'll also learn the soil's pH, which is vital for okra growth.
With this information, you can adjust your soil to create a perfect environment for your okra plants. This might involve adding organic matter, such as compost, or incorporating fertilizers to achieve the right nutrient balance.
Optimizing Soil Ph
With your soil test results in hand, you're ready to optimize the pH levels in your raised bed soil to create an ideal environment for okra growth.
Okra prefers a slightly acidic to neutral soil pH, ranging from 6.0 to 7.0. If your soil test reveals acidic conditions, you can add lime to raise the pH.
Conversely, if your soil is too alkaline, incorporate elemental sulfur or peat moss to lower it. Okra exhibits alkaline tolerance, but excessive levels can hinder nutrient uptake.
Aim for a balanced pH to promote healthy okra development. By adjusting your soil pH, you'll create a perfect environment for okra growth, ensuring a bountiful harvest.
Sowing Okra Seeds Correctly

When preparing the soil for okra seeds, make sure it has warmed up to at least 65°F (18°C), as okra seeds are sensitive to cool temperatures.
You'll want to sow your seeds about 1 inch deep and 12-18 inches apart, as overcrowding can lead to disease.
Plant them in rows that are 3 feet apart to allow for proper air circulation.
Certify the soil is moist but not waterlogged, as okra seeds germinate best in well-draining soil with a pH between 6.0 and 7.0.
Provide ideal soil warmth by using black plastic mulch or row covers to trap heat and retain moisture.
Providing Optimal Sunlight Conditions

Most okra varieties require full sun to produce a bountiful harvest, so certify your raised bed receives direct sunlight for at least six hours a day.
You'll want to position your raised bed in a spot that receives early morning sunlight, as this promotes healthy growth and development.
Be mindful of afternoon shade, however, as okra plants can be susceptible to heat stress.
If possible, provide some afternoon shade, especially in warmer climates, to prevent scorching.
Verify there are no obstructions, such as trees or buildings, that could cast shade on your raised bed during the critical sunlight hours.
Watering Okra Plants Properly
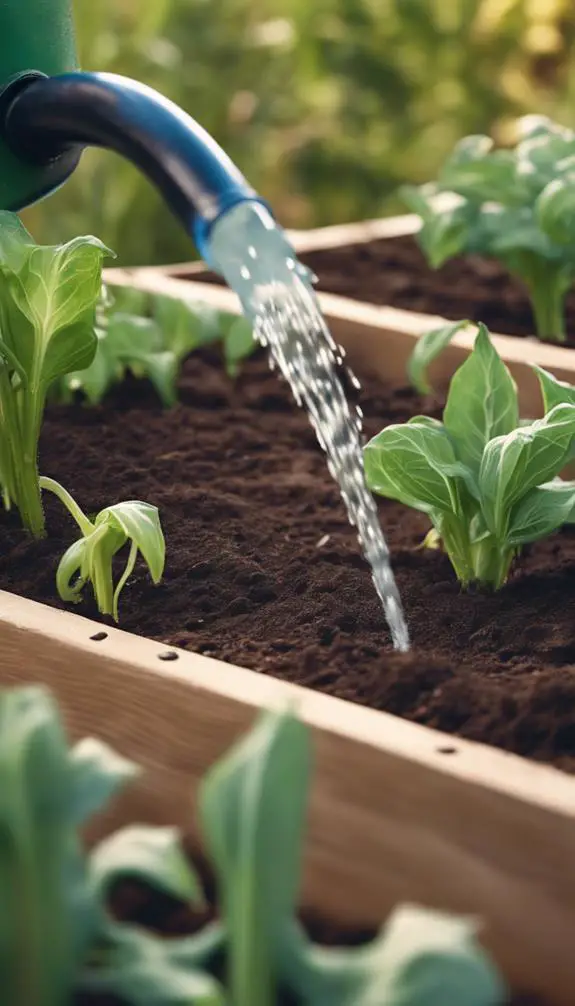
Okra plants thrive in moist soil, but overwatering can be detrimental to their health.
You'll want to guarantee consistent okra hydration, as water stressors can lead to reduced yields and weakened plants. Check the soil daily, and water when the top 2-3 inches feel dry to the touch.
Avoid getting water on the leaves to prevent fungal diseases. Instead, water at the base of the plant, allowing the soil to absorb the moisture.
Aim for about 1 inch of water per week, either through rainfall or irrigation. Mulching around the plants can also help retain moisture and reduce evaporation.
Fertilizing for Healthy Growth

How much fertilizer does your okra plant need to thrive? Okra requires a balanced diet of nutrients to produce a bountiful harvest.
Aim to provide your okra plants with a fertilizer that's high in phosphorus (P) and potassium (K), as these macronutrients promote fruiting and flowering. Apply a balanced fertilizer with an N-P-K ratio of 10-10-10 or 20-20-20 at planting time.
You can also side-dress with a high-phosphorus fertilizer (10-20-10) once the plants are about 6 inches tall.
Additionally, incorporate organic soil amendments like compost or well-rotted manure to improve okra nutrition and soil structure. These amendments will help retain moisture, suppress diseases, and support beneficial microorganisms.
Supporting Okra Plants Upright
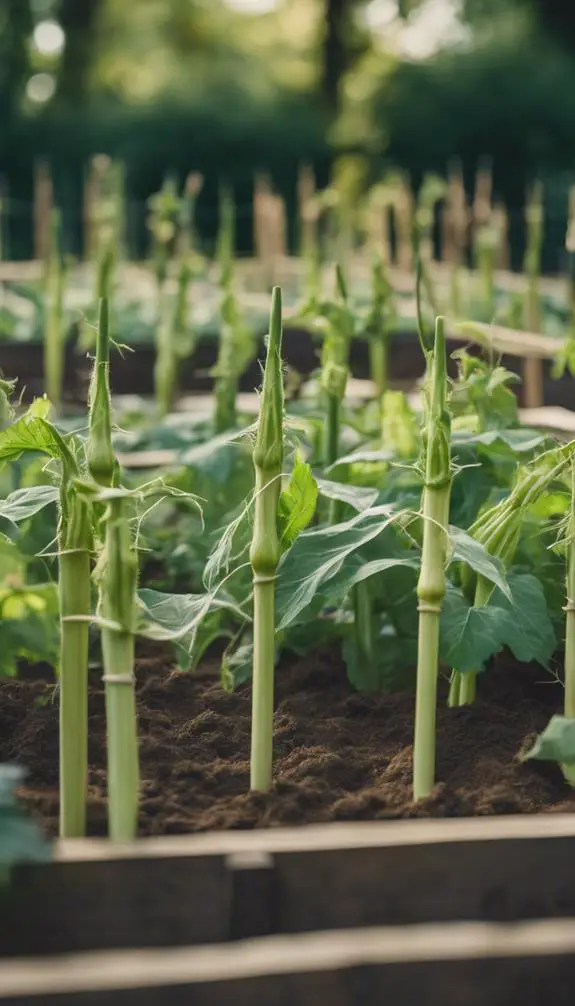
About halfway through the okra plant's life cycle, its stems will start to grow quite tall, reaching up to 6 feet or more.
To prevent them from toppling over and promote healthy growth, you'll need to provide support. Install okra stakes or plant trellises around your raised bed, spaced about 12-18 inches apart.
As the plants grow, gently tie the stems to the stakes or trellises using soft twine or plant ties. This will help keep the plants upright and encourage them to grow upwards, making it easier to harvest the okra pods.
Make sure the stakes or trellises are sturdy enough to hold the weight of the mature plants, and adjust the ties as needed to prevent damage to the stems.
Controlling Weeds and Pests

Your raised bed's success relies heavily on controlling weeds and pests, which can quickly overtake your okra plants and reduce yields.
To prevent this, you'll need to implement effective weed control measures. One approach is to use weed barriers, such as landscape fabric or plastic sheeting, to block weeds from germinating.
Another method is to apply a thick mulch layer, which can suppress weed growth while also retaining moisture and regulating soil temperature.
Additionally, consider using organic mulches like straw or wood chips, which can break down over time and add nutrients to the soil.
Pruning for Better Yields
Several okra plants can benefit from regular pruning to promote better yields and encourage bushy growth.
You'll want to focus on okra trimming the lower leaves, weak growth, and any spindly stems. This process redirects the plant's energy towards fruit formation and development.
Remove any weak or damaged branches, as these can attract pests and diseases. When pruning, make clean cuts just above a leaf node, using a sharp, sterile tool.
Prune your okra plants when they're around 6-8 inches tall, and continue to trim every 1-2 weeks. By doing so, you'll promote a strong, compact plant with an increased capacity for fruit production.
Regular pruning will also help improve air circulation, reducing the risk of disease.
Pollination and Fruit Set

As you cultivate okra in your raised bed, you'll want to understand the intricacies of pollination and fruit set, which rely on the unique structure of okra flowers.
These flowers, with their five petals and single pistil, require specific conditions to attract pollinators, such as bees and butterflies, that facilitate fertilization.
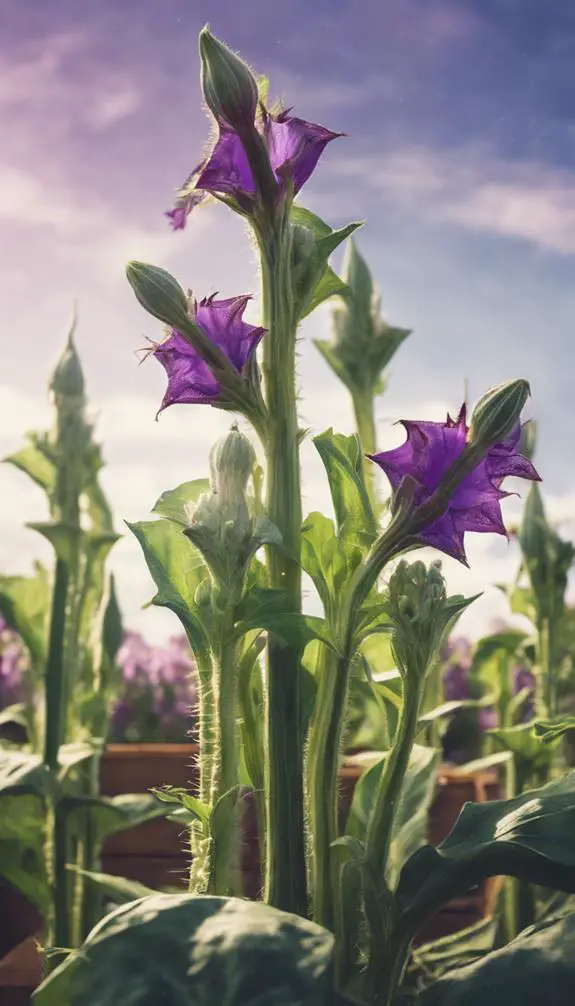
Okra Flower Structure
The okra flower's intricate structure is designed for ideal pollination and fruit set, ensuring a bountiful harvest in your raised bed.
You'll notice that okra flowers are yellow with five petals, and they're self-pollinating, meaning they don't require external pollinators.
The flower's anatomy consists of a receptacle, sepals, petals, stamens, and a pistil.
During flower formation, the stamens surround the pistil, allowing for easy pollen transfer.
This design enables efficient pollination, which is vital for fruit set.
As you examine the okra flower, you'll see how its structure facilitates successful pollination, ultimately leading to a plentiful okra harvest in your raised bed.
Okra Pollinator Attraction
Beyond the okra flower's self-pollinating design, it also employs a range of strategies to attract pollinators, thereby boosting pollination and fruit set in your raised bed.
Okra flowers produce a sweet, nectar-rich beverage that attracts bees, butterflies, and other pollinators. You can further enhance pollinator attraction by incorporating bee hotels and butterfly magnets into your raised bed design. This will provide a welcoming habitat for beneficial insects, increasing the likelihood of successful pollination.
Additionally, okra's bright yellow petals and distinctive shape make it an attractive target for pollinators. By combining these natural attractions with targeted habitat design, you'll create an ideal environment for pollination and fruit set in your okra crop.
Fruit Development Factors
You've successfully created an environment that attracts pollinators to your okra raised bed.
Now, it's vital to focus on the factors that influence fruit development. Climate influence plays a significant role in okra fruit set. Temperatures between 65°F and 95°F optimize pollination, while temperatures above 100°F can hinder fruit set.
Additionally, relative humidity above 60% facilitates pollen germination and fertilization.
Nutrient uptake also affects fruit development. Guarantee your okra plants receive adequate potassium, which promotes fruit growth and development. Monitor your plants' nutrient levels, and adjust your fertilizer application accordingly.
Identifying Common Okra Problems

Dig in and take a closer look at your okra plants, as subtle signs of trouble can easily slip past a casual observer.
Check for okra pests like aphids, whiteflies, and spider mites, which can cause curled or distorted leaves, yellowing, or a sticky substance on the leaves.
Inspect your plants for okra diseases like powdery mildew, leaf spot, and root rot, which can lead to yellowing, blackening, or softening of leaves and stems.
Be on the lookout for signs of nutrient deficiencies, such as yellowing or browning of leaves, stunted growth, or poor fruit set.
Regularly monitoring your okra plants will help you catch problems early, allowing you to take swift action to prevent the issue from spreading and minimize damage.
Harvesting Okra at the Right Time
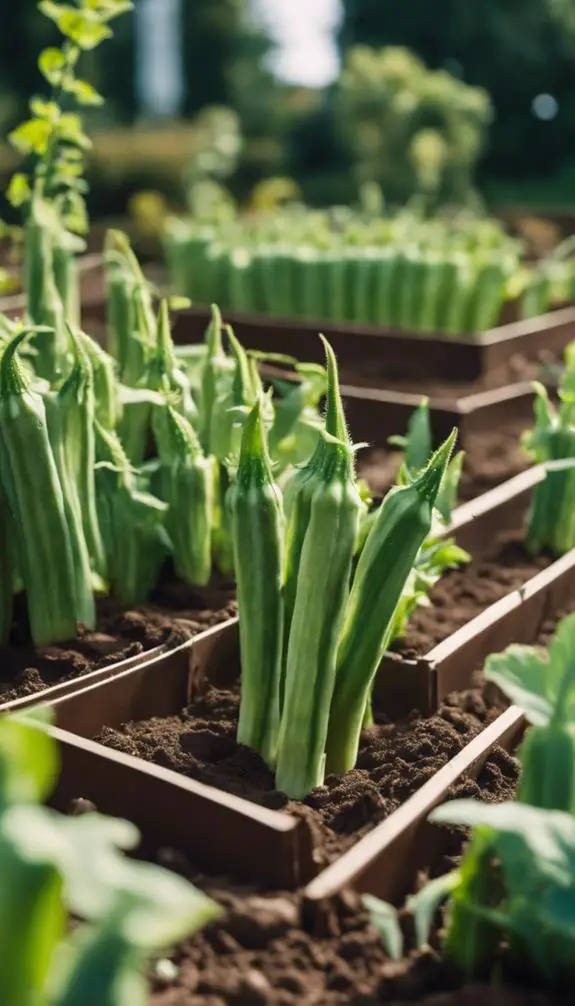
With okra pods growing rapidly, timing is essential when it comes to harvesting them at the right stage of maturity.
You should check on your okra plants daily, as pods can go from perfect to too big and fibrous in just a few days.
Okra ripeness is pivotal, and you'll know they're ready when they're bright green, plump, and about 3-5 inches long.
Harvest them when they're slightly soft to the touch, but still crisp.
Aim for a harvest frequency of every 2-3 days to encourage the plant to produce more pods.
Regular harvesting will also prevent over-maturity, which can lead to a decrease in okra production.
Storing Okra for Later Use

After enjoying a fresh okra harvest from your raised bed, some pods are likely to be leftover or ready for later consumption.
To preserve okra for future meals, you'll need to store it properly. Okra preservation is vital to maintaining its texture and flavor.
For short-term storage, place okra pods in a paper bag or wrap them in a paper towel to maintain humidity, then refrigerate.
For longer-term storage, consider freezer storage. Blanch okra pods in boiling water for 3-5 minutes, then immediately submerge them in an ice bath to stop the cooking process.
Pat dry and place them in airtight containers or freezer bags, making sure to remove as much air as possible before sealing. Label and store in the freezer at 0°F (-18°C) or below.
FAQs
Can Okra Plants Be Grown in Partial Shade?
You'll find that okra plants have moderate shade tolerance, but they'll thrive best when you provide them with full sun to partial shade, meeting their light requirements of at least 6 hours of direct sunlight daily.
How Often Should Okra Plants Be Rotated?
When planning okra orientation, you'll want to implement crop rotation every 2-3 years to avoid depleting soil nutrients and promoting pests; rotate okra 90 degrees from the previous year's bed to maximize growth and minimize disease.
Can Okra Be Grown in Containers Indoors?
You can successfully grow okra in containers indoors by providing sufficient indoor lighting, typically 4-6 hours of direct light or 12-14 hours of indirect light, and using a container with a minimum size of 12-14 inches deep and 18-20 inches wide.
Can Okra Be Grown From Cuttings?
You can attempt okra propagation through stem rooting, where you'll cut 3-4 inch stem sections, remove lower leaves, and plant them in a rooting medium, keeping it moist and warm, with a 50-70% success rate.
Will Okra Plants Grow Back After Frost?
You'll find that okra plants typically don't regrow after frost, as they're sensitive to temperatures below 55°F; however, with proper winter protection and frost recovery strategies, you can increase the chances of reviving your okra plants or promoting new growth.
Conclusion
You've successfully grown okra in your raised bed by selecting the right variety, preparing the soil, sowing seeds correctly, and providing ideal sunlight and watering conditions. With proper pollination and fruit set, you've identified and addressed common okra problems. Now, harvest your okra pods daily when they're bright green, plump, and 3-5 inches long, and store them for later use. By following these steps, you'll enjoy a bountiful okra harvest from your raised bed.