As you start planning your fall bulb garden, you’re probably wondering what it takes to create a vibrant display of spring blooms.
Choosing the right bulbs for your climate and garden style is just the beginning.
You’ll also need to prepare the perfect planting site, considering factors like sunlight, soil conditions, and drainage.
But that’s not all – you’ll also need to gather the right tools and know the best techniques for planting, caring for, and nurturing your bulbs.
From selecting the perfect planting location to dealing with common issues, there’s more to planting fall bulbs than meets the eye.
Key Takeaways
- Assess local climate, growing conditions, and desired bloom time to choose suitable fall bulbs for your garden.
- Prepare the planting site by ensuring well-draining soil, adequate sunlight, and proper air circulation.
- Plant bulbs at the correct depth (2-3 times their height) and spacing to allow for optimal growth and sunlight penetration.
- Use essential planting tools like trowels, cultivators, and bulb planters to efficiently plant bulbs in containers or directly in the ground.
- Apply fertilizer and mulch to provide necessary nutrients and retain moisture, and protect bulbs from pests and overwatering.
Choosing the Right Fall Bulbs
When choosing fall bulbs, it’s crucial to consider the specific growing conditions and climate in your area, along with the desired bloom time and color scheme, to ensure the best results.
You’ll want to select bulbs that thrive in your local climate and bloom at the right time to create a stunning display. With so many bulb varieties to choose from, it’s important to narrow down your options. Take into account the style of your garden – modern, traditional, or whimsical – and choose bulbs that match the aesthetic.
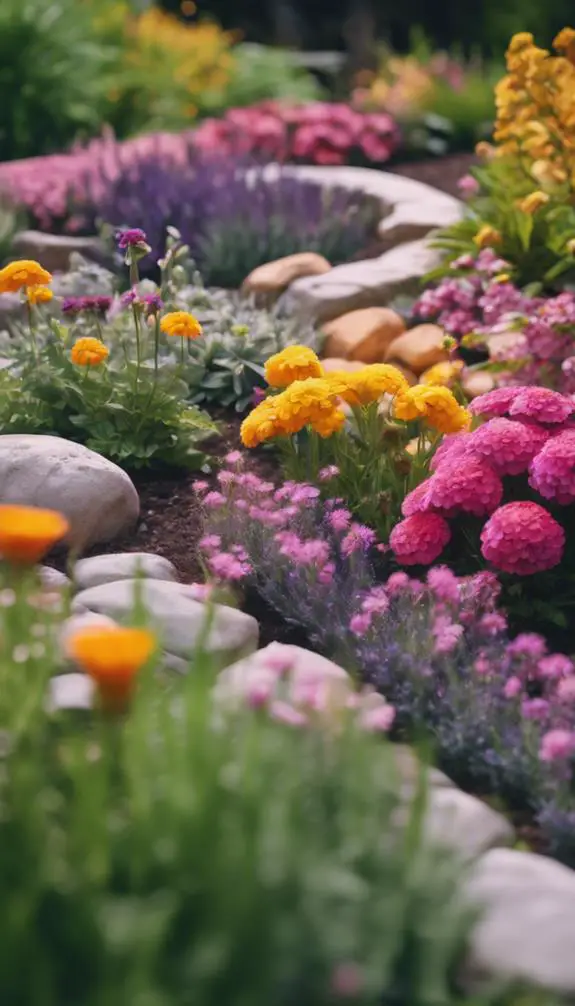
For a vibrant display, go for bulbs like tulips, daffodils, and hyacinths, which are available in a variety of colors. If you prefer a more subtle look, think about bulbs such as grape hyacinths or winter aconite, which bloom in shades of blue and yellow.
Consider the color scheme you wish to achieve – do you lean towards bold and bright, or soft and pastel? By selecting the right bulbs for your climate, bloom time, and color scheme, you’ll be well on your way to creating a stunning fall display that will fill you with pride.
Preparing the Planting Site
As you prepare the planting site, you’ll want to carefully select a location that receives the right amount of sunlight and has good air circulation.
Next, you’ll need to assess the soil to determine if it requires any amendments or adjustments to support healthy growth.
Choose a Location
When evaluating your yard, consider the fall microclimates that exist in different areas. You might’ve a warm, sunny spot near a south-facing wall or a cooler, shadier area under a tree. Take note of the amount of sunlight each area receives daily, as most fall bulbs require at least 6 hours of direct sunlight to bloom well.
Conduct a thorough yard examination to identify the best location for your bulbs. Look for areas with well-draining soil, as bulbs can rot if waterlogged. Avoid planting in low-lying areas where water tends to collect. Also, consider the mature size of the bulbs and leave enough space between each plant for proper growth.
Soil Preparation Needed
Now that you’ve identified the perfect spot for your fall bulbs, prepare the soil by loosening it to a depth of 8-10 inches to promote healthy root growth. This will allow the bulbs to establish a strong root system before winter.
Next, check your soil’s pH level, as most bulbs thrive in a slightly acidic to neutral soil pH (around 6.0-7.0). If your soil is too alkaline, add elemental sulfur or peat moss to lower the pH. Conversely, if it’s too acidic, add lime to raise the pH.
Add organic matter like compost to improve soil structure and fertility. Choose a compost type that’s rich in nutrients, such as mushroom compost or worm casting. Mix 2-3 inches of compost into the soil, taking care not to over-amend, as this can cause more harm than good.
A well-prepared soil bed will give your fall bulbs the best chance to thrive.
Remove Debris Carefully
Clear the planting site of any debris, including rocks, weeds, and twigs, to prevent interference with bulb growth and facilitate easy planting. You’ll be surprised at how much junk can accumulate in your garden over time. Take the time to carefully remove any obstacles, as they can hinder the growth of your bulbs.
Start by raking the area to loosen any debris, and then use a trowel or small shovel to remove any rocks or weeds. Be gentle, as you don’t want to disturb the soil too much. If you have a lot of leaves, consider using leaf cleanup strategies like composting or mulching to turn them into nutrient-rich soil. This won’t only clear your planting site but also provide valuable garden renovation tips for future gardening projects.
Gathering Essential Planting Tools
As you prepare to plant your fall bulbs, it’s crucial to gather the necessary tools to guarantee a successful planting experience.
You’ll need to collect gardening hand tools, such as a trowel, garden fork, and cultivator, to efficiently prepare the soil and plant the bulbs.
Additionally, you’ll require soil preparation essentials, like compost and fertilizer, and bulb planting accessories, such as bulb planters and garden markers, to get the job done efficiently.
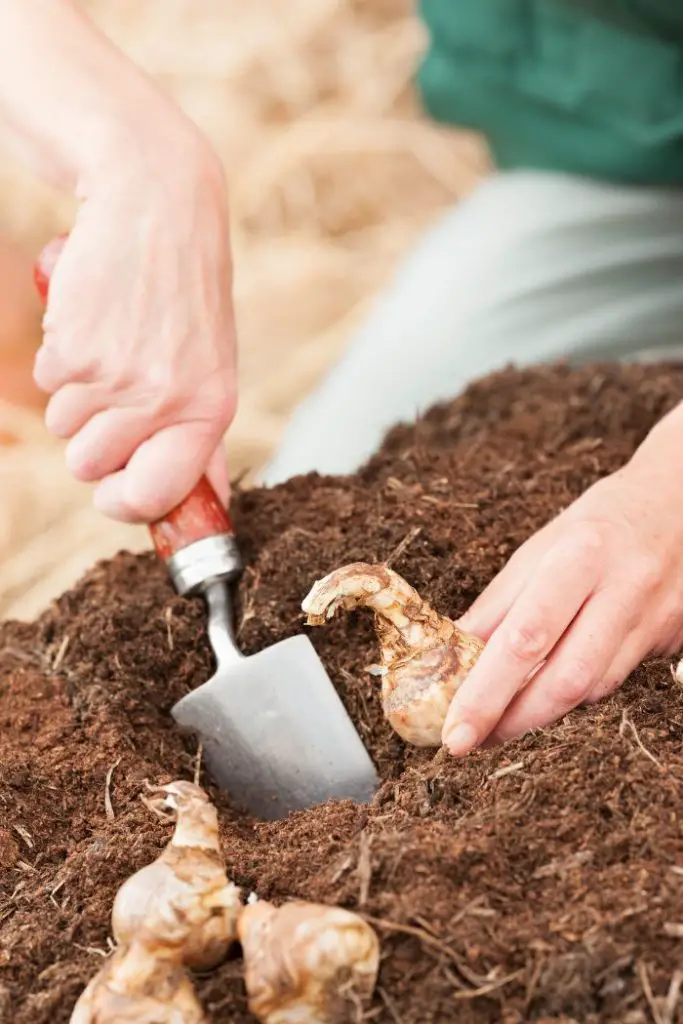
Gardening Hand Tools Needed
Gather a set of sturdy, high-quality gardening hand tools to make planting fall bulbs an efficient and enjoyable process. You’ll need a trowel or small shovel for digging, a bulb planter for precise planting, and a cultivator or garden fork for loosening soil.
Don’t forget a pair of garden gloves to protect your hands from thorns, dirt, and cold weather. Look for gloves with grip and traction to prevent slipping, and consider waterproof or water-resistant options for wet soil conditions.

Proper tool maintenance is essential to extend the lifespan of your tools. Clean your tools after each use, and store them in a dry place to prevent rust. Regularly sharpen your trowel and cultivator to maintain their effectiveness. Apply a rust-inhibiting coating or lubricant to metal tools to prevent corrosion.
Soil Preparation Essentials
With your trusty gardening hand tools at the ready, now it’s time to turn your attention to the soil, where a well-prepared bed awaits the fall bulbs.
Before planting, it’s crucial to make sure your soil is in top condition. Start by loosening the soil to a depth of about 12 inches to promote soil aeration. This will allow oxygen to reach the roots of your bulbs, supporting healthy growth.
Next, assess your soil’s compost quality. If it’s lacking, now’s the time to add a 2-inch layer of organic compost or well-rotted manure. This will enrich the soil, providing your bulbs with the necessary nutrients for a vibrant display.
As you prepare the soil, remove any debris, weeds, or rocks that could hinder bulb growth. Finally, rake the soil to create a smooth, even surface.
Bulb Planting Accessories
You’ll need a few specialized tools to plant your fall bulbs successfully, and having them at your disposal will make the process much smoother.
A bulb planter is a must-have, as it allows you to dig precise holes without damaging the surrounding soil or roots. You can choose from a variety of bulb planters, including handheld models and long-handled ones, depending on your personal preference and the size of your garden.
Garden gloves are another essential accessory, protecting your hands from thorns, dirt, and cold weather. Look for waterproof gloves with grip to guarantee a secure hold on your tools.
You’ll also need a trowel or small shovel to scoop out dirt and create a hole for the bulb. A measuring tape or ruler can come in handy for spacing bulbs evenly.
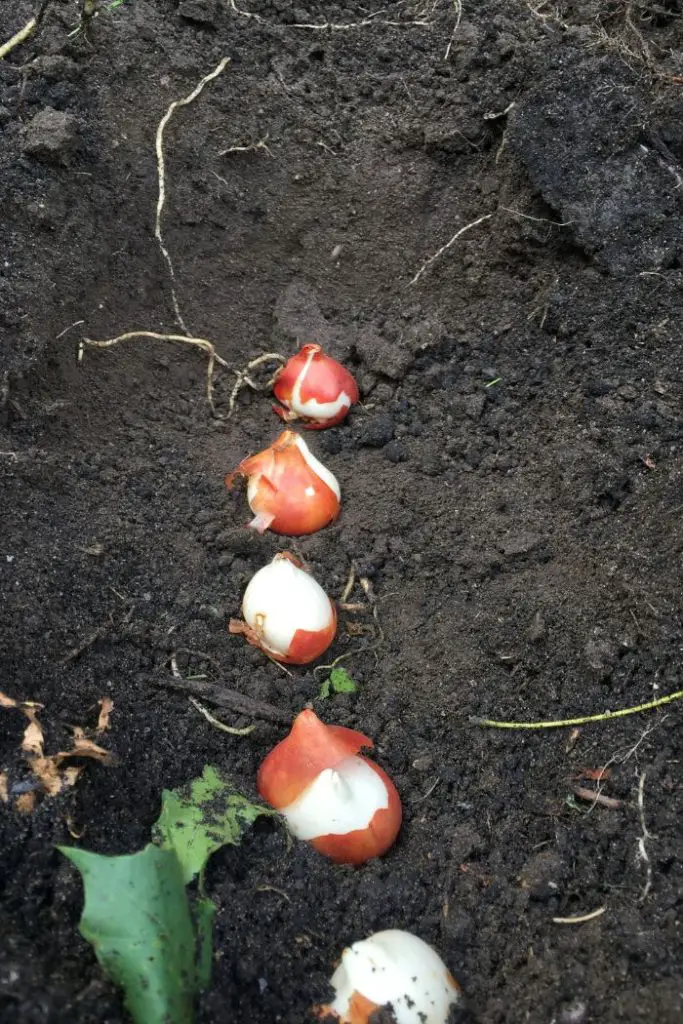
Planting Bulbs at Correct Depth
Planting bulbs at the right depth is essential, as it directly affects their ability to bloom, and a general rule of thumb is to plant them two to three times deeper than their height. This guarantees the bulb is planted at a depth that allows it to receive the necessary sunlight and water while safeguarding it from extreme temperatures.
To achieve the correct depth, you can use Bulb Anchors, which are small, weighted devices that hold the bulb in place while allowing it to grow. You can also use Depth Markers, which are small sticks or flags that mark the exact depth of the bulb, ensuring you’re planting at the correct level.
When planting, gently place the bulb in the hole, making sure the base of the bulb is level with the bottom of the hole. Fill the hole with soil, firming it gently as you go to prevent air pockets from forming. As you backfill, check the depth periodically to ensure you’re achieving the correct level.
Spacing Bulbs for Optimal Growth
As you get ready to plant your fall bulbs, you’ll want to take into account the importance of proper spacing to guarantee ideal growth.
You’ll need to balance the need for sufficient air circulation around each bulb with the desire to create a visually appealing display.
Proper Bulb Placement
When arranging fall bulbs, space them 2-3 times deeper and 3-6 times farther apart than their height to guarantee sufficient air circulation and sunlight penetration. This spacing allows for healthy growth and prevents overcrowding, which can lead to disease and pest issues.
Next, consider bulb orientation. Plant bulbs with the pointed end facing upwards, as this is where the stem will emerge. If your bulbs don’t have a clear ‘up’ side, plant them on their sides to prevent water from collecting in the hollows.
Think carefully about your planting patterns, too. You can plant bulbs in a random, naturalized pattern or create a more formal, structured design. For a natural look, scatter bulbs across the bed, then plant them where they fall.
For a more structured design, plant bulbs in rows or concentric circles. Remember to vary the planting depth and spacing based on the specific bulb variety to ensure optimal growth.
Soil Depth Matters
Your bulbs’ growth is heavily influenced by the soil depth at which you plant them, with different varieties requiring specific depths to thrive. As a general rule, larger bulbs like daffodils and tulips are planted 8-10 inches deep, while smaller bulbs like grape hyacinths and scillas are planted 3-5 inches deep.
The key is to guarantee the base of the bulb is planted at a depth where the soil structure is stable and well-draining, allowing for healthy root development. When planted too shallow, bulbs may not develop a strong enough root system, leading to weak growth and poor flowering. Conversely, planting too deep can cause the bulb to rot or struggle to emerge in the spring.
Spacing for Airflow
Proper spacing between bulbs allows for essential airflow, preventing moisture from accumulating and reducing the risk of rot and disease that can quickly spread between tightly packed bulbs.
As you plant your fall bulbs, keep in mind that each one needs its own breathing room. This doesn’t mean you can’t plant multiple bulbs close together, but rather that you should aim to create air pockets between them.
A general rule of thumb is to space bulbs two to three times deeper than their height, and about 3-6 inches apart, depending on the variety. This allows for air to circulate and reduces the risk of moisture accumulation.
By giving your bulbs the space they need, you’ll be rewarded with healthy growth and blooms that will thrive. Remember, it’s all about creating an environment that fosters air circulation and prevents moisture buildup.
With proper spacing, you’ll be on your way to a beautiful and thriving garden come springtime.
Planting Bulbs in Containers
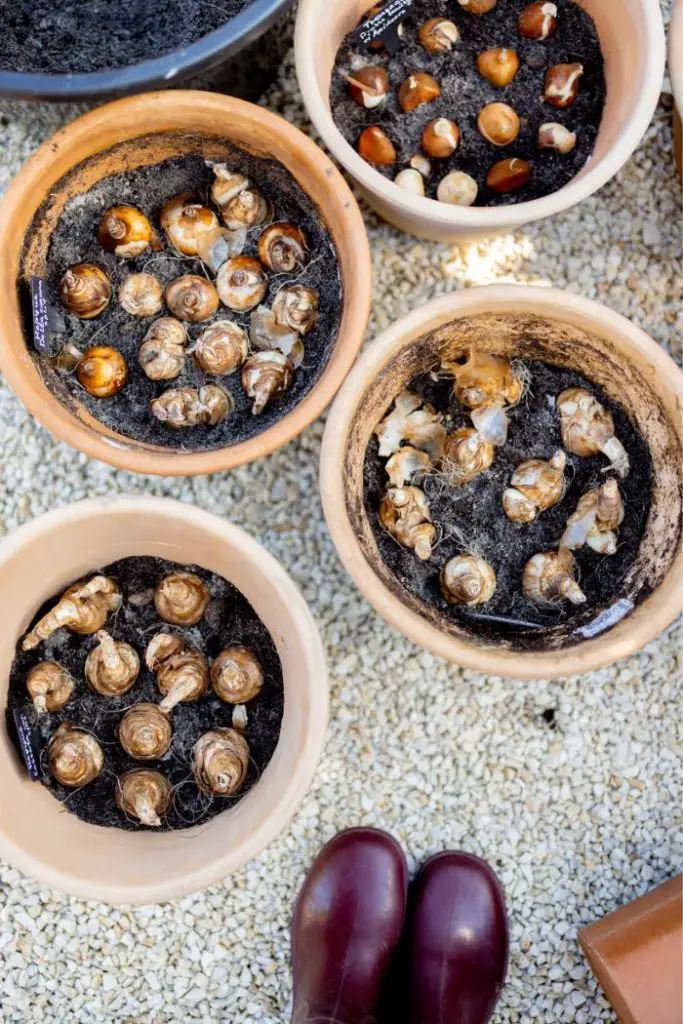
You can add an extra layer of versatility to your fall bulb display by planting bulbs in containers, which can be easily moved to different locations or stored in a garage or shed during the winter. When selecting a container, consider the mature size of the bulbs and choose a container that’s at least 6-8 inches deep. A larger container size will allow for better drainage and aeration around the bulbs.
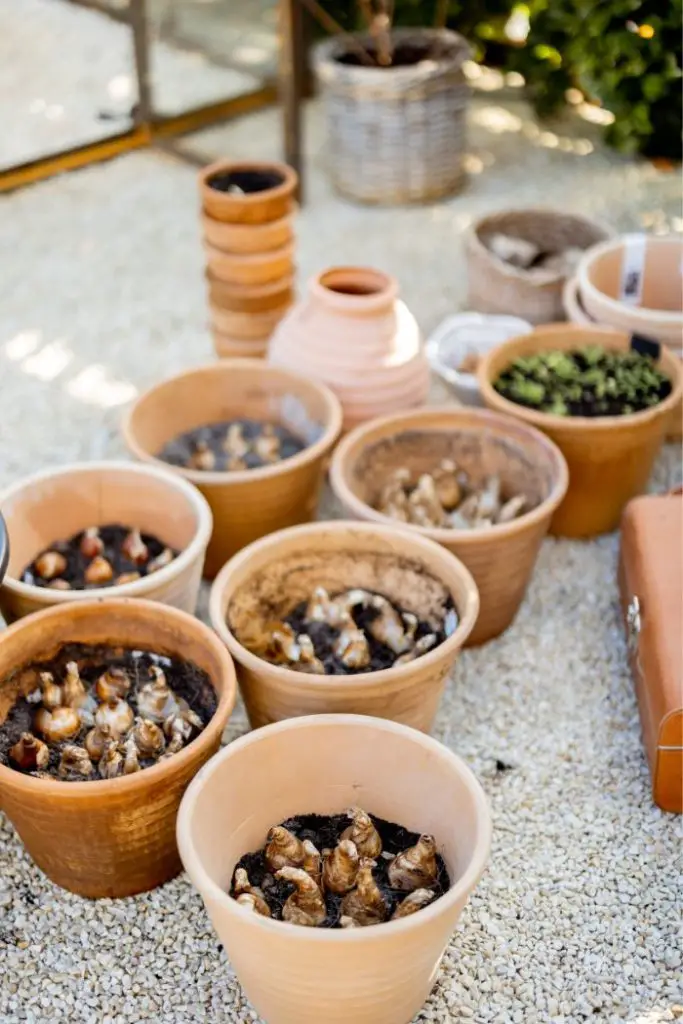
Make sure the container has good pot drainage, as excess water can cause the bulbs to rot. Drill holes in the bottom of the container or add a layer of small rocks or broken pottery to guarantee good drainage. A well-draining potting mix will also help prevent waterlogged soil.
When planting, space the bulbs in the container similarly to how you’d in the ground, allowing enough room for growth and airflow. By following these guidelines, you’ll be able to enjoy your fall bulbs in a beautiful and portable display.
Adding Bulb Fertilizer and Mulch
After planting, you’ll want to give your fall bulbs an extra boost by adding a bulb fertilizer to the soil, which provides necessary nutrients for healthy growth and blooming. There are different fertilizer types to choose from, such as granular, liquid, or organic options. When selecting a fertilizer, look for one that’s specifically formulated for bulbs and contains essential nutrients like phosphorus, nitrogen, and potassium. Follow the product instructions for application rates and timing.
Next, apply a layer of mulch around 2-3 inches thick to retain moisture, suppress weeds, and regulate soil temperature. Mulch benefits your bulbs by reducing soil erosion, improving soil health, and creating a welcoming environment for growth. You can use organic mulch materials like straw, bark chips, or leaves. Avoid using mulch that can attract pests or create a habitat for rodents.
Watering and Caring for Bulbs
Ensuring adequate Bulb Hydration is crucial once your fall bulbs are planted. This will help promote a strong root system and healthy growth during the first growing season. Providing consistent moisture is key to encouraging your bulbs to develop a robust root system. Remember to water your bulbs regularly, but be cautious of overwatering, as it can cause rot and other issues. Strive to keep the soil consistently moist, but not waterlogged.
In the winter months, offering Winter Protection for your bulbs is necessary. Applying a layer of mulch will help insulate the soil and protect your bulbs from freezing temperatures. This practice will help maintain a steady soil temperature and create a conducive environment for your bulbs to flourish.
While tending to your bulbs, watch out for any signs of distress or disease. Remove any dead or dying foliage to prevent the spread of disease and encourage healthy growth.
Dealing With Common Planting Issues
Even with proper planning and preparation, common issues can still arise when planting fall bulbs. Being able to identify and address these problems promptly is crucial for guaranteeing a successful bloom.
One common issue you may encounter is bulb rot, which occurs when bulbs are planted in soil that’s too wet or poorly drained. To prevent bulb rot, make sure to plant your bulbs in well-draining soil and avoid overwatering.
Another issue you may face is pest control. Squirrels, rabbits, and other rodents can be attracted to newly planted bulbs, so it’s important to take measures to deter them. You can do this by planting bulbs at a depth that’s difficult for pests to reach, or by using physical barriers like chicken wire or hardware cloth to protect your bulbs.
Additionally, consider using repellents like predator urine or hot pepper spray to deter pests. By being aware of these potential issues and taking steps to prevent them, you can ensure a successful and healthy bloom come springtime.
Caring for Bulbs After Planting
After you’ve finished planting your fall bulbs, turn your focus to providing the necessary care to guarantee they thrive during the winter months and emerge healthy in the spring. To prevent bulb rot, make sure the soil drains well and avoid overwatering. You can also apply a layer of compost or well-rotted manure to improve soil structure and fertility.
For winter mulching, apply a 2-3 inch layer of organic mulch, such as straw or bark chips, around your bulbs. This will help retain moisture, suppress weeds, and regulate soil temperature. However, be cautious not to mulch too close to the bulb, as this can cause rot. Instead, create a ‘donut’ of mulch around the planting area, keeping a small circle around the bulb clear.
Enjoying Your Spring Blooms
After a winter of anticipation, your patience is rewarded as the first tender shoots of your fall-planted bulbs begin to emerge, bursting forth with vibrant colors and sweet fragrances that herald the arrival of spring.
As the snow melts away, you’ll start to notice the first signs of life, from the delicate white petals of snowdrops to the bright yellow trumpets of daffodils.
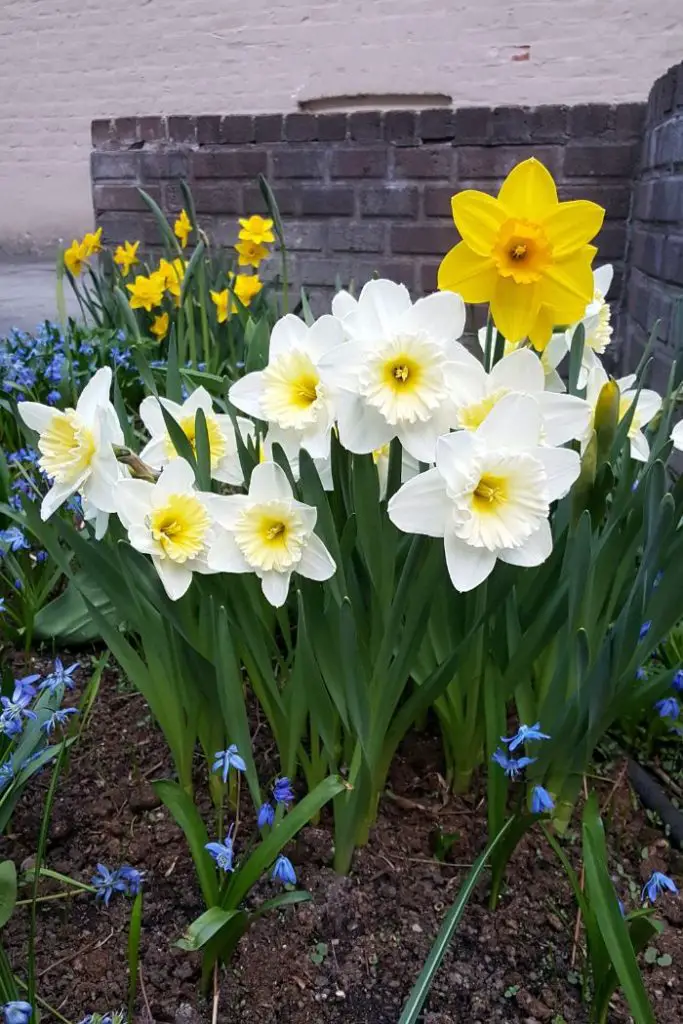
Your spring colors will unfold according to a predictable blooming timeline, with early risers like grape hyacinths and scillas paving the way for later arrivals like tulips and alliums.
As the weeks progress, your garden will transform into a kaleidoscope of colors, with each variety adding its unique hue to the mix. Be sure to take note of the blooming timeline, so you can plan your outdoor activities and garden tours accordingly.
Whether you’re hosting a spring soiree or simply enjoying a quiet morning in the garden, the vibrant blooms will create a sense of community and connection to nature.
Frequently Asked Questions
Can I Plant Fall Bulbs in the Same Spot Every Year?
You can’t plant fall bulbs in the same spot every year, as it leads to soil depletion and reduces bulb performance. Practice bulb rotation to prevent this and guarantee healthy growth.
Do Deer and Rabbits Eat Fall Bulbs, and How Can I Protect Them?
As you get ready for fall planting, it’s smart to take into account the threat of deer and rabbits devouring your bulbs; use wildlife deterrents or bulb cages to protect them, ensuring your beautiful blooms thrive.
Can I Plant Fall Bulbs in Areas With Heavy Shade?
You can plant fall bulbs in areas with heavy shade, but you’ll need shade-tolerant varieties that thrive in low-light conditions or dappled light, ensuring a successful bloom come spring.
How Long Do Fall Bulbs Take to Bloom After Planting?
After planting, you’ll wait 3-4 months for bulb development, and then another 2-3 months for the blooming timeline, so be patient, as your fall bulbs will bloom around late winter to early spring.
Can I Plant Fall Bulbs in the Spring Instead of the Fall?
You’re wondering if you can plant fall bulbs in the spring instead of the fall, but be aware that spring challenges, like warmer temperatures, can affect bulb flexibility, making it harder for them to thrive.
Conclusion
You’ve successfully planted your fall bulbs, and with proper care, they’ll thrive. Remember to water them during dry spells, and add fertilizer as needed.
As winter ends, reduce watering, and let the foliage die back naturally. This allows the bulb to recharge for next year’s bloom.
By following these steps, you’ll be rewarded with a vibrant display of spring flowers, and your hard work will pay off.