You're about to venture on a fascinating journey of setting up a Kratky Mason jar system, a clever way to grow your favorite plants hydroponically. To get started, you'll need to gather some essential materials, including Mason jars, a growing medium, and a nutrient solution tailored to your plant's specific needs. But that's just the beginning – you'll also need to sterilize your equipment, plant your seeds or clones, and provide the right amount of light. And that's where things get really interesting, as you'll soon discover the importance of maintaining pH balance and monitoring water levels. Are you ready to take the first step?
Summary
- Thoroughly wash and dry a food-grade Mason jar to create a sterile environment for plants to thrive.
- Mix a well-balanced nutrient solution with a correct pH level between 5.5 and 6.5 for ideal nutrient absorption.
- Plant seeds 1-2 inches deep and 1-2 inches apart in a moist growing medium, and provide reliable root support.
- Assemble the net pot, ensuring centered and even pot hole placement, and secure it with clips or twist ties.
- Monitor water levels daily and provide adequate lighting, with a minimum of 12 hours of light per day, for healthy plant growth.
Gather Essential Materials

Six essential components are required to set up a Kratky Mason jar system.
You'll need a suitable container, a growing medium, a nutrient solution, an aeration system, a trellis or support, and a water reservoir.
When selecting a container, consider material options such as glass, plastic, or ceramic. Choose a container that's food-grade, non-reactive, and suitable for hydroponic growing.
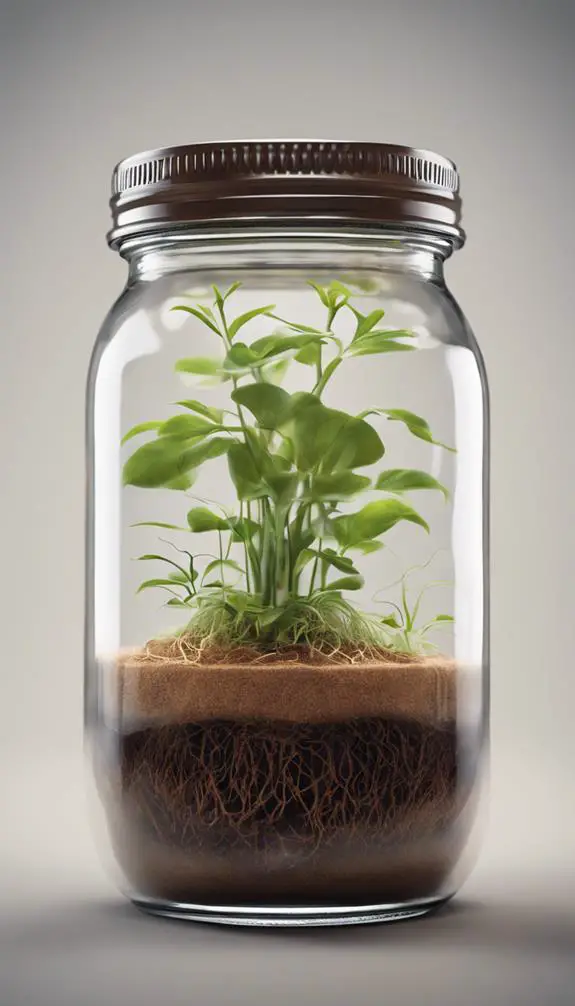
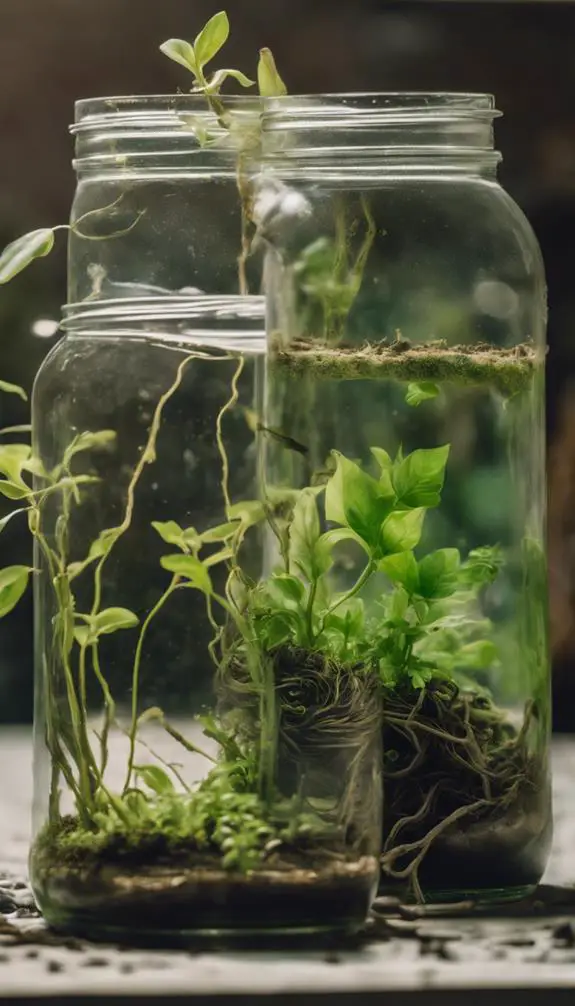
For container selection, Mason jars are a popular choice due to their affordability, durability, and ease of use. Measure the jar's diameter and height to confirm the growing medium and aeration system fit properly.
Prepare Mason Jars
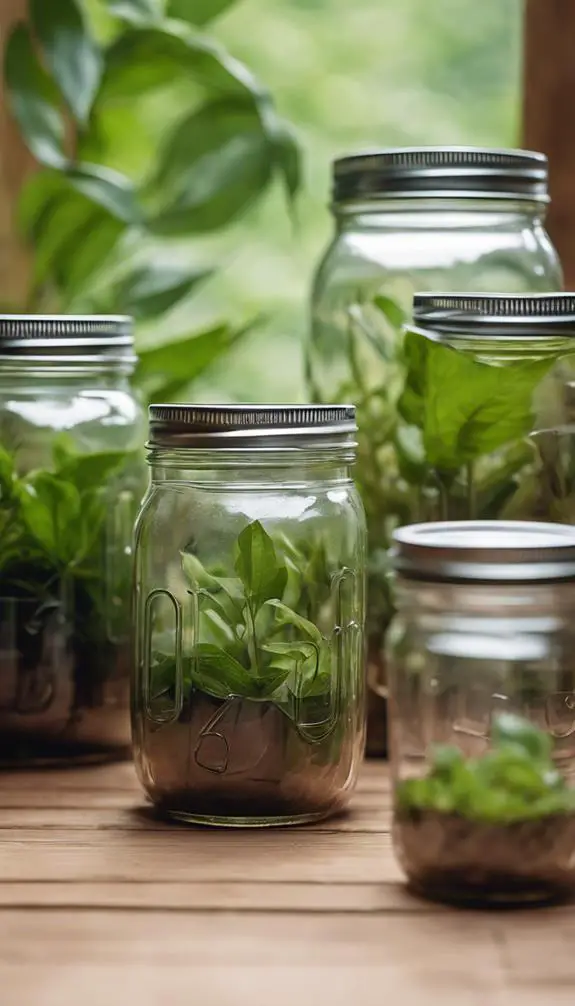
To prepare your Mason jars, thoroughly wash them with soap and warm water to remove any residue or debris.
This step is vital in ensuring a sterile environment for your plants to thrive. When selecting Mason jars, opt for ones made from borosilicate glass, as they can withstand extreme temperatures.
For ideal Jar Preparation Techniques, use a soft-bristled brush to scrub away any stubborn residue, then rinse thoroughly. Dry the jars with a lint-free cloth to prevent water spots.
Mix Nutrient Solution

With your Mason jars properly prepared, you're ready to create the nutrient solution that will fuel your plants' growth.
To mix the solution, you'll need to calculate the correct mix ratios for your specific plants. A general starting point is a solution strength of 1-2% (10-20ml of nutrient concentrate per liter of water).
You can adjust this ratio based on your plants' specific needs and growth stages. Use a measuring cup or graduated cylinder to accurately measure the nutrient concentrate and water.
Mix the solution in a separate container, then pour it into the Mason jar reservoir. Verify the solution is well-mixed and at the correct strength to provide ideal nutrition for your plants.
Sterilize Equipment

You'll need to clean the equipment thoroughly to remove any debris or residue that may interfere with your Kratky system.
Start by washing your Mason jar, net pot, and any other equipment in warm soapy water, then rinse everything thoroughly.
Next, sanitize the area where you'll be assembling your system to prevent contamination.
Clean the Equipment
Your Mason jar and equipment are now free of debris, but they still harbor unseen enemies: bacteria, fungi, and other microorganisms that can contaminate your system and hinder plant growth.
Before you start setting up your Kratky system, it's vital to clean and disinfect all equipment to prevent contamination. Conduct an equipment inspection to identify any areas with visible dirt, grime, or mineral deposits.
Develop a cleaning protocol that involves washing each component with mild soap and warm water, followed by a thorough rinse. Pay particular attention to crevices, threads, and other areas where microorganisms tend to accumulate.
Sanitize the Area
Clean equipment is just the first step; now it's time to sanitize the area to eliminate any remaining microorganisms.
You'll need a clean workspace to prevent contamination of your Kratky Mason Jar System. Start by wiping down the work surface with a disinfectant solution, making sure to cover every inch.
Don't forget to sanitize any surrounding areas, including countertops, tables, and floors. Use a UV light sanitizer or a bleach solution to create a sterile environment.
Pay special attention to any areas where your equipment will come into contact with the surface. By sanitizing the area, you'll minimize the risk of contamination and create an ideal environment for your plants to thrive.
Plant Seeds or Clones

As you prepare to plant seeds or clones in your Kratky Mason jar system, guarantee the growing medium is moist but not waterlogged, since excessive moisture can lead to root rot and poor germination.
For seed selection, choose high-quality seeds suitable for hydroponic systems, and follow the specific planting instructions provided. Typically, seeds are planted 1-2 inches deep and 1-2 inches apart.
For clone care, gently remove the clone from its growing medium, taking care not to disturb the roots. Trim any long roots to prevent tangling and encourage healthy growth. Plant the clone at the same depth as it was previously grown, and secure it with a small amount of growing medium.
Create Net Pot Assembly
You'll now create the net pot assembly, a vital component of your Kratky Mason Jar System.
To do this, you'll follow specific steps to guarantee a stable and effective growing environment.
You'll need to select the right net pot size, as it directly impacts the health and development of your plants.
Net Pot Assembly Steps
Every Kratky Mason jar system relies on a well-assembled net pot to support the growth of your plants.
When assembling your net pot, you'll need a net pot design that allows for ideal root growth and aeration. Begin by cutting a piece of netting to fit snugly over the lip of your Mason jar.
Secure the netting with a rubber band or twist tie, ensuring it's tight enough to hold the growing medium in place. Next, add your chosen growing medium, leaving enough space for the roots to breathe.
Use pot assembly techniques like gently teasing out the roots to encourage healthy growth. Finally, place your plant in the net pot, and you're ready to move on to the next step in setting up your Kratky Mason jar system.
Net Pot Size Matters
Selecting the right net pot size is vital for ideal plant growth in your Kratky Mason jar system.
You want to guarantee the net pot is large enough to hold the growing medium and roots, but not so large that it takes up too much space in the jar. Perfect sizing allows for the right balance of water and oxygen to reach the roots.
A net pot that's too small can lead to root bound, while one that's too large can cause the growing medium to become waterlogged.
Choose a net pot that's 1-2 inches smaller in diameter than the Mason jar's mouth to guarantee a snug fit. This will also allow for easy removal and cleaning.
Assemble Jar System

As the Kratky method requires a precise setup to thrive, begin by gathering all the necessary components, including the Mason jar, net pot, growing medium, and wick.
Verify each jar component is carefully selected and prepared to avoid assembly challenges.
Next, fill the net pot with the chosen growing medium, gently teasing out any clumps to guarantee even distribution.
Cut the wick to the desired length, making sure it reaches from the net pot to the bottom of the Mason jar.
Now, place the net pot into the Mason jar, taking care not to disturb the growing medium.
Add Nutrient Solution

Now that your Kratky system is assembled, you're ready to add the nutrient solution.
This solution provides essential macronutrients and micronutrients for your plant's growth. Mix the nutrient solution according to the manufacturer's instructions, taking care to achieve the recommended nutrient ratio.
A general starting point is a balanced ratio of 20-20-20 (nitrogen-phosphorus-potassium). Adjust the solution strength based on your plant's specific needs and growth stage.
For most plants, a solution strength of 1-2 EC (electrical conductivity) is suitable. Verify the solution is thoroughly mixed and dissolved before adding it to the jar.
Suspend Plant Roots
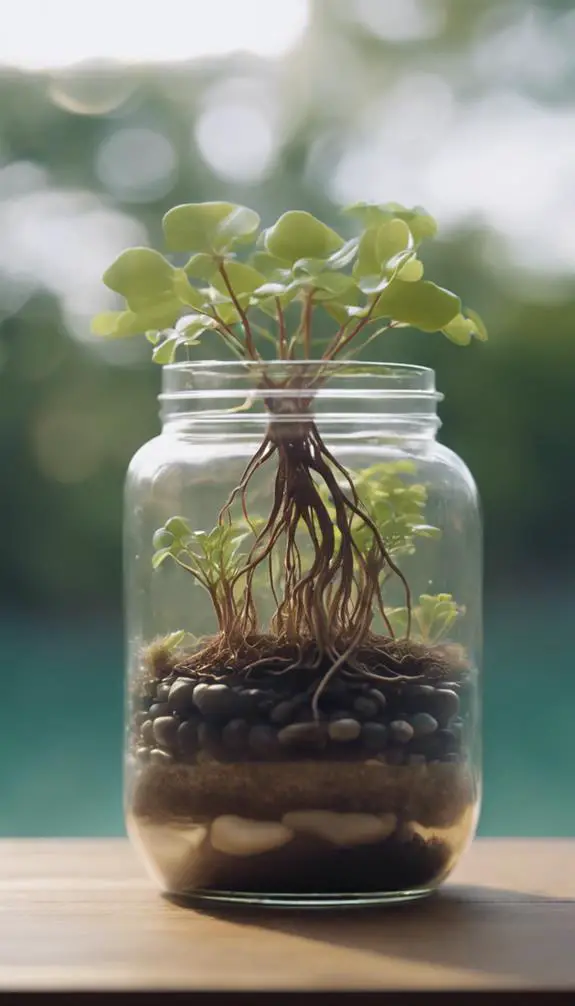
You'll need to suspend your plant's roots in the nutrient solution using a reliable root support method.
This can be achieved by assembling a net pot, which will hold the growing medium and plant in place.
Root Support Methods
The Kratky method relies on suspending plant roots in a nutrient-rich solution, which necessitates a reliable root support system to guarantee maximum growth.
You'll need to implement a root support method that secures the roots while allowing for ideal aeration and nutrient uptake.
One effective approach is using root anchors, which can be made from materials like rockwool or clay pebbles.
These anchors provide a stable base for the roots to grow, ensuring they don't float away or become tangled.
Additionally, incorporating aeration methods, such as air stones or pumps, will enhance oxygen exchange and promote healthy root development.
Net Pot Assembly
With your root support system in place, turn your attention to assembling the net pot, which will suspend your plant's roots in the nutrient-rich solution.
This net pot design is vital for ideal root growth and access to nutrients. Start by placing the net pot into the Mason jar, ensuring the pot hole placement is centered and even.
Secure the net pot using the provided clips or twist ties, making sure it's snug and level. The net pot's mesh material allows for easy root penetration and aeration, promoting healthy root development.
Adjust the net pot's height to accommodate the plant's root system, leaving enough room for growth and nutrient uptake.
Provide Adequate Lighting

Adequate lighting is crucial for a thriving Kratky mason jar system, as it directly impacts photosynthesis and, ultimately, plant growth.
You'll want to provide your plants with a minimum of 12 hours of light per day. Natural sunlight is the best option, so place your jar near a sunny window or under a skylight.
If that's not possible, consider using LED grow lights, which are energy-efficient and produce minimal heat. You can also use T5 or T8 fluorescent lights, but be aware they produce more heat and consume more energy.
Regardless of the lighting option you choose, guarantee it's positioned 6-8 inches above the plant to promote healthy growth.
Monitor Water Levels
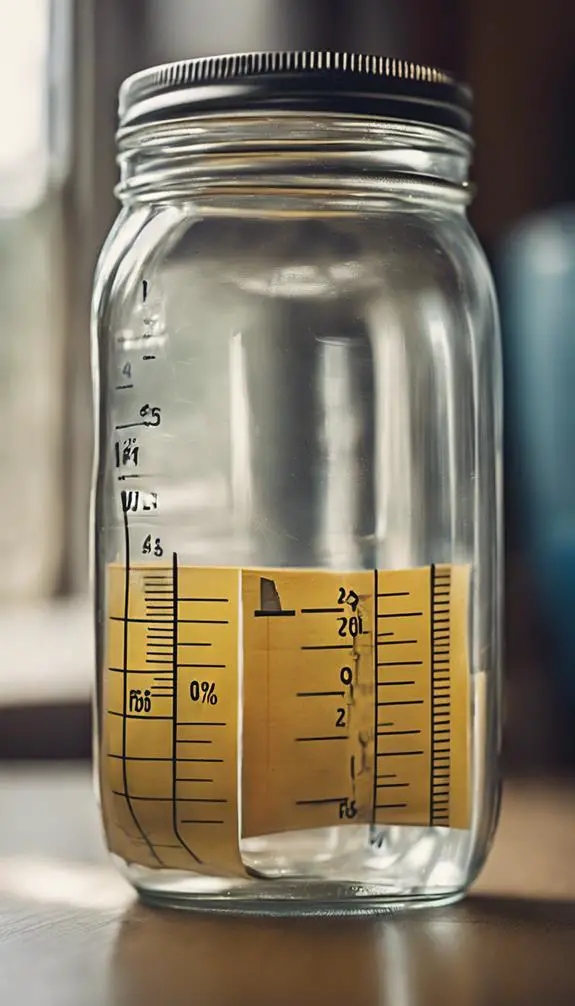
In your Kratky mason jar system, water levels must be monitored daily to prevent waterlogged roots, which can lead to root rot and plant death.
You'll need to track the water level to verify it's within the ideal range. To do this, mark the initial water level on the side of the jar with a permanent marker. Then, check the level daily, making note of any changes.
This water tracking will help you identify if the plants are consuming water at a normal rate. If the level remains stagnant, it may indicate a problem with the system.
Regular level monitoring allows you to make adjustments as needed, guaranteeing a healthy and thriving plant.
Maintain Ph Balance
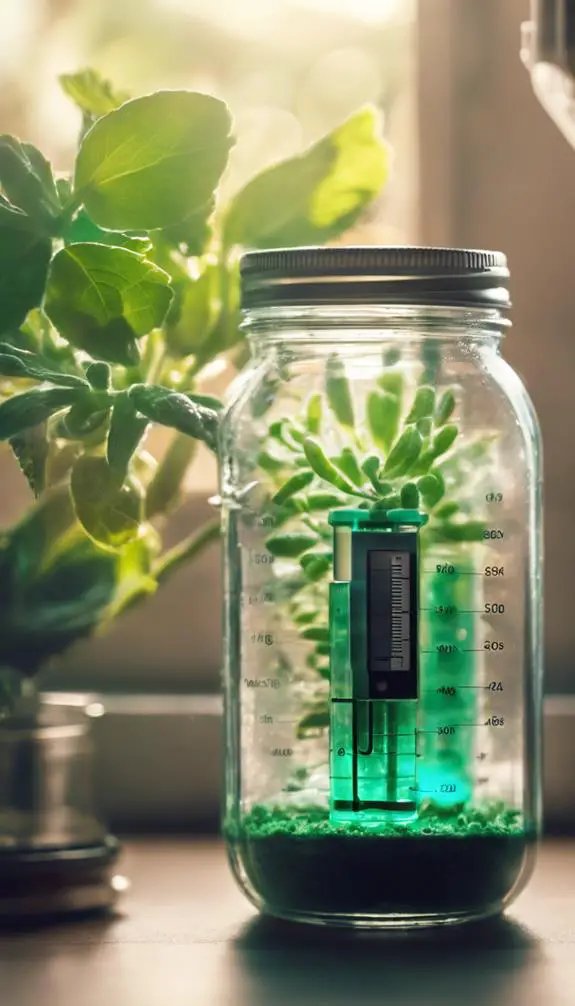
As you fine-tune your Kratky mason jar system, pH balance becomes a critical component to monitor, since it directly affects nutrient uptake and plant growth.
pH fluctuations can lead to acidic environments, which can be detrimental to your plants. You'll want to aim for a pH range between 5.5 and 6.5, as this allows for ideal nutrient absorption.
To maintain this balance, you'll need to regularly test your system's pH levels using pH test strips or a pH meter. If your pH levels are too high or too low, you can adjust them by adding pH-adjusting solutions or nutrients specifically designed for hydroponic systems.
Troubleshoot Common Issues
Three common issues can arise in your Kratky mason jar system, and being able to identify and address them promptly is crucial to maintaining a healthy and thriving environment for your plants.
One common mistake is overwatering, which can lead to system failures and root rot. Check your water levels regularly to prevent this.
Another issue is inadequate aeration, causing roots to become oxygen-starved. Confirm your jar has sufficient airholes to promote healthy root growth.
Finally, incorrect nutrient balances can hinder plant development. Regularly test and adjust your nutrient solution to prevent deficiencies or toxicities.
FAQs
Can I Use a Kratky System for Flowering or Fruiting Plants?
You can use a Kratky system for flowering or fruiting plants, but be aware that intense light spectrum effects may require adjustments to pest control methods, ensuring ideal growth and minimizing potential issues like fungal diseases or pest infestations.
How Often Should I Top up the Nutrient Solution?
You'll need to monitor and adjust the nutrient solution regularly, checking reservoir levels daily and topping up as needed to maintain ideal solution strength, ensuring your plants receive a consistent supply of nutrients.
Will a Kratky System Work With Tap Water?
You can use tap water in a Kratky system, but be aware that varying water quality may lead to mineral buildup, affecting plant growth; consider testing and adjusting pH, EC, and nutrient levels to guarantee maximum performance.
Can I Move My Kratky System Outdoors?
You can move your Kratky system outdoors, but guarantee you provide shade to prevent water temperature fluctuations and algae growth, and choose a location with consistent air circulation to maintain ideal growing conditions.
Is a Kratky System Suitable for Beginners?
As a beginner, you'll find a Kratky system appealing due to its easy maintenance and low cost, allowing you to focus on perfecting your hydroponic skills without breaking the bank or getting overwhelmed by complicated setups.
Conclusion
You've successfully set up your Kratky Mason jar system, providing your plants with a nutrient-rich environment. Guarantee consistent growth by monitoring water levels, maintaining a pH balance between 5.5 and 6.5, and troubleshooting any issues that arise. With proper care, your plants will thrive in this hydroponic system. Now, focus on maintaining ideal conditions and enjoying the fruits of your labor.