Drip Irrigation Systems: The Ultimate Guide
Drip irrigation systems are the most efficient way to water your garden. They use less water, last longer, and can be customized to suit any budget or need.
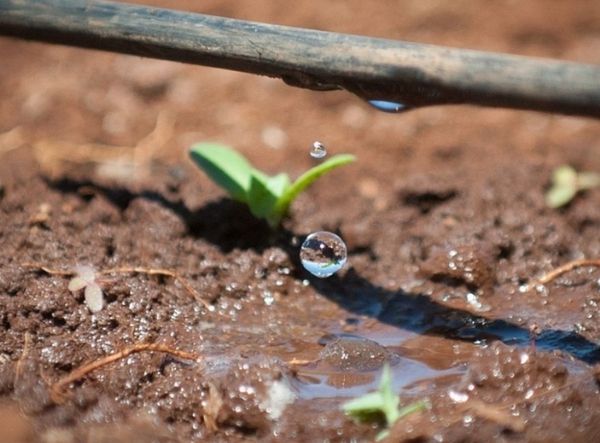
These systems work by running a hose or a mainline from the tap at a slow rate so that it drips out in small droplets rather than coming out as a high-pressure stream of water. This system uses nozzles and emitters which create an even distribution of moisture over the area being watered.
There are many benefits to drip irrigation systems. It is efficient, saves money and time which definitely makes it the best way of watering your plants.
Advantages of Drip Irrigation
Drip irrigation is a popular irrigation system because it does boast many benefits. Understanding the benefits of this style of watering system can be a key component to choosing the right irrigation system for your garden.
1. Efficient
This style of irrigation system is efficient because it produces little waste. This is because you are watering the root zone – where the water is needed. Most overhead watering methods waste approximately 25% of the water they distribute.
Only 10% of the water applied to your plants will be wasted when using drip irrigation systems. The water is absorbed into the soil faster than it can evaporate helping your plants grow.
2. Easy to Install
Drip irrigation systems are easy to design and install on your own. This allows you to have a watering system that will specifically cater to the needs of your plants and the design of your garden.
Therefore, because of the simplicity of the design of a drip irrigation system, it’s completely possible for most people to install this system themselves.
3. Cost Effective
Not only is a drip irrigation system easy to install, but it’s also cost-effective especially in the way of saving on your water bill. You can purchase kits if you have the extra funds to spend.
However, if you desire an irrigation system on a budget, you can also use a DIY version of a drip irrigation system kit where you piece the system together which will be equally as effective and cost less.
4. Reduces Disease and Weeds
Are you tired of weeds taking over your garden? Are you struggling to keep your plants healthy and thriving?
Drip irrigation can help you treat both problems. Where water goes only to the roots of the plants you want to water, it makes it difficult for weeds to germinate elsewhere in the garden. The direct watering method also helps to prevent diseases from forming on your plants because diseases need excess moisture to survive.
5. Steady Watering
When you use other watering methods, it is very common to have un-even watering on your garden with some areas getting excess and other areas not getting enough.
Drip irrigation stops this by supplying water to all zones of the garden. Each plant is watered equally and accurately.
6. Stops Loss
When your plants get too much water at one time, the soil begins to erode and with the loss of soil also comes a loss of available nutrients for your garden.
Because drip irrigation is a low flow system, it doesn’t cause the soil to erode. Therefore, allowing nutrients, beneficial microbes, and soil to stay right where they are.
Disadvantages of Drip Irrigation
As with everything in life, when there’s an upside there must also be a few drawbacks. Drip irrigation is no exception. Here are the cons to using a drip irrigation system:
1. Proper Installation
This has been discussed earlier, but it needs to be stated again. You must install the system properly with enough emitters and proper spacing, or the system won’t work effectively.
When the system doesn’t give off enough water, the root systems will dry out and cause your plants to suffer.
2. System Maintenance
For drip irrigation to work properly it must remain free of debris and blockages in the tubing and the emitters.
This requires you to flush the system regularly to remove any blockages and stop further blockages from developing.
3. Falling Hazard
It’s important to stake the tubing in the system in the ground. Not only will this help it work more effectively, but it will also help avoid falling hazards when you’re working in the garden.
Unfortunately, when you have tubes laying on the ground in the garden, it can be easy to get your feet tangled. Keep this in mind when choosing to go with this style of irrigation system.
You now know the good, bad, and ugly when it comes to drip irrigation. It’s a great system for watering your plants easily.
Yet, there are some concerns that must be explored before investing in this setup. Hopefully, you now have a better understanding of drip irrigation and feel confident you can make an informed decision.
Why Not Sprinklers?
Overhead irrigation, such as your sprinkler system, sprays out water that covers an intended area and everything within that area. That means that soil, the sidewalk, or even your house will potentially get wet.
Overhead irrigation applies water rapidly. Most overhead sprinklers measure water on a per-minute basis (GPM, gallons per minute) which means that the soil may not be able to soak up all the water, leading to puddling and waste.
Sprinklers also waste a lot of water through evaporation and wind drift. On top of all that, sprinklers apply water to the stems and leaves of plants which can attract diseases like powdery mildew and other troublesome diseases.
Types of Drip Irrigation
Now that you know how drip irrigation works and why you should choose it, it’s time to learn about the different options. There are several different types of drip irrigation systems.
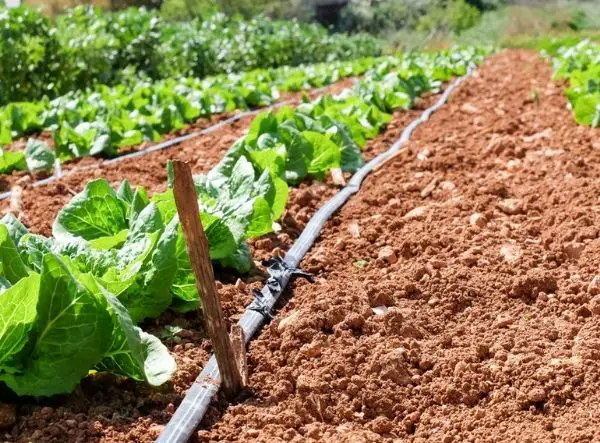
Surface System
The surface drip irrigation systems utilize emitters that are laid out on the surface of the garden soil. They can send water down into the ground about six inches deep.
The advantage of this system is that it is easy to monitor. You can tell if the emitters are working properly by the amount of water they are releasing. The surface system is also great because you can see the lines and can diagnose leaks in the system quickly.
The disadvantage of this system is that it is labor-intensive. Generally, you put the driplines out at the beginning of the season and take them back up for storage at the end of the season to prevent winter damage. Deep watering is also a little more time-consuming as it takes a couple of hours.
Sub Surface System
The subsurface system (SDI) is more permanent than the surface system. Typically, you see this system on large farms, but it’s becoming more popular with smaller operations.
For this system, you bury tubing or PVC pipe in the soil. These lines can be placed below the frost line to keep the lines from freezing in the winter. You want to make sure to also not hit them when tilling or plowing the beds.
One disadvantage of this method is that the water is deeper and not as available to seedlings or small plants. This type of system can also be harder to maintain and do regular maintenance as you cannot see the pipes or tubing underground which makes diagnosing problems more difficult.
Soaker Hoses
Soaker hoses are porous and covered in tiny pinpoint holes. The water sweats out of them onto the soil. They work well in raised beds, containers, and beds alongside a building.
Soaker hoses are flexible and can bend to go with your bed if it has an irregular shape. They’re perfect for smaller gardens.
The disadvantage is that they’re easier to damage and take more work to maintain. Soaker hoses are also more prone to dry rot and will need to be replaced every year or two.
Gravity Fed Drip Irrigation Systems
Drip irrigation is incredibly efficient, and even more so if you use gravity to feed the water into the tubes. I use a gravity-fed system with a 58-gallon tank on a raised platform to water an area where water is not available. The 58-gallon tank has a water spigot that you can attach your drip irrigation system to. The water can be turned on to allow water to flow through your system.
The downside is that I have to monitor this system. I turn it on at the tank and then watch to see when the soil looks sufficiently wet, which is labor-intensive. However, it’s better than carrying water to this remote part of the garden.
If you go with my set-up, I suggest putting a filter between your water source and the tubes so that your lines don’t become clogged.
Parts of Drip Irrigation
A drip irrigation system consists of multiple parts. Each part plays a vital role in the effectiveness of the system. Here’s how each part contributes to the system as a whole:
1. Filter
A filter is one of the most important parts of a drip irrigation setup. Filters are especially vital if you’re collecting rainwater from a rooftop because the water may contain dirt particles or debris.
These filters are super easy to install and are good for a few months before they will need to be replaced. By adding a filter, you keep the tubes clear and allows the water to reach the plants consistently.
Check the latest price for the Boogie Blue Plus Filter
2. Value or Splitter
A valve is where the system begins. It attaches to the water source to provide a way for the water source to be turned off and on. You can also have your valves on a timer system to automatically regulate the flow.
I prefer to use a hose splitter on my water source so that I can still access this faucet with a regular garden hose. I will use a two-way splitter.
Check the latest price for the IPOW Solid Brass Body Backyard 2 Way Splitter
which is the one that I love and trust.
3. Backflow Preventer
The backflow preventer plays an important role in drip irrigation. It attaches to the valve and is what keeps the water moving towards the plant and not back into the water source.
If you don’t include a backflow preventer, you run the risk of contaminating your water source. If your soil has soil-borne diseases, and the water can flow backward, those diseases could end up in your water source.
Check the latest price for the Drip Depot Backflow Preventer
4. Pressure Regulator
If you don’t have a pressure regulator included in your drip irrigation system you could have inconsistent water flow. This isn’t good because either your plants will get a large gush of water or they won’t get anything at times. By adding the regulator, it maintains a consistent flow of water to the plants. We use just a simple 25 PSI pressure regulator.
Check the latest price for the 3/4 Inch – 25PSI Pressure Regulator
5. Timer
A timer is the next piece that I will include in my drip irrigation systems. It attaches to one side of the splitter. Putting the timer here will allow all of the lines to work off of the same timer.
You can choose to install your timer further down your system to control individual zones but I find that it works best here. I have had this simple analog timer for several years and it still works great.
Check the latest price for the Rain Drip Analog Timer
6. Four way hose splitter
I choose to install another hose splitter here as it allows me to break down my drip irrigation system into 4 different zones. Breaking your garden down into zones allows you to water a portion of your garden at a time.
I use this brass four-way hose splitter as it lasts longer and has shut-off valves for each line.
Check the latest price for the Four Way Hose Splitter
7. Tubing to Hose Adapter
A tubing adaptor does exactly what it says it will do. It allows the tubing to attach to the rest of the set-up. Without this there’d be no system.
This one little piece allows the main drip supply line to connect to the water hose connector. As small as it may be, it has an important job of connecting the drip tubing supply line to the water spigot or faucet. This allows you to easily connect and disconnect the drip line from he water source.
Check the latest price for the Tubing to Hose Adapter
8. Main Supply Tubing
The main supply line or tubing is 1/2″ that comes in a roll of either 50/100/200 feet. This tubing is pretty durable and once unrolled can be stretched out around your garden space.
This tubing connects using compression fittings so you simply push them together. It is pretty easy to work with and is quite affordable.
Check the latest price for the 1/2″ Main Supply Tubing
9. 1/4″ Drip Tubing
The tubing that you run to individual plants or containers is 1/4″ that comes in a roll of either 50/100/200 feet. This tubing is pretty durable and once unrolled can be stretched out around your garden space.
This tubing connects using compression fittings so you simply push them together. It is pretty easy to work with and is quite affordable.
Bonus Tip: It helps to have a cup of warm water to insert the tubing into before trying to push on fittings. The warm water will loosen up the tubing and help you put fittings on easier.
Check the latest price for the 1/4″ Main Supply Tubing
10. Emitters, Sprayers & Sprinklers
There are a variety of different fittings to use with the 1/4 inch drip tubing. There are drip emitters, different types of sprayers, and even sprinklers that you can attach to the tubing.
With a wide array of options – you can mix and match to meet all of your plants’ needs.
Drippers/Emitters
Drippers or emitters are the last point of the irrigation system at base of the plant. This is the piece that will actually deliver the water to the plant so choosing the best type is very important. I use a variety of different drippers and even some sprayers depending on the type of plant that I am watering.
For example, I will use a dripper for plants that are larger than may need more watering throughout the week. This can be a tomato, pepper plant, or something similar that would need a deep watering at least once per week. A dripper will emit the amount of water per hour (or gph) that it is rated for. I will typically use a 1gph for these plants but again it depends on factors.
Check the latest price on the drip emitters on Amazon that I use.
Sprayers
I use sprayers in the same way as I do drippers but for different plants or even different growing areas. The sprayers will usually spray the water in a circular manner. This can be in a 180 degree pattern or a complete 360 degree pattern depending on the individual type of sprayer.
I like to use the 360 degree sprayer pattern in the middle of a raised bed or planting area so that it waters the entire area. The 180 degree ones come in handy if you are watering plants that are near the house or another structure or thing that you don’t want to water because you can point the sprayer away from those objects.
Check the latest price on drip sprayers on Amazon
that I use.
Sprinklers
I use sprinklers the same way as I do with sprayers but they typically will have a gph rating and work great for plants that need a lighter flow of water.
Check the latest price on drip sprinklers on Amazon
Designing Your System
Now it’s time to create a drip irrigation system for your garden.
Planning
Every garden is different. The best way to plan your drip irrigation system is to draw out your garden space on a piece of paper. Make a note where water stands or just runs off. What areas of the garden tend to be dryer?
Next, consider where your raised beds, containers, or in-ground beds are that will need to have drip irrigation hooked up. Measure where you want to place your pipes. This will tell you how many total feet of pipe you need to get from your water source down to the garden.
Measure the length of each row of plants and draw it out on your plan. If you’re going around beds you can lay out the string and then measure your length.
Each area you run a supply line to is called a zone. You may have several zones. For example, a vegetable garden, berries, and herb garden may all be in one zone, while fruit trees are in another, and need a different plan. This is where the four-way splitter comes in handy.
Spacing
You can purchase different tubes depending on what plants are in the row. For example, I plant cutting lettuce about six inches apart or your tomatoes maybe 2-3 feet apart. For this, you can take un-drilled drip irrigation tubing and simply punch your own holes where you need them to be.
You can run a 1/4 inch line with a dripper to each plant or run a drip sprayer to an area of plants.
If you’re feeling overwhelmed, plan out one section of your garden at a time. This way you can get used to your new way of watering and only invest a small amount at a time.
Drip Irrigation Kits
If you are feeling confused about putting it all together you can check out irrigation kits which are widely available online. Some of these drip irrigations available contain everything you need for individual gardens whereas others will need one or two additional items.
The downside of kits is that they do not take into consideration the needs of your individual setup. That said, they’re a good option for people who are new to drip irrigation. Here are a few of the kits that we recommend.
How to Install Drip Irrigation Systems:
Installing drip irrigation is quite simple. Follow these few steps, and you’ll be ready to use this style of system in no time:
1. Connect to Water Source
The system begins by connecting the valve, backflow preventer, pressure regulator, filter, tubing adaptor, and drip tubing to the water source.
This water source can be anything from an outdoor spigot to a rainwater catchment system. A rain catchment system is a great way to supply water to a drip irrigation system. This is a great rain barrel if you are in the market.
2. Spread the Tubing
Once the system is connected to the water source, it’s time to layout the tubing of the system. Run it throughout your garden.
Make sure you have the emitters in the proper place and make sure you loop the tubing around the base of any trees or shrubs. It should form a wide circle around the base of any tree or shrub to accommodate the wider root system.
3. Stake the Tubing
Be sure to stake the tubing of the drip irrigation to the ground. If not, they can be easily moved around. This will make them ineffective.
If the emitters aren’t placed in the proper position the system doesn’t get water to the proper parts of the plant. Staking helps stop the movement.
4. Cap the End
When the tubing is capped, you can turn on the water and begin to utilize your drip irrigation system.
The last step in the process is to cap the end of the drip tubing. As mentioned above, this will stop water loss and keep the water flowing through the emitters instead of the end of the tubing.
Helpful Tips
There are two important aspects to a drip irrigation system which you must take care of properly and plant properly to get the best experience from this style of watering system. Here’s what you should know before installation:
1. Emitters
Choosing the proper style of the emitter and properly installing them can make all the difference in the effectiveness of the drip irrigation system.
When placing your irrigation system in your gardening area, you must look to see if you have any elevated areas or low spots where water can pool. This should affect how you layout your irrigation plan.
If you have an area elevated over five feet you should choose an emitter variety that will compensate for any uneven water pressure which may occur because of the water fighting to make it up the incline.
If you have flat ground in your garden, you should choose to go with a turbulent flow emitter. Yet, if your water source is one that is gravity fed (i.e., a rainwater system) use a short-path emitter because they seem to do better with lower water pressure.
It’s vital to have approximately two emitters per plant placed 18 inches apart. If you have larger plants in your gardens, such as trees or shrubs, you’ll require more emitters to provide adequate water.
Having two emitters per plant, it allows for backup in the event one of the emitters becomes clogged.
However, if you’re choosing a more compact style of gardening (such as square foot gardening) you may have to downsize on the number of emitters in the system to allow for adequate spacing.
You should also be aware there are different styles of emitters that can be purchased based upon what you’re intending to water.
If you’re trying to water ground cover plant varieties, there are sprayer emitters that cast water onto the plants because their roots are harder to reach.
If you’re trying to water hanging baskets, there are fogger emitters available that apply adequate water without having such a cumbersome system.
However, if you’re trying to water typical plants in the ground where their roots are easily accessed, single emitters will be your best option.
Understanding the different styles of emitters and proper spacing is vital to properly install drip irrigation systems.
2. Debris
Some people recommend burying your drip lines and emitters in the ground to disguise them and keep them from becoming a trip hazard.
This is a personal choice because though this could stop you from tripping over your irrigation system, it’s also going to cause clogging issues.
Filters help cut down on the number of blockages in the system, but debris will still find a way to block emitters.
Therefore, check your emitters frequently. The other issues with burying your tubes and emitters is pests will chew the tubes in two.
Plus, roots will grow through the tubes and emitters. This will cause your tubes to burst and ruin your entire system.
Frequently Asked Questions About Drip Irrigation Systems
Here are some of the most commonly asked questions:
What is the average cost of a drip irrigation system?
A drip irrigation system costs $2,150 per acre on average, with a typical range of $1,800 to $2,500 for a commercial system. For a small home garden, it may cost as little as $50 to install. The size of your yard, quality of materials and difficulty of the project factor into the final cost.
How long do drip irrigation systems last?
Expect a conventional type of sprinkler system to last 40 to 50 years if properly maintained but only expect a drip system to last 10 to 15 years with much more maintenance. From a green stand point one should also consider that a drip system saves water but it also generates more garbage because it does not last as long.
How often should I water with a drip system?
We recommend you run drip irrigation systems: Twice a week in spring and fall. Every other day in the summer. Once a week or every other week in winter.
This of course depends on where you live. We live in Texas and our drip irrigation systems run at least once a day for 15 to 20 minutes.
Can drip irrigation tubing be buried?
Raindrip supply tubing and feeder lines can be buried. However, drip tubing should not be buried. If buried, you risk clogging the emitters. If you do not want your drip tubing exposed, you can cover it with mulch.
How far can you run drip irrigation tubing?
This tubing is an essential component in a drip irrigation systems, but too much of it becomes a maintenance headache. Limit the use of ¼ tubing to no more than 12 inches in length per run. LENGTH OF RUN LIMITS: ½ inch tubing can run up to 200 linear ft. ¼ inch tubing should not exceed 19 ft in length.
Do I need a pressure regulator for drip irrigation?
Most drip irrigation systems operate best at lower water pressures than are common in a typical water supply system. … You probably will need to install a pressure regulator on your drip irrigation system if your water pressure is higher than 2,8 bars (40 PSI). Keep in mind that a pressure regulator only reduces the water pressure.
What PSI should you use for drip irrigation?
10 to 30 pounds per square inch Drip irrigation systems are generally designed to operate in the pressure range of 10 to 30 pounds per square inch (psi), but domestic water is usually delivered to house- holds at pressures above 30 psi.
In Conclusion
Drip irrigation systems are the best way to water your garden because they are efficient, easy to setup and most of all – saves you time and money.
If you like this article about drip irrigation systems – please share it on social media. Also, check out our article on What are the best herbs to grow? or How to prepare your herb bed for winter!
Be sure to Like us on Facebook and Follow us on Instagram, Twitter, and Pinterest!
Subscribe to us on YouTube!