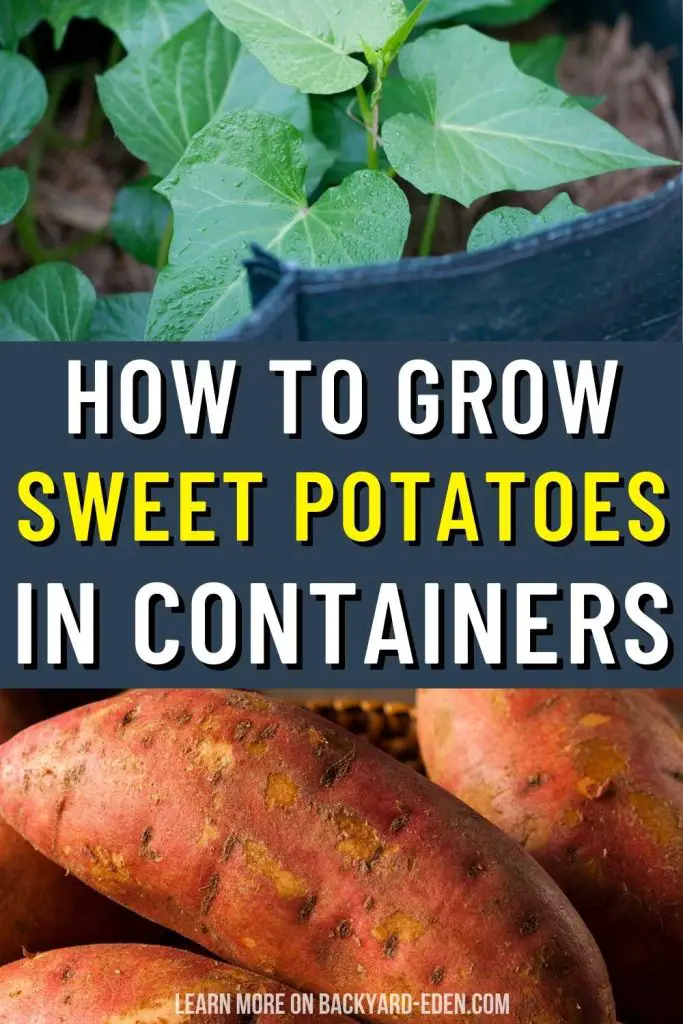
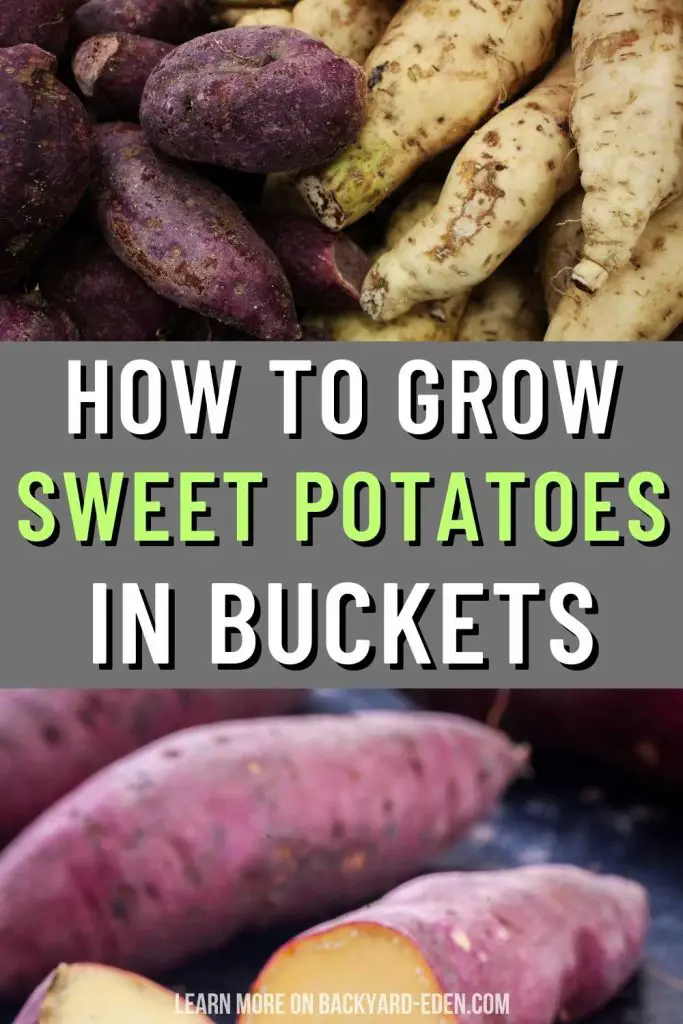
Hey there! Ever thought about growing your own food right at home, even if you don’t have a lot of space? Well, you’re in luck because today we’re diving into how you can grow sweet potatoes in a simple 5 gallon bucket. Yep, you heard that right—a bucket! Sweet potatoes are not only delicious but also packed with nutrients, and growing them yourself can be both fun and rewarding.
In this guide, we’ll walk you through everything you need to know to get started. From why you should consider this method, to the step-by-step process of planting, caring for, and finally harvesting your sweet potatoes. Whether you’ve got a green thumb or are new to gardening, we’ve got you covered with easy-to-follow advice.
So, grab your gardening gloves, and let’s get planting. By the end of this post, you’ll be well on your way to enjoying your very own homegrown sweet potatoes. Let’s dig in!
This post may contain affiliate links. Read our full disclosure here.
Why Grow Sweet Potatoes in a 5 Gallon Bucket?
Growing sweet potatoes in a 5 gallon bucket has a bunch of cool benefits. Let’s break them down:
- Saves Space: Not everyone has a big backyard or garden. A bucket takes up very little room. You can put it on your balcony, patio, or even a sunny spot inside.
- Control Over Soil: One of the secrets to healthy plants is good soil. With a bucket, you get to choose the perfect soil for your sweet potatoes right from the start.
- Easy Pest Control: Pests can be a real headache in a traditional garden. But with a bucket, it’s easier to keep those critters away from your sweet potatoes.
- No Weeding: Forget about spending hours pulling weeds. In a bucket, your sweet potatoes are the star of the show, with no unwanted guests.
- Fun to Monitor: Watching your sweet potatoes grow in a container is really satisfying. Plus, it’s easier to see how they’re doing and make sure they’re happy.
- Delicious Results: Imagine harvesting your own sweet potatoes. They’re super tasty and you’ll know they’re grown with love and care.
Growing sweet potatoes in a bucket is pretty straightforward and doesn’t need a lot of fancy equipment or space. It’s a smart way to garden, especially if you’re just starting out or have limited room. Let’s get into how you can do it!
What You’ll Need
To get started with your bucket garden, you don’t need a lot of fancy tools or materials. Here’s a simple list of what you’ll need:
- A 5 Gallon Bucket: This is going to be your garden. Make sure it has drainage holes at the bottom. If it doesn’t, we’ll need to make some. This is crucial for preventing too much water from staying in the bucket, which could harm your sweet potatoes.
- High-Quality Potting Soil: Sweet potatoes love loose, well-draining soil. Grab some good potting soil from your local garden center. It’s better than using dirt from your yard because it’s specially made to help plants in containers thrive.
- Sweet Potato Slips: These are not seeds, but young sweet potato plants. You can buy them online or from a garden store. Sometimes, you can even start your own slips from a sweet potato you bought at the store!
- Water: Sweet potatoes need a steady supply of water, but they don’t like to be soaked. We’ll talk more about how to water them just right.
- A Sunny Spot: Sweet potatoes are sun lovers. They need about 6 to 8 hours of sunlight each day. Find a spot where they can bask in the sun’s glow.
- Optional: Compost or Fertilizer: If you want to give your sweet potatoes a little extra boost, you can mix some compost or a balanced, slow-release fertilizer into your potting soil.
That’s pretty much it! With these simple supplies, you’re ready to start your sweet potato garden. Let’s move on to getting your bucket ready for planting.
Preparing Your Bucket
Before planting your sweet potatoes, you’ll need to get your bucket ready. Here’s how to do it:
- Drill Drainage Holes (if necessary): If your bucket doesn’t already have holes in the bottom, you’ll need to make some. Use a drill to create about four to six small holes evenly spaced out. This is to make sure excess water can escape, which is super important for preventing root rot.
- Pick the Right Location: Sweet potatoes love warmth and sunlight. Choose a spot where your bucket will get at least 6 to 8 hours of direct sunlight every day. This could be on a sunny patio, balcony, or even a south-facing window if you’re short on outdoor space.
- Fill With Soil: Take your high-quality potting soil and fill the bucket. Leave about an inch of space from the top so you can water your plants without the soil spilling over. If you’re using compost or a slow-release fertilizer, mix it in with the soil now.
- Water the Soil: Before planting your slips, give the soil a good watering. It should be moist but not soaking wet. This makes it welcoming for your sweet potato slips to start growing.
- Check the Setup: Once your bucket is filled and in the right spot, make sure it’s stable and won’t tip over. You want your sweet potatoes to have a secure home to grow in.
That’s it! Your bucket is now prepped and ready for the sweet potato slips. This might seem like a small step, but it’s crucial for giving your plants the best start possible. Now, let’s move on to planting.
Planting Your Sweet Potato Slips
Planting sweet potato slips is exciting. It’s when your garden starts to come to life. Here’s how to plant them for the best start:
Make sure you do this after the last frost in spring. Sweet potatoes need warm soil to grow well.
Take each slip and gently remove any leaves from the bottom half. This part of the slip is going to be buried in the soil.
Create a hole in the soil with your finger or a small tool. It should be deep enough to bury the bottom half of the slip, but leave the top half with the leaves above the soil.
Place one slip in each hole. If your bucket is large enough, you can plant two or three slips, but make sure to space them out evenly. They need room to grow.
After placing the slips in the holes, gently fill the soil back in around them. Press the soil down lightly around each slip to make sure it’s secure and there are no air pockets.
Water your newly planted slips gently but thoroughly. The soil should be moist, which helps the slips to settle in and start growing roots.
Keep the soil moist over the next few days as your slips adjust to their new home. Avoid letting it dry out completely, but also be careful not to overwater.
Patience is key now. In a few weeks, you should see new growth as your sweet potatoes start to establish themselves.
Planting sweet potato slips correctly is crucial for a healthy crop. Now that your slips are in, you’re on your way to growing your own sweet potatoes. Let’s look at how to care for them as they grow.
Caring for Your Sweet Potatoes
After planting your sweet potato slips, taking good care of them will help ensure a bountiful harvest. Here’s what you need to know:
Watering is essential. Sweet potatoes like consistent moisture, especially as they start to grow. Water them when the top inch of soil feels dry to the touch. Try not to let the soil get completely dried out, but also avoid overwatering, as too much water can lead to root rot.
Sunlight is their best friend. Your sweet potatoes need about 6 to 8 hours of direct sunlight each day to thrive. If you’ve placed them in a spot that gets good sunlight, they should be happy. Watch how the sun moves and make sure that buildings or plants do not shade your bucket for too long during the day.
Feeding your sweet potatoes can give them an extra boost. If you mixed compost or a slow-release fertilizer into your soil at the start, you might not need to add much more. However, a mid-season feeding can help, especially if you notice the leaves looking a little pale. Use a balanced, water-soluble fertilizer, but follow the instructions carefully so you don’t overdo it.
Watch out for pests and diseases. Luckily, sweet potatoes in buckets are less prone to issues than those in the ground. Still, keep an eye out for common pests like sweet potato weevils or slugs. If you spot any, you can often remove them by hand or use organic pest control methods. Diseases are less common but watch for signs of wilting or spots on leaves and act quickly if you see them.
Supporting growth. As your sweet potatoes grow, they might start to vine and spread out. This is normal and part of their charm! If you want to keep things tidy or have limited space, you can gently guide the vines to grow in a certain direction or even up a trellis.
Caring for sweet potatoes isn’t too complicated. With the right amount of water, plenty of sunlight, and a little bit of attention, you’ll be on your way to growing a healthy and productive plant. Up next, let’s talk about the exciting part—harvesting your sweet potatoes.
Harvesting and Storing Sweet Potatoes
The moment you’ve been waiting for—harvest time! Here’s how to know when your sweet potatoes are ready and what to do next:
Knowing when to harvest is all about timing and signs. Sweet potatoes are usually ready to harvest about 3 to 4 months after planting, but the real indicator is the foliage. When the leaves start to yellow and die back, it’s a good sign that your sweet potatoes are ready. Also, if you peek into the soil, you might see some of the sweet potatoes poking through, looking plump and ready.
How to harvest: Be gentle. Use your hands or a small tool to dig around in the soil carefully. You want to avoid damaging the sweet potatoes with cuts or nicks, as this can affect their storage life. Gently lift them out and brush off any loose soil. Don’t wash them right away, as moisture can promote rot during storage.
Curing sweet potatoes is a crucial step you might not know about. It helps to toughen up their skin and improve their sweetness. After harvesting, place your sweet potatoes in a warm (about 80-85°F), humid place for about 10 days. This process helps them to heal any minor damages and prepares them for storage.
Storing your harvest: Once cured, move your sweet potatoes to a cool, dark place where they can be stored for several months. A basement or root cellar is ideal, but any cool, not-too-dry area will do. Keep them out of the fridge, as cold temperatures can affect their taste and texture.
Enjoying your sweet potatoes: After all this work, you’ll want to enjoy your sweet potatoes in all sorts of dishes. They’re great baked, mashed, fried, or even used in pies and other desserts. Plus, sweet potatoes you’ve grown yourself always seem to taste better.
To wrap up, harvesting and storing your sweet potatoes properly will ensure you get to enjoy the fruits of your labor for months to come. This part of the process is just as rewarding as the planting and growing stages, giving you a delicious, home-grown bounty to enjoy with friends and family.
With your harvest complete, you’ve now seen the whole journey of growing sweet potatoes in a 5-gallon bucket, from preparation to enjoying the harvest. Gardening is a rewarding adventure, and we hope you’re inspired to try growing sweet potatoes or even other vegetables in buckets. Happy gardening!
FAQs
How Long Do Sweet Potatoes Take to Grow in a Bucket?
Sweet potatoes usually need about 3 to 4 months to grow in a bucket before they’re ready to harvest. The exact time can vary depending on the variety and growing conditions. Look for signs like yellowing leaves and visible sweet potatoes in the soil.
Can I Grow Sweet Potatoes in Any Type of Container?
You can grow sweet potatoes in different types of containers, but 5 gallon buckets are preferred due to their ideal size and depth. Ensure the container you choose has sufficient drainage.
Do I Need to Water My Sweet Potatoes Every Day?
Watering every day isn’t always necessary. The goal is to keep the soil moist but not soggy. Check the top inch of the soil; if it’s dry, it’s time to water.
How Many Sweet Potatoes Can I Expect From One Plant?
Expect to harvest about 3 to 5 pounds of sweet potatoes from each bucket. The yield can be influenced by the care you give your plants and their growing conditions.
What Are the Common Pests and Diseases, and How Can I Prevent Them?
Sweet potato weevils, slugs, and various fungal diseases are common. Early pest management and preventative measures like ensuring good air circulation and avoiding overwatering can help keep your plants healthy.
Can I Grow Sweet Potatoes Indoors?
Growing sweet potatoes indoors is possible if you can provide enough sunlight or supplemental light and maintain warm temperatures. However, they thrive best outdoors in direct sunlight.
When Is the Best Time to Plant Sweet Potato Slips in a Bucket?
Plant sweet potato slips after the last spring frost when the soil is warm. This creates an optimal growing environment for the slips.
How Do I Know When to Harvest My Sweet Potatoes?
Harvest time is usually indicated by the yellowing and dying back of the leaves, along with the visibility of sweet potatoes at the soil’s surface, typically around 3 to 4 months after planting.
Conclusion
Growing sweet potatoes in containers is an excellent way for anyone to try their hand at gardening, no matter the size of their outdoor space. It’s a method that teaches patience, care, and the rewards of hard work. Whether you’re a seasoned gardener or a newbie, the process of growing food is a powerful connection to the earth and the cycles of nature.
We hope this guide has inspired you to roll up your sleeves and give it a try. Remember, gardening is a learning experience, and each season brings its own lessons and rewards. Don’t be discouraged by setbacks; instead, see them as opportunities to grow and improve.