Looking to grow your own fresh and nutritious greens at home? Look no further! In this article, we’ll guide you through the step-by-step process of growing microgreens for beginners.
From prepping the water and medium to planting the seeds and caring for them during germination and sprouting, we’ve got you covered.
Discover the benefits of microgreens, such as their high nutrient content and quick growth time.
Get ready to embark on your microgreen growing journey and enjoy the satisfying flavors they bring to your plate.
Key Takeaways
- pH your water to create a slightly acidic environment for optimal microgreen growth.
- Smooth out the growing medium to ensure even growth and prevent uneven patterns.
- Plant microgreen seeds evenly in the tray and consider sowing more seeds for larger varieties.
- Water the seeds using a spray bottle and maintain a moist environment for germination.
Preparing Water and Medium
To prepare the water and growing medium for your microgreens, begin by balancing the pH of your water. pH balance is important because microgreens thrive in a slightly acidic environment. Aim for a pH between 5.5-6.0 for optimal growth. Balancing the pH of your water is crucial before adding it to the growing tray. You can check out a video tutorial on how to prepare water for hydroponic growing to help you with this step.
One common mistake in preparing water isn’t checking the pH levels. If the pH is too high or too low, it can affect the growth of your microgreens. To troubleshoot pH levels, you can use a pH testing kit or pH strips to measure the acidity of the water. If the pH is too high, you can lower it by adding a small amount of white vinegar or citric acid. If the pH is too low, you can raise it by adding a small amount of baking soda.
In addition to water, you can also explore alternative growing mediums for your microgreens. Hydroponic growing is a popular method that uses water instead of soil. It offers benefits such as faster growth, less water usage, and fewer pests. Some common hydroponic growing mediums include coconut coir, perlite, and vermiculite. These mediums provide support and allow the roots to access water and nutrients efficiently.
Planting Seeds
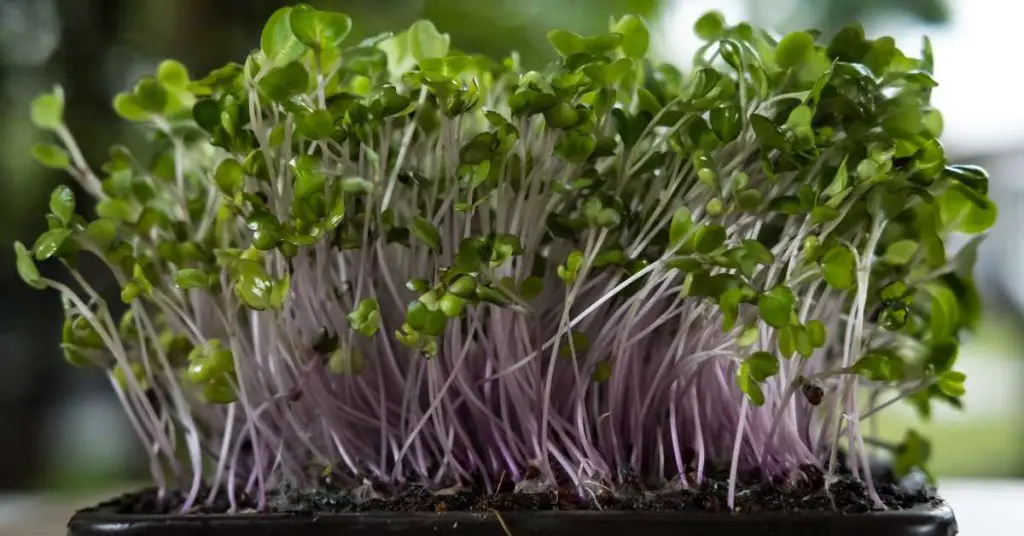
Plant your microgreen seeds evenly into the growing tray. This step is crucial for ensuring even growth and a bountiful harvest. Here are some tips to help you plant your microgreen seeds successfully:
- Sprinkle the seeds evenly into the tray. Make sure to distribute them as evenly as possible to ensure close to even coverage, especially for small seeds like basil.
- Consider sowing more seeds for larger varieties like radish or cabbage. These seeds are typically larger, so you may need to sow more to achieve proper coverage.
- Label your seeds for easy tracking in your garden journal. This will help you keep track of the different types of microgreens you have planted.
- After planting, water the seeds using a spray bottle. Provide enough water to create a moist environment for germination. Moisture is crucial for the seeds to sprout and grow.
- Use pH balanced water to maintain optimal conditions. Microgreens thrive in a slightly acidic environment, so aim for a pH between 5.5-6.0.
By following these planting tips, you’ll be on your way to a successful microgreen cultivation.
Enjoy the benefits of microgreens, such as their high nutritional value and the variety of different types you can grow.
Don’t be discouraged if you encounter common problems in growing microgreens, as they can be easily overcome with proper care and attention.
Watering Seeds
After planting your microgreen seeds, it’s time to give them some water to create a moist environment for germination. Watering your seeds properly is essential for their growth and development. Here are some watering techniques and methods to help you ensure the success of your microgreens.
One common method is using a mist or spray bottle to water your seeds. This allows you to distribute water evenly and gently, preventing any damage to the delicate seeds. Mist or spray the seeds every twelve hours for the first 3-4 days to maintain a moist environment.
Preventing overwatering is crucial to avoid drowning the seeds and causing root rot. Be mindful not to saturate the growing medium excessively. Remember, microgreens prefer a moist environment, not a waterlogged one.
Consider the frequency of watering. As a general rule, misting or spraying the seeds every twelve hours for the first few days is recommended. However, every microgreen variety has different water requirements, so it’s essential to monitor the moisture level of the growing medium and adjust the watering frequency accordingly.
When watering your microgreens, ensure that the water you use is pH balanced. Microgreens thrive in a slightly acidic environment, so aim for a pH between 5.5-6.0. Balancing the pH before watering will help create the optimal conditions for germination and growth.
Germination and Sprouting
To promote proper germination and sprouting of your microgreens, create a warm and dark environment.
Here are some steps to help you through the germination process:
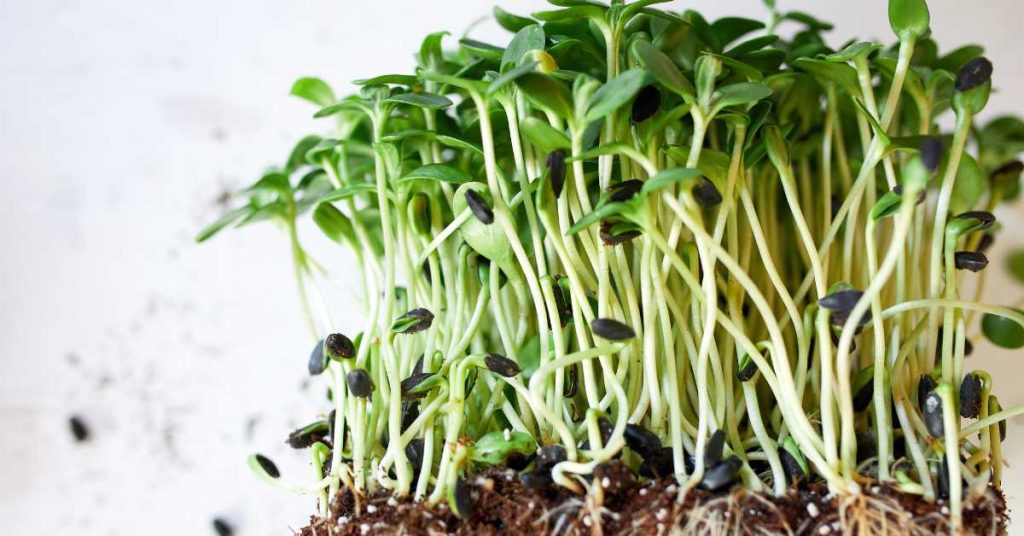
- Choose the right seeds: Select high-quality microgreen seeds that are specifically labeled for sprouting. Some popular options include broccoli, radish, and sunflower.
- Pre-soak the seeds: Soaking larger seeds like peas or corn in warm water for 24 hours before planting can help speed up germination.
- Plant the seeds: Sprinkle the seeds evenly over the soil surface and lightly press them into the soil. No need to cover the seeds with soil as they’ll find their way down.
- Provide moisture: After planting, mist the seeds with water using a spray bottle. It’s important to keep the seeds moist during germination. Regularly mist them every twelve hours in the first few days.
- Maintain the environment: Create a warm and dark environment by placing a second growing tray on top of the one with seeds. Make sure no light spills through and maintain a temperature of around 70°F (21°C).
Common challenges during germination may include uneven sprouting or mold growth. To troubleshoot these issues, ensure that the growing medium is evenly moist and well-drained, and maintain proper ventilation to prevent mold. Additionally, make sure to provide adequate light once the seeds have sprouted.
Microgreens have specific nutrient requirements. They need a well-balanced fertilizer or a nutrient-rich soil mix. Avoid over-fertilizing, as it can lead to stunted growth or nutrient burn. Monitor the nutrient levels and adjust accordingly to ensure healthy and vigorous growth of your microgreens.
Black It Out
To promote proper germination and sprouting of your microgreens, you can create a warm and dark environment by covering the growing tray with an overturned second tray or a light-blocking material. This step is crucial as it creates the ideal conditions for your microgreens to grow successfully.
Creating a dark environment is important because it helps in maintaining the proper temperature for germination. By blocking out light, you can prevent any fluctuations in temperature that could hinder the germination process. It’s recommended to maintain a temperature of around 70°F (21°C) for optimal growth.
During the germination stage, it’s also essential to mist the seeds regularly. This helps to keep the growing medium moist, which is crucial for the seeds to sprout and grow. Mist the seeds every twelve hours for the first 3-4 days to ensure they’ve enough moisture to germinate.
While creating a dark environment is important for germination, it’s equally important to provide light once the seeds have sprouted. Once the microgreens have emerged, remove the cover and place them in a location where they can receive adequate light. Light is essential for their growth and development.
After harvesting your microgreens, it’s important to store them properly to maintain their freshness. Rinse the greens in cool water to remove any soil, then store them in a container with a fitted lid or a sealable bag. This will help to keep them fresh for 3-4 days.
Growing Kits
When growing microgreens, a convenient option for beginners is to use growing kits. These kits provide everything you need to get started, including seeds and a growing medium. Here are some pros and cons of using growing kits:
Pros:
- Convenience: Growing kits come with all the necessary supplies, making it easy for beginners to start growing microgreens.
- Time-saving: With a growing kit, you don’t have to spend time searching for individual components. Everything is conveniently packaged together.
- Beginner-friendly: Growing kits usually come with detailed instructions, making it easier for beginners to understand the process and get successful results.
- Variety: Many growing kits offer a variety of microgreen seeds, allowing you to try different flavors and textures.
- Cost-effective: Buying a growing kit is often more cost-effective than purchasing individual supplies.
Cons:
- Limited customization: Growing kits may not offer as much flexibility in terms of choosing your own growing medium or specific varieties of microgreens.
- Potential for lower quality: Some growing kits may not provide the highest quality seeds or growing medium, which can affect the success of your microgreens.
Maintenance Tips:
- Follow the instructions provided with the growing kit for watering and light requirements.
- Monitor the moisture levels in the growing medium to prevent overwatering or drying out.
- Place the growing kit in a location with adequate sunlight or use a grow light if necessary.
- Regularly check for signs of pests or diseases and take appropriate action.
Troubleshooting Guide:
- If your microgreens aren’t germinating, check the temperature and moisture levels. Adjust as needed.
- Yellowing or wilting leaves may indicate overwatering or insufficient sunlight. Adjust the watering schedule and lighting conditions accordingly.
Best Microgreens for Beginners:
- Radish: Fast-growing and adds a peppery flavor to dishes.
- Sunflower: Nutty flavor and rich in nutrients.
- Pea shoots: Sweet and crunchy with a mild flavor.
- Broccoli: Mild and slightly bitter taste, packed with antioxidants.
- Basil: Fragrant and adds a fresh, herbal flavor to dishes.
Common Mistakes:
- Overwatering: Avoid saturating the growing medium. Microgreens only need moist conditions for germination and growth.
- Insufficient light: Make sure your microgreens are getting enough sunlight or use a grow light to provide adequate illumination.
- Crowding the seeds: Sprinkle the seeds evenly and avoid overcrowding, as this can lead to poor growth and competition for resources.
Using a growing kit can be a great way for beginners to start growing microgreens. Just follow the instructions, provide proper care and maintenance, and soon you’ll be enjoying your own homegrown microgreens!
DIY Option
If you prefer more customization and flexibility, the DIY option for growing microgreens allows you to choose your own growing medium and specific varieties of microgreens. Seed saving is one of the advantages of the DIY approach, as you can collect and store seeds from mature microgreens for future use.
When it comes to optimal lighting, microgreens require around 12-16 hours of light per day. You can achieve this by placing them near a sunny window or using artificial grow lights.
As for watering frequency, it’s important to keep the growing medium consistently moist but not waterlogged. Watering every one to two days is usually sufficient, but you should adjust based on the moisture level of the soil or growing medium.
If you encounter any issues such as mold, pests, or slow growth, troubleshooting common issues can help you address these problems effectively.
Lastly, the DIY option allows you to experiment with different types of microgreens, including popular varieties like peas, radish, sunflower, wheatgrass, and broccoli. With a little practice and patience, you can enjoy a bountiful harvest of fresh and nutritious microgreens right from your own home.
Choosing Growing Medium
For the DIY option of growing microgreens, one important aspect to consider is the choice of growing medium. The growing medium serves as the foundation for your microgreens, providing them with the necessary nutrients and support for healthy growth.
Here are five options you can choose from:
- Soil: Soil is a popular choice for growing microgreens as it provides essential nutrients and promotes strong root development. Organic or nutrient-rich soil can yield better results.
- Coco Coir: Coco coir is a sustainable alternative to soil, made from coconut husks. It retains moisture well and provides good drainage for the microgreens.
- Vermiculite: Vermiculite is a lightweight and sterile growing medium that helps retain moisture while allowing for proper airflow. It’s ideal for smaller microgreen varieties.
- Hydroponic Growing Mats: These mats are made of biodegradable materials and are designed specifically for hydroponic growing. They provide excellent water retention and are easy to use.
- Biostrate: Biostrate is a biodegradable fabric that’s often used in hydroponic systems. It provides support for the microgreens and retains moisture effectively.
Choosing the right growing medium is essential for the success of your microgreens. Consider the benefits of each option, the nutritional value of microgreens, popular microgreen varieties, and how you plan to incorporate them into your recipes. Additionally, keep in mind the tips for seed saving to ensure a sustainable supply of microgreens for future growth.
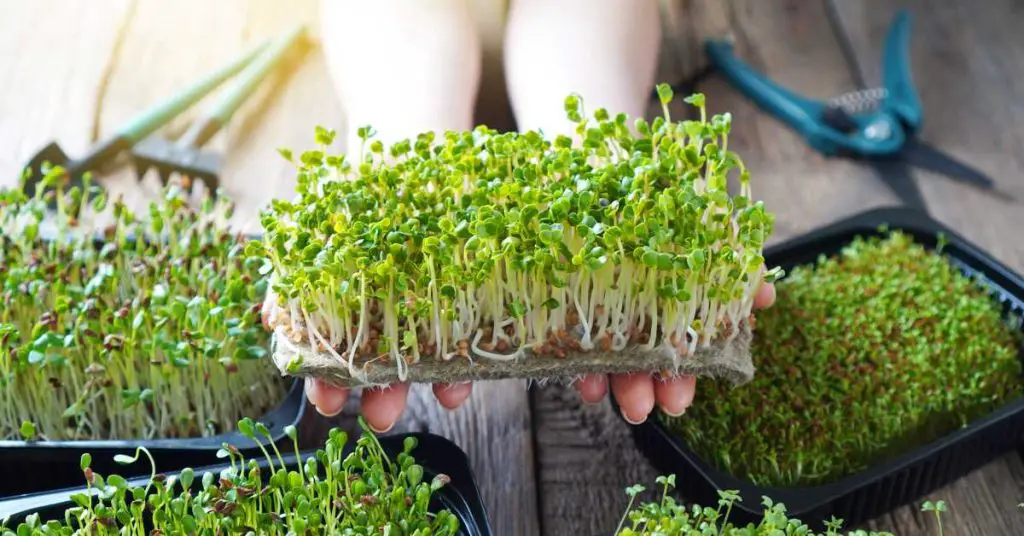
How to Prepare The Growing Trays
To prepare your growing trays for microgreens, start by ensuring good drainage by adding drainage holes to the trays. This is important because excess water can lead to root rot and other issues. You can use scissors to punch holes in the bottom of the trays, making sure to create enough holes for proper drainage. If you don’t have trays with drainage holes, you can use alternative growing containers such as shallow plastic containers or even recycled food containers with holes punched in them.
Another important step is to choose larger containers for larger seeds and smaller containers for smaller seeds. This will help prevent overcrowding and promote healthy growth. Additionally, placing a drip tray or plate underneath the trays will catch any draining water and prevent messes.
If you’re using larger seeds like peas, corn, or wheatgrass, you may consider soaking them in warm water for 24 hours before planting. This can help soften the seed coat and promote faster germination.
Whether you choose to grow microgreens indoors or outdoors, proper drainage is crucial for their success. Indoors, you can place the trays near a window for natural light or use artificial grow lights. Outdoors, make sure the trays are placed in an area with adequate sunlight and protection from extreme weather conditions.
How Much Seed Do You Need To Use Per Tray?
Now that you have prepared your growing trays with proper drainage, it’s time to determine the amount of seeds you’ll need for your microgreens. Calculating the right quantity of seeds is important to ensure successful growth and a bountiful harvest.
Here’s a step-by-step guide to help you determine the seed amount:
- Measure your containers: Use a measuring cup or scale to determine the volume or weight of the containers you’ll be using to grow your microgreens.
- Consider watering techniques: Different watering techniques may require different amounts of seeds. For example, if you plan to bottom water your microgreens, you may need fewer seeds compared to top watering.
- Determine light requirements: Depending on the light intensity and duration your microgreens will receive, you may need to adjust the seed amount. Higher light levels may require fewer seeds, while lower light levels may require more seeds.
- Factor in harvesting methods: If you prefer to harvest your microgreens when they’re smaller, you may need to sow more seeds. On the other hand, if you want larger microgreens, you can sow fewer seeds.
- Calculate quantities: Based on the information gathered from measuring containers, watering techniques, light requirements, and harvesting methods, calculate the quantity of seeds needed. You can use online calculators or refer to seed packaging instructions for guidance.
How To Plant Microgreen Seeds
Plant the seeds for your microgreens in the prepared growing trays. Before planting, it’s important to select high-quality seeds. Choose organic, non-GMO seeds specifically meant for microgreen cultivation. You can find a variety of seeds such as radish, sunflower, and broccoli, each with its own unique flavor and nutritional benefits.
Proper seed storage is essential to maintain seed viability. Store your seeds in a cool, dry place away from direct sunlight. You can use airtight containers or resealable bags to keep them fresh for longer periods.
When it comes to planting the seeds, sprinkle them evenly over the soil surface in your growing trays. Lightly press the seeds into the soil, ensuring good seed-to-soil contact. For smaller seeds like basil, make sure to achieve close to even coverage. If you’re planting larger varieties like radish or cabbage, consider sowing more seeds for a fuller harvest.
After planting, water the seeds using a spray bottle to create a moist environment for germination. Use pH balanced water to maintain optimal conditions. Mist the seeds every twelve hours for the first 3-4 days to keep them consistently moist.
Once the seeds germinate and sprout, remove the cover and provide them with ample light. A windowsill is usually sufficient, but avoid direct sunlight that can burn the leaves. Maintain a temperature of around 55-75 degrees Fahrenheit for ideal growth.
In the next step, we’ll discuss seedling care, including transplanting and hardening off the microgreens.
Growing Microgreens
After planting the seeds and providing them with ample light, it’s time to focus on the next step in growing microgreens: caring for the seedlings.
Here are some tips for successful microgreen growth:
- Watering: Make sure to water your microgreens regularly to keep the soil moist. Avoid overwatering, as it can lead to mold or root rot. Use a spray bottle or watering can with a fine mist to prevent disturbing the delicate seedlings.
- Nutrient-rich soil: Microgreens require nutrient-rich soil for optimal growth. Consider using organic potting soil or a specially formulated microgreen growing mix. These soils provide the necessary nutrients to support healthy plant development.
- Harvesting: Harvest your microgreens when they’ve reached the desired height, usually around 1-2 inches. Use clean scissors or a sharp knife to cut them just above the soil surface. Rinse the harvested microgreens gently with cool water to remove any soil particles.
- Troubleshooting: If you encounter common microgreen problems such as yellowing leaves, overcrowding, or pests, take action promptly. Adjust the watering schedule, provide better air circulation, and remove any damaged or diseased plants.
- Enjoying microgreens: Explore popular microgreen recipes like adding them to salads, sandwiches, smoothies, or garnishing your favorite dishes. Experiment with different flavors and textures to elevate your culinary experience.
Growing microgreens isn’t only nutritious but also rewarding. With proper care and attention, you can enjoy a continuous supply of fresh, vibrant microgreens right at home.
How To Harvest Microgreens
To harvest your microgreens, simply cut them just above the soil surface using clean scissors or a sharp knife. Harvesting microgreens is an exciting and rewarding part of the growing process. Not only do you get to enjoy the fruits of your labor, but you also reap the numerous benefits of eating microgreens. These tiny greens are packed with nutrients and can contain higher levels of vitamins and minerals compared to their fully grown counterparts. They add flavor, color, and texture to a variety of dishes, making them a versatile ingredient in your recipes.
When it comes to harvesting, there are a few tips for a successful microgreen harvest. Firstly, make sure to wait until your microgreens have developed their seed leaves or first true leaves. This is usually after about a week of growth. Use long-bladed scissors to cut the greens at the base, about half an inch above the soil. This ensures that you harvest the leafy part of the microgreens, leaving the root intact for future regrowth.
After harvesting, it’s important to store microgreens properly to maintain their freshness. Rinse the greens in cool water if there’s any soil on them, and remove any seed hulls by submerging the greens and letting the hulls float to the top. Store the microgreens in a container with a fitted lid or a sealable bag in the refrigerator for 3-4 days. This will help keep them fresh and crisp until you’re ready to use them in your favorite recipes.
Incorporating microgreens into your recipes is a great way to elevate the taste and presentation of your dishes. You can top crusty bread smeared with hummus, add them to salads, mix them into soups and dressings, or sprinkle them on top of toast, pizza, or frittatas. The possibilities are endless!
Frequently Asked Questions
How Long Do Microgreens Take to Grow?
Microgreens typically take about 1-3 weeks to grow, depending on the variety. The germination duration is usually a few days, and you can harvest them once the cotyledons have emerged or the first true leaves develop.
What Are the Benefits of Growing Microgreens at Home?
Growing microgreens at home offers numerous benefits. You can enjoy their high nutritional value, save money by having a fresh supply, enhance dishes with their freshness and flavor, practice sustainable gardening, and create customized blends for your taste preferences.
How Should Microgreens Be Stored After Harvesting?
After harvesting microgreens, store them in airtight containers, like plastic bags or glass jars, in the refrigerator. To maintain freshness, add a paper towel to absorb excess moisture. Use within a few days for best flavor and nutritional value.
Can Microgreens Be Grown Without Soil?
Yes, microgreens can be grown without soil using hydroponic methods and alternative substrates. Water-based systems and vertical farming are popular options for growing microgreens in soilless mediums.
Are There Any Specific Temperature Requirements for Growing Microgreens?
To successfully grow microgreens, it’s important to control the temperature. Microgreens thrive in specific temperature ranges, which differ depending on the variety. Maintaining ideal growing conditions will promote optimal microgreen growth rates and ensure successful cultivation.
Conclusion
Congratulations! You’re now equipped with the knowledge and skills to grow your own microgreens at home. By following the step-by-step process outlined in this article, you can enjoy the benefits of fresh and nutritious greens right at your fingertips.
From preparing the water and growing medium to harvesting your microgreens, this cost-effective and satisfying gardening project will bring vibrant flavors and textures to your meals.
So get started on your microgreen growing journey and enjoy the abundance of delicious and nourishing greens.


