You’ve probably heard of plant propagation, but have you ever wondered how to clone your favorite plant exactly? That’s where air layering propagation comes in – a technique that allows you to grow a new plant from a stem while it’s still attached to the parent plant.
By inducing roots to grow on the stem, you can create a genetically identical duplicate. Sounds intriguing, right? But how does it work, and what are the benefits of using this method?
Let’s explore the world of air layering propagation and uncover the secrets to successfully propagating your favorite plants.
Key Takeaways
- Air layering propagation is a horticultural technique that involves rooting a stem while it’s still attached to the parent plant.
- The process involves wounding the stem, applying a root stimulator, and creating a humid microclimate to promote root development.
- Air layering allows growers to reproduce plants with desirable traits and can be used to propagate a wide range of plant species.
- This technique offers several benefits, including increased success rates, reduced transplant shock, and faster root development.
- Air layering has been used for centuries and is a valuable tool in horticulture, particularly for propagating plants that are difficult to root from cuttings.
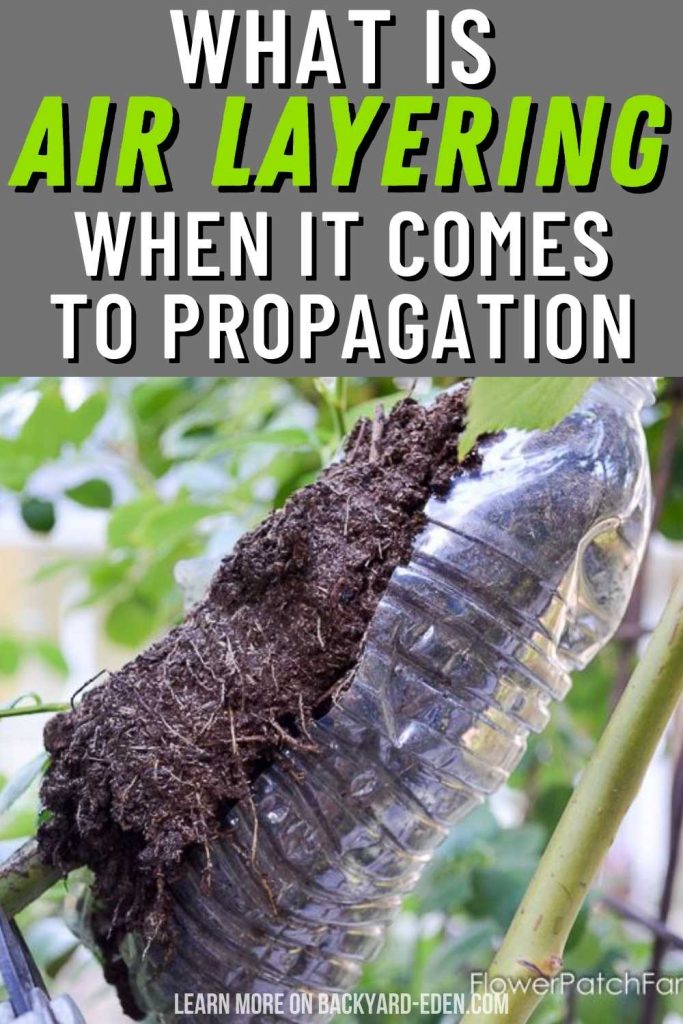
What Is Air Layering In Plant Propagation Exactly?
When you carefully peel back the bark of a stem, just above a node, and pack the exposed area with a moist medium, you’re effectively creating a mini-greenhouse that fosters roots to develop from the stem, a process known as air layering.
This innovative gardening method allows you to propagate new plants without cutting the stem, making it an attractive option for air plant enthusiasts. By creating a humid microclimate, you’re encouraging roots to grow from the stem, eventually forming a new air plant.
Air layering is a precise and controlled method that requires patience, but the results are well worth the wait. As you master this technique, you’ll find it’s an excellent way to share plants with fellow gardening enthusiasts or expand your own collection.
With air layering, you can reproduce your favorite air plants, preserving their unique characteristics and ensuring their beauty is shared with others. By embracing this method, you’ll tap into the full potential of your air plant collection and become a skilled gardener in the process.
Brief History of Air Layering
You can explore the origins of air layering back to ancient China, where it was first practiced by skilled horticulturists around 2000 BCE. This ancient technique was used to propagate plants, allowing them to thrive in new environments. The Historical Roots of air layering are deeply ingrained in traditional Chinese horticulture, where it was considered an essential skill for gardeners and farmers.
As you investigate further into the history of air layering, you’ll discover that it was used to cultivate a wide range of plants, from fruit trees to medicinal herbs. The Ancient Practices of air layering were often passed down through generations, with each horticulturist refining and perfecting the technique.
Air layering became an integral part of Chinese horticulture, allowing gardeners to create new plants quickly and efficiently. The technique was often used to propagate rare or difficult-to-grow plants, making it an invaluable skill for any serious horticulturist.
Benefits of Air Layering Propagation
By adopting air layering propagation, gardeners can greatly increase their chances of successfully reproducing plants with desirable traits, such as improved yields or enhanced disease resistance. This method allows you to replicate plants with precision, ensuring that the new plants retain the same beneficial characteristics as the parent plant.
One of the significant benefits of air layering propagation is increased yields. By reproducing plants with improved yields, you can enjoy a bountiful harvest without sacrificing space.
Speaking of space, air layering propagation is also incredibly space-efficient. You can propagate multiple plants in a relatively small area, making it perfect for hobbyists with limited garden space.
Air layering propagation also delivers faster results compared to traditional propagation methods. You’ll be enjoying your new plants in no time, without the long wait associated with seed germination or cuttings.
Plus, this method is hobbyist-friendly, requiring minimal equipment and expertise. With air layering propagation, you can focus on nurturing your plants, rather than worrying about the complexities of propagation. By adopting this method, you’ll be well on your way to growing a thriving, productive garden that brings you joy and satisfaction.
How Air Layering Works Step-by-Step
As you prepare to air layer a plant, you’ll start by wounding the stem. This involves making a small incision that will stimulate root development. This deliberate injury triggers a response in the plant, causing it to grow roots from the wound site.
Wound the Stem
To induce rooting, make a clean, angled cut about one-third of the way through the stem, carefully removing a thin slice of bark and cortex, but avoiding the cambium layer. This wound will stimulate the stem to produce roots. As you make the cut, consider the stem anatomy: the bark is the outermost layer, followed by the cortex, and then the cambium layer, which is responsible for new growth. Be gentle, as excessive force can damage the stem and reduce the chances of successful rooting.
When wounding the stem, take advantage of the stem’s flexibility. Gently bend the stem to create a small notch, making it easier to remove the bark and cortex. This flexibility is essential, as it allows you to work with the stem without causing unnecessary damage.
Remember to keep the cut clean and angled, as this will promote healthy root growth. By wounding the stem correctly, you’ll set the stage for successful air layering and encourage the development of strong, healthy roots.
Root Development
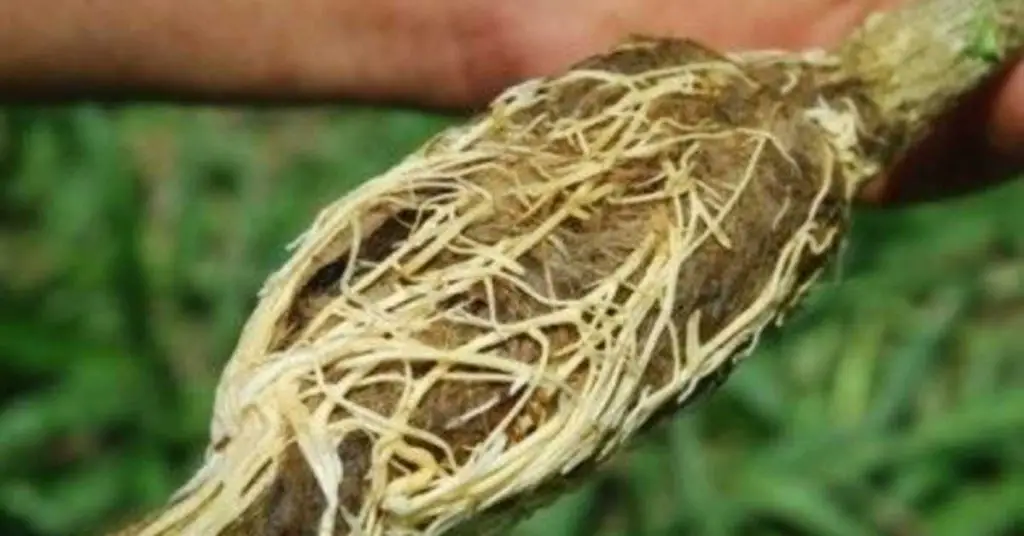
You’ll observe root development occurring when the wounded stem begins to produce roots, which typically takes anywhere from several weeks to a few months, depending on the plant species and environmental conditions. During this stage, the plant’s natural response to the wound triggers the formation of adventitious roots, which emerge from the callus tissue. These roots will eventually develop into a fully functional root system, complete with root hairs and a robust root anatomy.
As you inspect the stem, you’ll notice the roots growing downward, creating a network of fine roots that will eventually support the new plant. This is a critical phase, as the root system is essential for the plant’s survival and growth. The roots will absorb water and nutrients from the soil, allowing the plant to thrive.
It’s essential to maintain ideal conditions, such as adequate moisture and humidity, to support healthy root development. By doing so, you’ll increase the chances of successful air layering and encourage the formation of a robust root system, which will ultimately lead to a thriving, independent plant.
Choosing the Right Plant Material
Your success in air layering propagation hinges on selecting plant material with the right characteristics. The ideal stem section should have at least two nodes and be around 6-12 inches long. When it comes to plant selection, you’ll want to choose a section with a good balance of vigor and flexibility. This will secure that the new roots have a strong foundation to grow from.
Material quality is also vital. You’ll want to avoid taking sections that are weak, diseased, or damaged. Look for stems with a rich green color and a slightly woody texture, as these indicate healthy growth and a higher likelihood of successful propagation. Avoid taking sections from weak or spindly stems, as these may not have the necessary energy reserves to support new root growth.
When evaluating potential plant material, consider factors like the plant’s overall health, its growth rate, and its response to pruning. By selecting high-quality material, you’ll be giving your air-layered plants the best possible start in life.
Preparing the Plant for Layering
Having selected a suitable stem section, you’re ready to prepare it for air layering by making a small incision on the stem about one-third of the way through, just above a node. This incision should be careful and precise, as it will help stimulate root growth.
Next, gently remove any leaves or branches from the area, making sure not to damage the stem. This will help the plant focus its energy on producing roots.
It’s essential to choose a plant that’s healthy and thriving, with good soil conditions. Plant selection is critical, as it will directly impact the success of the air layering process.
Consider the type of plant you’re working with and its specific needs. For example, some plants may require more moisture or specific soil conditions to thrive.
Wounding the Stem Correctly
Make a clean, angled cut about one-quarter of the way through the stem, sloping upward from the node, to stimulate root growth and promote callus formation. This significant cutting technique will encourage the plant to focus its energy on producing roots rather than leaves.
When wounding the stem, it’s vital to maintain stem sanitation by using a sharp, sterile tool to minimize the risk of infection. You’ll want to make a smooth, even cut, avoiding tearing or crushing the stem, which can hinder the rooting process.
Proper cutting techniques are important at this stage, as they directly impact the success of air layering. By making a clean, angled cut, you’ll create an ideal environment for roots to develop. Take your time, and make precise, gentle cuts to ensure the best possible outcome.
Applying Root Stimulator or Hormone
As you proceed with air layering propagation, it’s crucial to apply a root stimulator or hormone to boost root development.
You’ll need to prepare the root hormone correctly, applying it using an effective method to guarantee the best results.
Root Hormone Preparation
To enhance the rooting process, you’ll need to prepare a root hormone for application, which can greatly boost the chances of successful air layering propagation. This involves selecting a high-quality root hormone product that contains synergistic blends of plant growth regulators, which work together to stimulate root growth.
Look for products that contain hormone synergies, such as indole-3-butyric acid (IBA) and naphthaleneacetic acid (NAA), which have been proven to enhance root development. Additionally, consider using root boosters, such as vitamins and micronutrients, to provide ideal conditions for root growth.
When preparing the root hormone, be sure to follow the manufacturer’s instructions for mixing and application rates to achieve the best results. It’s also essential to handle the root hormone carefully, as it can be sensitive to light, temperature, and contaminants.
Hormone Application Methods
With the prepared root hormone in hand, you’ll apply it directly to the wounded area of the stem, making sure to coat the entire surface evenly. This guarantees the hormone is absorbed efficiently, promoting healthy root development. When applying the hormone, make sure to wear gloves to prevent any skin irritation and avoid contaminating the area.
For best results, you can also use foliar spraying to supplement the hormone application. This method involves spraying a diluted solution of the hormone on the leaves, promoting a systemic response that enhances root growth. However, be cautious not to overdo it, as excessive hormone residue can have adverse effects on plant growth.
When handling the hormone, it’s important to follow the manufacturer’s instructions and take necessary safety precautions. Always wash your hands thoroughly after application, and clean any equipment used to prevent cross-contamination. By following these guidelines, you’ll be well on your way to successfully air-layering your plants.
Optimal Hormone Dosage
You’ll need to determine the most effective dosage of root stimulator or hormone to apply, as excessive amounts can be detrimental to root growth. When it comes to air layering propagation, finding the ideal hormone dosage is important. This is because hormones interact with each other and with the plant’s natural hormones, influencing root development.
To calculate the best dosage, you’ll need to take into account factors such as the type of plant, the age of the cutting, and the environment it’s in. Dosage calculations involve understanding the concentration of the hormone product and the recommended application rate. A general rule of thumb is to start with a low dosage and gradually increase as needed.
It’s crucial to follow the product’s instructions and consider any hormone interactions that may affect root growth. By striking the right balance, you’ll be able to promote healthy root development and increase the chances of successful air layering.
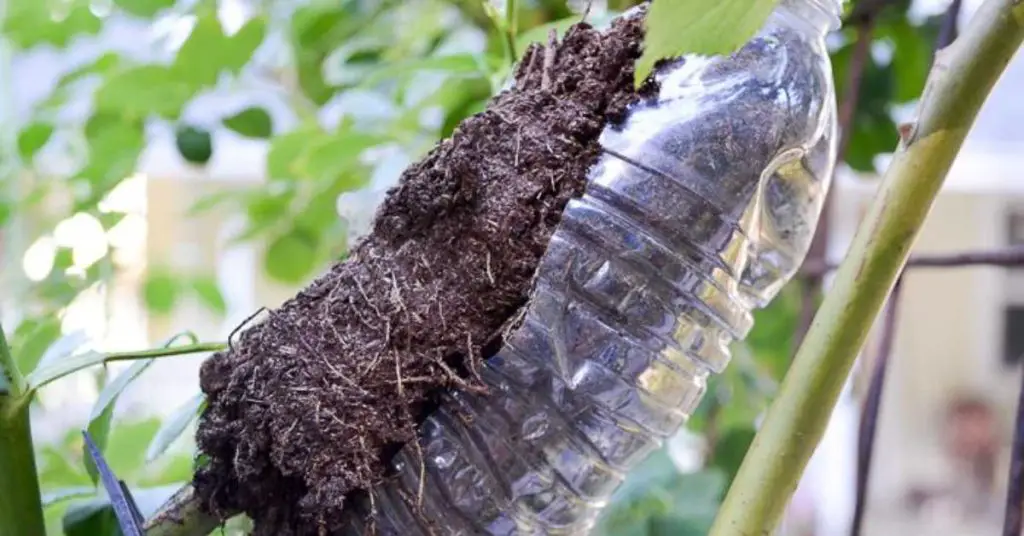
Creating a Moist Environment
By wrapping the rooted area in a moist, transparent plastic bag, you create a humid microclimate that fosters healthy root development. This environment allows for ideal humidity levels, typically between 80-90%, which encourages strong root growth.
The plastic bag acts as a mini-greenhouse, maintaining high humidity and preventing moisture loss from the soil. As a result, the roots receive the necessary moisture, and the soil remains consistently moist but not waterlogged. This balance is essential, as excessive soil moisture can lead to root rot, while inadequate moisture can hinder root development.
Monitoring and Maintaining Humidity
As you’ve created a humid microclimate, it’s now important to regularly check the moisture levels inside the plastic bag to make sure they stay within the best range. You want to maintain a humidity level between 80-90% to promote healthy root development.
To achieve this, you’ll need to implement effective humidity control measures. Consider investing in a fogging system or mist timers to maintain a consistent misting schedule. Climate sensors can also be used to monitor the environment and adjust humidity levels accordingly.
In hot and dry climates, evaporative cooling systems can help reduce temperatures and maintain the best humidity. Conversely, in humid environments, dehumidification strategies may be necessary to prevent over-humidification.
Timing the Root Development Process
As you time the root development process, you’ll need to pinpoint the root initiation stage when the roots start to form and apply root pruning techniques to stimulate growth.
You’ll also need to take into account suitable timing factors, such as plant species and environmental conditions, to guarantee successful air layering.
Root Initiation Stage
Timing the root development process is vital during the root initiation stage. Here, you’ll wait for 1-6 months, depending on the plant species and environmental conditions, for roots to develop from the buried stem section. This period is essential as it sets the stage for successful root formation.
You’ll need to guarantee the stem is properly prepared beforehand, which involves wounding the stem to stimulate root growth. This process, known as stem preparation, helps trigger the production of rooting hormones, increasing the chances of successful root formation.
During the root initiation stage, maintaining ideal environmental conditions is crucial. This includes high humidity, warm temperatures, and adequate light to encourage root development from the buried stem section. Monitoring soil moisture levels is also necessary, ensuring the soil is consistently moist but not waterlogged.
Root Pruning Techniques
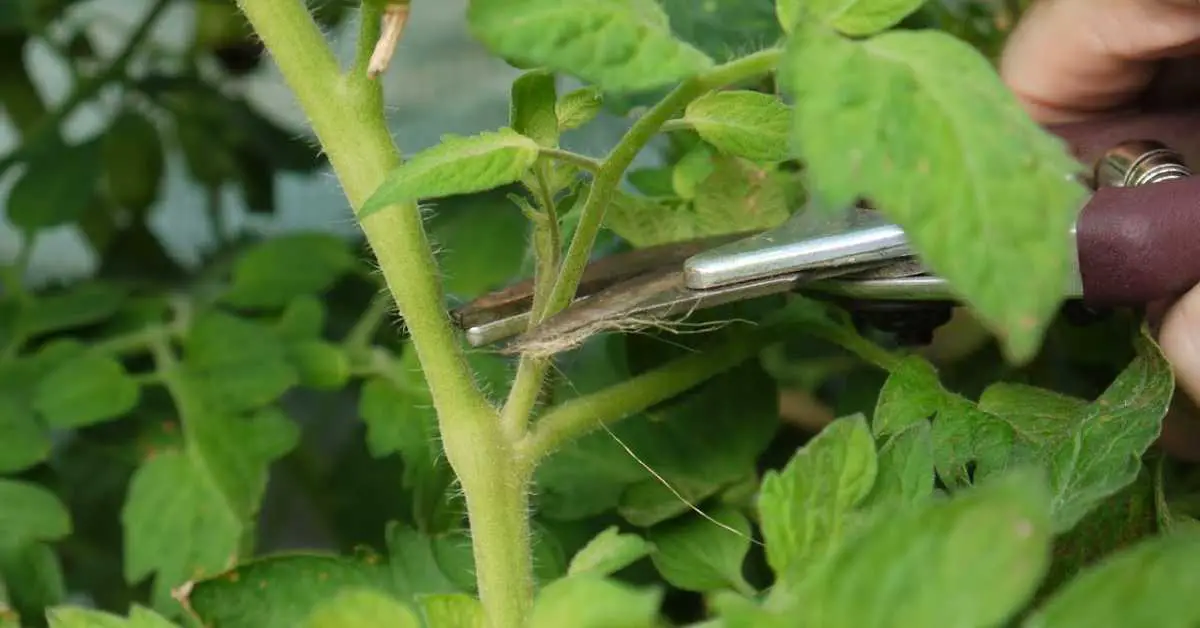
You’ll need to prune the roots once they’ve developed sufficiently, a critical step in the air layering process that demands careful timing to prevent root bound and promote healthy plant growth. This delicate process demands precision and attention to detail to avoid damaging the roots.
When pruning, use specialized pruning tools, such as root pruning scissors or clippers, to guarantee clean cuts that minimize damage to the roots. Make precise cuts at a 45-degree angle, just above a root node, to encourage new growth. Remove any weak or damaged roots to prevent the spread of disease and encourage healthy development.
Prune roots in a well-ventilated area to prevent moisture buildup, which can lead to root rot. By pruning at the right time, you’ll avoid root bound, allowing the plant to develop a robust root system that supports vigorous growth.
Optimal Timing Factors
Proper timing of root development is crucial, and several key factors influence when to prune roots, including the plant’s species, age, and environmental conditions. As you prepare for air layering propagation, you’ll want to take into account the best timing factors to guarantee successful root development.
Seasonal fluctuations, for instance, can greatly impact the process. In regions with distinct seasons, you’ll want to schedule your root pruning accordingly. For example, if you’re working with deciduous plants, prune roots during the dormant season when the plant is less stressed. In regions with mild winters, you may need to adjust your timing to accommodate the plant’s growth patterns.
Climatic conditions also play a significant role in determining the most suitable time for root pruning. In areas with high temperatures and low humidity, you may need to prune roots during the cooler months to minimize stress on the plant. Conversely, in regions with high humidity and mild temperatures, you may be able to prune roots year-round.
Separating the New Plantlet
Gently sever the callus from the parent plant about an inch above the node, using a sharp, sterile tool to minimize damage to the new roots. This is an essential step in air layering propagation, as it allows you to separate the new plantlet from its parent without causing harm. As you make the cut, take care not to disturb the new roots that have formed during the layering process.
New roots forming is a vital part of air layering, and you should be proud of the progress you’ve made so far. Now, it’s time to grant the new plantlet its independence. Carefully remove any remaining connections to the parent plant, taking care not to damage the delicate roots. You may need to gently rock the plant back and forth to loosen any remaining bonds.
As you separate the new plantlet, you’ll be rewarded with a sense of accomplishment, knowing that you’ve successfully propagated a new plant.
Aftercare for the New Plant
Now that the new plantlet is separated from its parent, it’s vital to provide ideal growing conditions to ensure a smooth change and promote healthy establishment. You’ll want to replicate the same conditions the mother plant was in, with similar temperature, humidity, and light exposure.
When it comes to watering, establish a consistent schedule to avoid overwatering or underwatering. Start with once-a-week watering and adjust as needed based on soil moisture.
Speaking of soil, choose a well-draining mix specifically designed for your plant species. Avoid using regular potting soil, as it can retain too much water and cause root rot.
Monitor your plant’s progress closely, and make adjustments to its care as needed. Keep an eye out for signs of stress, such as yellowing leaves or droopy stems.
With proper care, your new plantlet will thrive and become a strong, healthy plant. Remember, patience is key – it may take some time for your plant to adjust to its new environment.
Frequently Asked Questions
Can Air Layering Be Used for All Types of Plants?
You’ll find that air layering isn’t suitable for all plants, as it depends on plant hardiness and soil tolerance. You’ll need to take into account these factors to determine if air layering will work for your specific plant.
How Long Does It Take to Develop Roots Using Air Layering?
When you use successful layering techniques, you can expect root development to take around 1-6 months, depending on factors like plant species and environmental conditions, allowing you to successfully propagate new plants.
Is Air Layering the Same as Grafting or Budding?
You’ll find air layering, grafting, and budding share similar goals, but differ in technique and benefits: air layering develops roots on a stem, while grafting and budding join two plants, offering unique comparison benefits and technique differences.
Can Air Layering Be Done in Indoor or Outdoor Settings?
When deciding where to air layer, you’ll thrive in indoor settings with controlled Lighting Conditions and Temperature Control, but outdoor settings with filtered sunlight and moderate temps can also work, it’s all about finding the perfect balance for your plant.
Are There Any Diseases or Pests That Target Air-Layered Plants?
When air-layering, you’ll need to watch out for fungal attacks, which can spread quickly in humid environments. Guarantee pest resistance by maintaining good air circulation and inspecting your plants regularly, preventing infestations that can harm your air-layered cuttings.
Conclusion
You’ve now grasped the fundamentals of air layering propagation. By inducing roots to grow on a stem while it’s still attached to the parent plant, you can produce genetically identical new plants.
With the right technique, materials, and timing, you can successfully propagate desirable plant varieties. Remember to monitor humidity, timing, and aftercare to guarantee healthy root development and a thriving new plantlet.