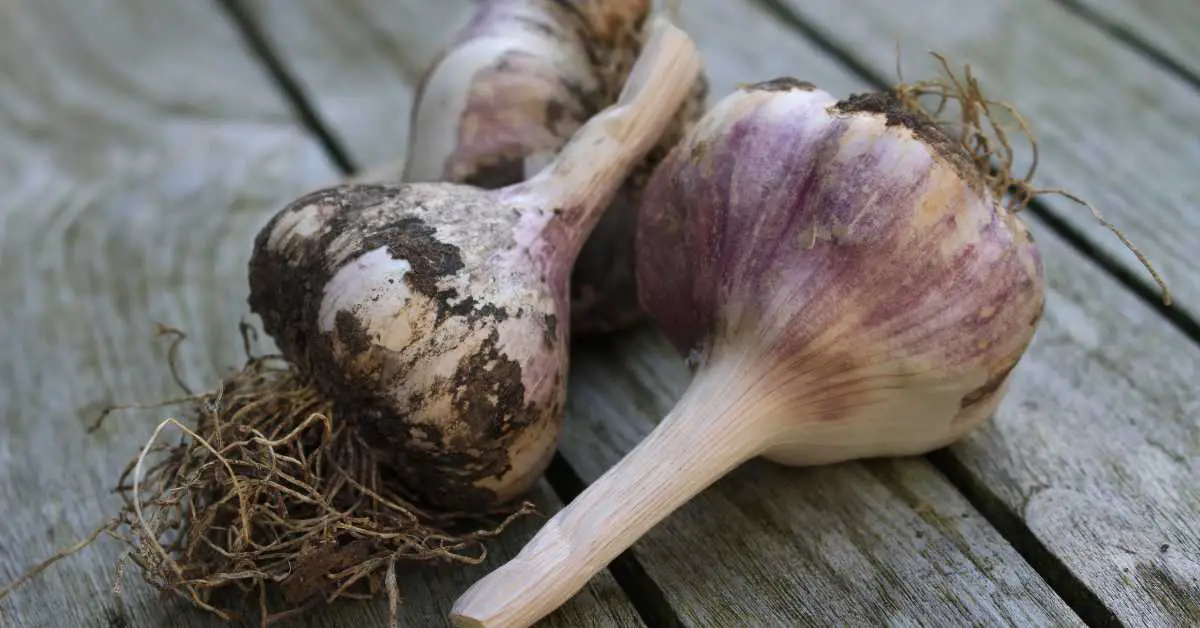
Today, we’re diving into how to grow garlic, a favorite ingredient in kitchens around the globe. Garlic not only enhances the flavor of food but also offers health benefits, making it a fantastic choice for your garden.
Growing garlic at home is both cost-effective and simple. When you grow your own garlic, you can choose from a variety of types that might not be available in your local store, ensuring you get the best flavor and quality. Plus, home-grown garlic is fresher and can be stored to last through several months, providing you with a long-lasting supply for your cooking needs.
In this guide, we’ll take you step-by-step through the process of growing garlic, from choosing the right type to planting, caring for, and finally harvesting your garlic. Whether you are new to gardening or have some experience, these tips will help ensure your garlic thrives.
Let’s get started and unlock the potential of your green thumb with garlic!
Why Should Gardeners Grow Their Own Garlic?
Growing your own garlic has several advantages that make it a worthwhile addition to any garden. Here are some reasons why gardeners should consider planting garlic:
First, garlic is economical. Store-bought garlic can be expensive, especially if you prefer organic varieties. Growing your own is cost-effective because a single clove planted produces a new bulb, multiplying your initial investment many times over.
Second, the flavor of home-grown garlic is superior to that of store-bought ones. The garlic you grow yourself is fresher, which enhances its taste and strength in your cooking. You can also choose from many different varieties, some of which may not be available in supermarkets, such as Rocambole or Elephant garlic, each offering unique flavors.
Health benefits are another significant perk. Garlic is known for its health-promoting properties, including boosting the immune system and reducing heart disease risks. When you grow your own, you can ensure it’s organic and free from harmful chemicals, making it healthier.
Additionally, garlic is easy to grow and requires little space. It can be grown in a small garden plot, raised beds, or even containers. This versatility makes it ideal for gardeners with limited space.
Lastly, growing garlic can improve your garden’s health. Garlic acts as a natural pest deterrent, helping to protect other plants in your garden from harmful insects without the need for chemical pesticides.
In essence, growing your own garlic not only saves money and enhances your dishes but also contributes to a healthier diet and garden environment.
Choosing the Right Garlic Variety
Selecting the right garlic variety for your garden depends on several factors, including your local climate, the flavors you prefer, and your plans for using the garlic in cooking or storing it. Each variety of garlic brings its own unique qualities and growth requirements, so it’s important to choose wisely to ensure the best results in your garden.
Hardneck Varieties are best suited for cooler climates. They produce fewer but larger cloves and are known for their robust flavors, making them a favorite for culinary enthusiasts who enjoy a more pronounced garlic taste. Hardneck garlic is also appreciated for its scapes, which are edible and can be harvested in early summer. Varieties like ‘Rocambole’ and ‘Purple Stripe’ are popular choices for their complex flavors and good storage qualities.
Softneck Varieties thrive in milder climates and are the type most commonly found in stores due to their longer shelf life. Softneck garlic is easier to grow and tends to produce more cloves per bulb, although they are smaller. This type is excellent for braiding and storage, making it ideal for those looking to keep garlic on hand throughout the year. ‘Silverskin’ and ‘Artichoke’ garlic are two common softneck varieties that are prized for their mild flavor and versatility in recipes.
When choosing a garlic variety, consider how you plan to use the garlic. If you enjoy cooking with fresh garlic and want a variety that adds a spicy kick to dishes, a hardneck type may be the best choice. If you need garlic that stores well and still offers a good flavor, softneck may be more suitable.
Additionally, it’s a good idea to source your garlic cloves from a reputable nursery or seed supplier to ensure they are disease-free and specifically suited for planting. Sometimes garlic from the grocery store is treated to inhibit sprouting, which can affect its ability to grow.
By understanding your needs and the characteristics of each garlic type, you can select the best variety for your garden and enjoy a successful harvest.
Preparing to Plant
Getting your garden ready for planting garlic is an essential step to ensure a healthy and productive crop. Here’s how to prepare your garden for planting garlic, which is typically done in the fall for most climates.
When Is The Best Time To Plant Garlic?
The best time to plant garlic is in the fall, about six to eight weeks before the ground freezes. This timing allows the garlic to establish roots before the winter. In areas with mild winters, you may also plant in early spring, but fall planting is preferred as it typically results in larger bulbs.
Soil Preparation
Garlic thrives in well-draining soil rich in organic matter. Before planting, prepare your garden bed by loosening the soil to a depth of about 12 inches and mixing in compost or aged manure to improve soil fertility and texture. Garlic prefers a soil pH of 6.5 to 7.0. If you’re unsure about your soil pH, it’s a good idea to conduct a soil test and adjust the pH accordingly using lime (to raise pH) or sulfur (to lower pH).
Site Selection
Choose a planting site that receives full sun, as garlic needs at least 6 hours of direct sunlight daily to develop properly. Avoid areas where water tends to collect, as too much moisture can cause the bulbs to rot.
By preparing your soil properly and choosing the right planting time and location, you can provide an optimal environment for your garlic to grow. This preparation not only supports the initial growth phases but also sets the stage for a bountiful harvest next season.
Planting the Garlic
Once your garden bed is prepared, it’s time to plant your garlic cloves. Here’s a step-by-step guide to planting garlic properly, ensuring the best chances for a successful crop.
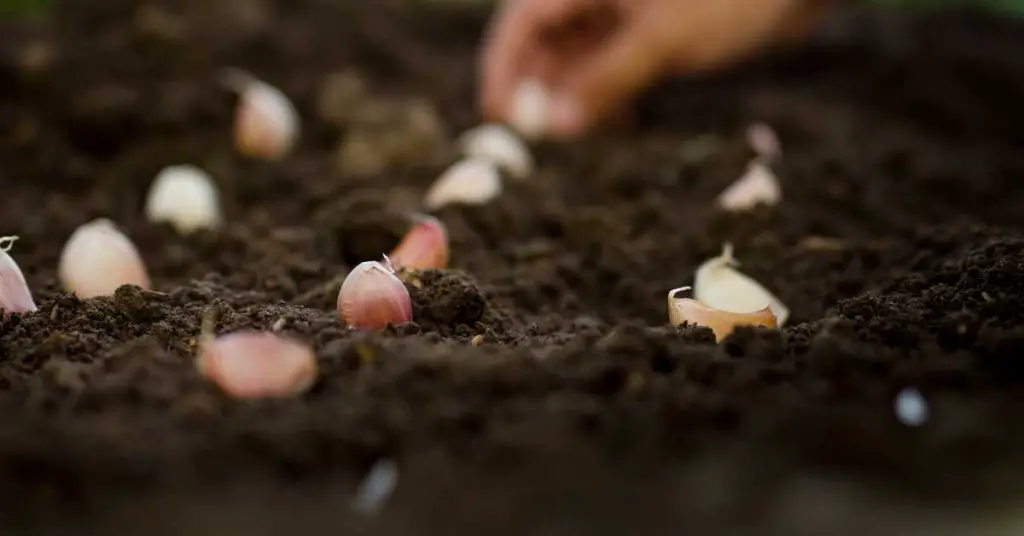
Separate the Cloves
Begin by gently breaking apart the garlic bulb into individual cloves. Be careful not to damage the cloves or remove their papery husks, as this can reduce their ability to ward off diseases and pests.
Depth and Spacing
Plant the cloves pointy end up, about 2 inches deep into the soil. This depth helps protect them from harsh winter temperatures. Space the cloves about 6 inches apart to give each plant enough room to grow and develop a full bulb. If you’re planting multiple rows of garlic, space the rows about 12 inches apart.
Orientation
It’s crucial to plant the cloves with the pointy end facing upwards. This is where the green shoots will emerge. The flat end is where the roots will grow. Planting them upside down can hinder the garlic’s growth.
Soil Covering
After planting, cover the cloves with soil, gently pressing down to ensure contact between the cloves and the soil, which helps with root establishment.
Mulching
In colder climates, apply a thick layer of mulch (such as straw or leaves) over the planted area. Mulch helps insulate the soil, keeping the temperature more consistent and protecting the cloves from freezing during the winter. It also helps retain soil moisture and suppresses weed growth.
Watering
After planting and mulching, give your garlic bed a thorough watering. This initial watering helps settle the soil around the cloves and ensures they have the moisture needed to start developing roots. After this, water sparingly, as garlic does not require a lot of water, especially during the fall and winter.
Planting garlic is a straightforward process, but attention to detail can make a big difference in the success of your crop. With the cloves properly planted and the bed prepared for winter, your garlic will be set to grow once spring arrives, leading to a harvest of fresh, flavorful bulbs.
Caring for Garlic Plants
Once your garlic is planted, proper care throughout the growing season is crucial for developing healthy bulbs. Here’s how to ensure your garlic gets what it needs to thrive:
Watering Needs
Garlic requires consistent moisture but does not do well with waterlogged soil. During the growing season, water your garlic plants deeply once a week if there has been no rain. This is especially important during the spring and early summer as the bulbs are developing. Overwatering can lead to fungal diseases and rot, so it’s important to let the soil dry out slightly between waterings.
Fertilizing
Garlic benefits from fertilization, but the timing and type of fertilizer are important. Apply a balanced fertilizer or well-rotted compost at the time of planting and then again in the early spring as the plants begin to grow vigorously. Avoid high-nitrogen fertilizers later in the growing season as this can encourage more leaf growth at the expense of bulb development.
Mulching
Maintain a layer of mulch around your garlic plants. Mulch helps regulate soil temperature, retain soil moisture, and suppress weeds that can compete with your garlic for nutrients. In spring, you might need to pull back the mulch slightly to allow the soil to warm up.
Weed Control
Keep the garlic bed free from weeds, which can reduce bulb growth by competing for nutrients and water. Hand-pull weeds to avoid disturbing the garlic roots. If you mulched properly, this should be minimal work.
Scapes
If you are growing hardneck garlic, you will see a flower stalk, or scape, emerge in the spring. Cutting off the scapes once they begin to curl allows the plant to redirect energy from flower production to bulb growth, leading to larger bulbs. Scapes are also edible and can be used in cooking, offering a mild garlic flavor.
By monitoring these aspects of care—watering, fertilizing, mulching, and weed control—you can help ensure your garlic plants are healthy and productive, leading to a successful harvest.
Harvesting Your Garlic
Knowing when and how to harvest garlic is key to getting the most out of your crop. Here’s how to determine the right time to harvest and the steps involved in doing it properly.
When to Harvest
Garlic is usually ready to harvest in the late spring or early summer, depending on your climate and when it was planted. The best indicator that garlic is ready for harvest is the condition of the leaves.
When approximately one-third to one-half of the leaves have turned brown, starting from the bottom up, it’s typically time to start harvesting.
This usually occurs several months after planting, but the exact timing can vary based on weather conditions and the garlic variety.
How to Harvest
- Check the Bulbs: Before fully harvesting, dig up one or two bulbs to check their size and maturity. The cloves should be well-formed, and the skins should be intact around each clove.
- Dig Carefully: Use a garden fork or shovel to gently loosen the soil around the plants. Be careful not to damage the bulbs; garlic skins are delicate and can be damaged easily, which reduces their storage life.
- Lift the Bulbs: Once the soil is loosened, you can lift the bulbs out of the ground by their stems. Shake off any excess soil gently, being careful not to remove the papery husk.
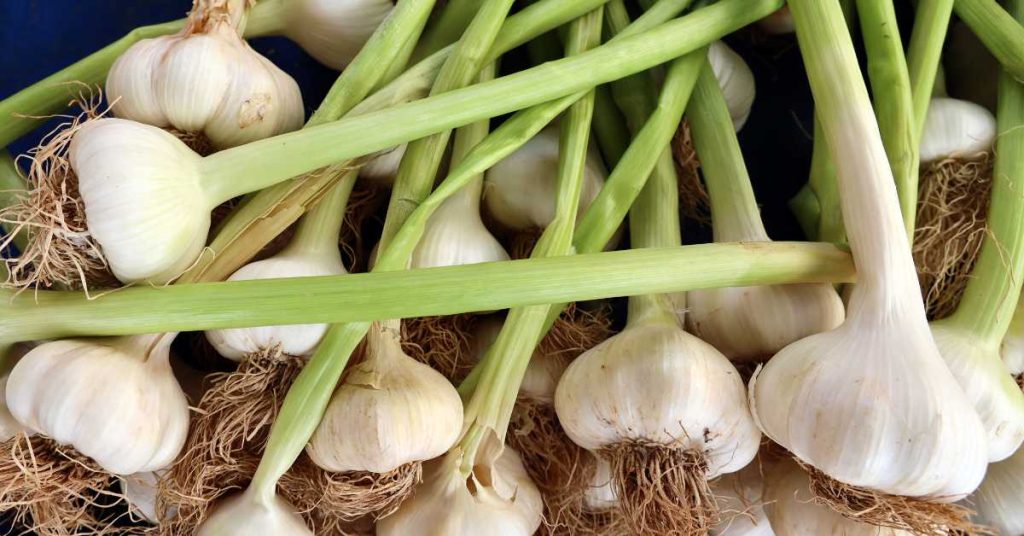
Curing Garlic
After harvesting, garlic needs to be cured (dried) to prepare it for storage. Curing helps to extend the shelf life of the bulbs.
- Dry the Garlic: Place the harvested bulbs in a single layer in a dry, well-ventilated area out of direct sunlight. A shed, garage, or covered porch works well for this. Allow the bulbs to dry for a few weeks until the roots have dried and the outer skin is papery.
- Trim the Roots and Stalks: Once cured, trim the roots close to the bulb, and you can also trim the stalks if desired (especially for softneck varieties which can be braided).
Storing Garlic
Store the cured garlic in a cool, dry place with good air circulation. Properly stored garlic can last several months depending on the variety and conditions.
Harvesting garlic at the right time and curing it properly ensures that you’ll have a supply of garlic from your garden that can last you until the next growing season.
Common Problems and Solutions
Growing garlic can sometimes present challenges, from poor growth to pests and diseases. Here are some troubleshooting tips to help you identify and resolve common issues, ensuring a healthier garlic crop.
Poor Growth
- Cause: Often due to inadequate soil nutrients, insufficient sunlight, or overcrowding.
- Solution: Make sure garlic is planted in well-fertilized, well-draining soil. Ensure plants receive at least 6 hours of direct sunlight daily. Proper spacing is crucial, so follow guidelines for planting distances to prevent competition for resources.
Diseases
- Cause: Fungal diseases like white rot and botrytis rot are common in damp conditions.
- Solution: Improve soil drainage and avoid overhead watering to keep foliage dry. Practice crop rotation to reduce disease buildup in the soil. Remove and destroy infected plants to prevent the spread of disease.
Pests
- Cause: Insects such as onion thrips and garlic mites.
- Solution: Use insecticidal soaps or neem oil as organic treatment options. Maintain clean garden practices, removing plant debris that can harbor pests.
Non-Forming Bulbs
- Cause: Planted too shallow, not enough cold exposure for hardneck varieties, or planted at the wrong time of year.
- Solution: Ensure cloves are planted at the correct depth and timing for your climate. For hardneck types, ensure they get enough cold exposure by planting in the fall.
Yellowing Leaves
- Cause: Overwatering, poor soil drainage, or nutrient deficiencies.
- Solution: Adjust watering practices to allow the soil to dry out between waterings. Enhance soil with compost to improve drainage and nutrient content.
These common issues and their solutions highlight the importance of good cultural practices in growing garlic. By adjusting care techniques and monitoring plants regularly, you can often prevent or mitigate problems, leading to a successful garlic harvest.
FAQs
How Long Does It Take for Garlic to Grow?
Garlic typically takes about eight to nine months to mature when planted in the fall. The exact duration depends on the variety and growing conditions. Hardneck garlic is usually ready by mid-summer, while softneck varieties might take a bit longer. Planting in the fall allows the garlic to establish roots before the winter, and the bulbs develop and mature by early summer.
Can Garlic Be Grown in Pots?
Yes, garlic can be successfully grown in pots. Choose a deep container with good drainage to accommodate the roots and allow for adequate soil moisture control. Plant the cloves as you would in the ground, ensuring they are spaced a few inches apart. Keep the pot in a sunny location and water regularly to maintain even soil moisture.
What Should I Do If My Garlic Plants Are Not Forming Bulbs?
If your garlic plants are not forming bulbs, it may be due to several reasons, such as inadequate chilling (for hardneck varieties), not enough daylight, or too much nitrogen in the soil. Ensure that the plants are getting at least six hours of direct sunlight each day, and avoid high-nitrogen fertilizers late in the growing season. Also, planting at the right time is crucial for bulb development.
How Much Water Does Garlic Need?
Garlic needs to be watered once a week with about an inch of water, more if the weather is particularly hot and dry. However, it’s important not to overwater garlic, as too much moisture can lead to root rot and other fungal diseases. Ensure the soil is well-draining and allow it to dry slightly between waterings.
Is Garlic Frost Tolerant?
Garlic is quite frost tolerant and actually requires a period of cold to properly form bulbs. Hardneck varieties, in particular, need several weeks of cold temperatures (below 40°F) to differentiate the cloves. Garlic is typically planted in the fall so it can establish roots and then go dormant during the winter, before resuming growth in the spring.
Can I Grow Garlic from Store-Bought Cloves?
While it is possible to grow garlic from store-bought cloves, it’s not always recommended because these cloves might be treated to prevent sprouting and could carry diseases. For best results, purchase garlic bulbs from a garden center or nursery that are certified disease-free and intended for planting. This ensures healthy growth and a good harvest.
Conclusion
As we wrap up this guide on how to grow garlic, remember that the success of your garden often comes down to the care and attention you provide. Garlic is a rewarding crop that not only adds flavor to your dishes but also offers numerous health benefits and can enhance the overall health of your garden.
By following the steps outlined—from selecting the right variety and preparing the soil to planting, caring for, and eventually harvesting your garlic—you are well on your way to enjoying your own home-grown bulbs. Experiment with different varieties to find the ones that best suit your taste and climate, and don’t hesitate to adjust your gardening practices based on what you learn each season.
Gardening is a journey of continuous learning and satisfaction. Each year brings new opportunities to improve and expand your skills. So, take pride in each step of the process and enjoy the simple pleasure of harvesting garlic that you grew yourself.
Thank you for following along with this guide. Happy gardening, and may your garlic be plentiful and your dishes flavorful!


