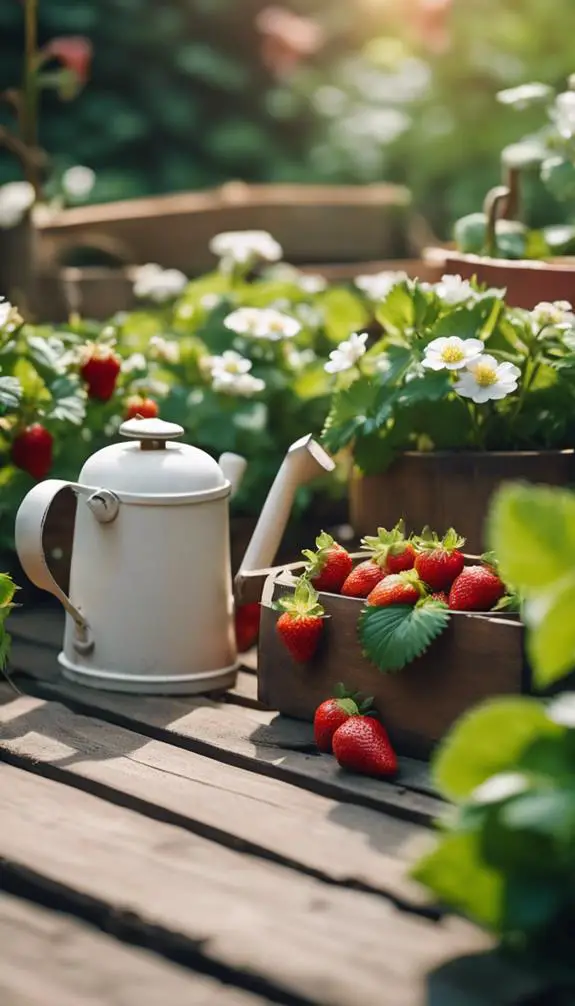
Did you know that you can grow beautiful plants from seeds without the need for fancy equipment or a green thumb? Well, guess what? Winter sowing is your lucky coincidence!
In just 7 simple steps, you can learn how to winter sow seeds and become a proud plant parent. This method is perfect for those who crave a sense of belonging in the gardening community. No more feeling left out or inexperienced!
With winter sowing, you’ll discover the joy of nurturing your own little green family. So, let’s dive in and learn how to embrace the magic of winter and watch your seeds bloom into stunning plants.
Key Takeaways
- Winter sowing is a cost-effective and efficient gardening technique that uses natural elements like cold and precipitation to facilitate germination and plant growth.
- It is suitable for growing a wide variety of plants, including vegetables, herbs, and flowers, and is particularly beneficial for cold climate gardeners as the snow provides natural insulation.
- The ideal time to start winter sowing is 6-8 weeks before the average last frost date, and proper planning based on the average last frost date is crucial for successful winter sowing.
- To winter sow seeds, choose containers that are deep enough for root growth, use a high-quality seed starting mix, water seeds using a fine mist setting, place containers in a sunny location, and monitor containers regularly for germination and growth.
What is Winter Sowing?
Winter sowing is a gardening technique where you sow seeds outdoors in containers during the winter months, using the natural elements to facilitate germination and plant growth. This method allows you to start your seeds early, taking advantage of the winter cold and natural precipitation.
It’s a cost-effective and efficient way to grow a wide variety of plants, including vegetables, herbs, and flowers. Winter sowing techniques involve using containers such as milk jugs or plastic trays, creating mini-greenhouses that protect the seeds from extreme temperature fluctuations. Some of the best plants for winter sowing include cold-hardy vegetables like kale, lettuce, and spinach, as well as perennial flowers like coneflowers and black-eyed Susans.
By following winter sowing tips and tricks, you can successfully grow healthy seedlings and achieve early blooms. Compared to traditional seed starting indoors, winter sowing has its advantages in terms of cost, space, and less reliance on artificial lighting. However, it’s important to avoid common mistakes in winter sowing, such as overwatering, using the wrong type of containers, or not providing enough ventilation.
With proper planning and care, winter sowing can be a rewarding and productive gardening technique.
Winter Sowing Benefits
By utilizing the winter sowing technique, you can reap a multitude of benefits for your garden. Winter sowing offers several advantages over traditional seed starting methods.
Firstly, it’s particularly beneficial for cold climate gardeners. The natural insulation provided by the snow helps protect the seeds and seedlings from harsh winter conditions.
Secondly, winter sowing allows you to extend your growing season. By starting your seeds outdoors in winter, you give them a head start and can enjoy an earlier harvest.
Lastly, winter sowing is a cost-effective gardening method. It eliminates the need for expensive equipment like grow lights or heat mats, making it accessible to beginners and those on a budget.
Follow these winter sowing tips for beginners to ensure a successful growing experience.
When Should You Start?
To determine the ideal time to start winter sowing seeds, you should consider the average last frost date in your area. This date is crucial because it indicates when the risk of frost damage is significantly reduced. Starting your winter sowing too early may expose your seeds to the harsh weather conditions, while starting too late may not give them enough time to grow and develop before planting them outdoors.
The best time to start winter sowing is typically 6-8 weeks before your average last frost date. However, it’s important to note that optimal start times can vary depending on the specific type of plant you’re sowing. Some plants prefer an early start, while others thrive with a slightly later start.
What You’ll Need
To successfully winter sow seeds, you’ll need a few essential supplies. Here’s what you’ll need to get started:
- Container types: Choose containers that are deep enough for root growth, such as recycled milk jugs or plastic containers with drainage holes. This will provide a suitable environment for your seeds to thrive.
- Seed starting mix: Use a high-quality seed starting mix that’s well-draining and sterile. This will provide the necessary nutrients and moisture retention for germination.
- Watering techniques: Use a spray bottle or watering can with a fine mist setting to water your seeds. This will prevent overwatering and ensure even moisture distribution.
Remember to place your containers in a location that receives adequate sunlight according to the specific sunlight requirements of your seeds. And when it’s time to transplant, follow proper transplanting tips to ensure successful growth in your garden.
With the right supplies and techniques, you’ll be on your way to a flourishing winter garden.

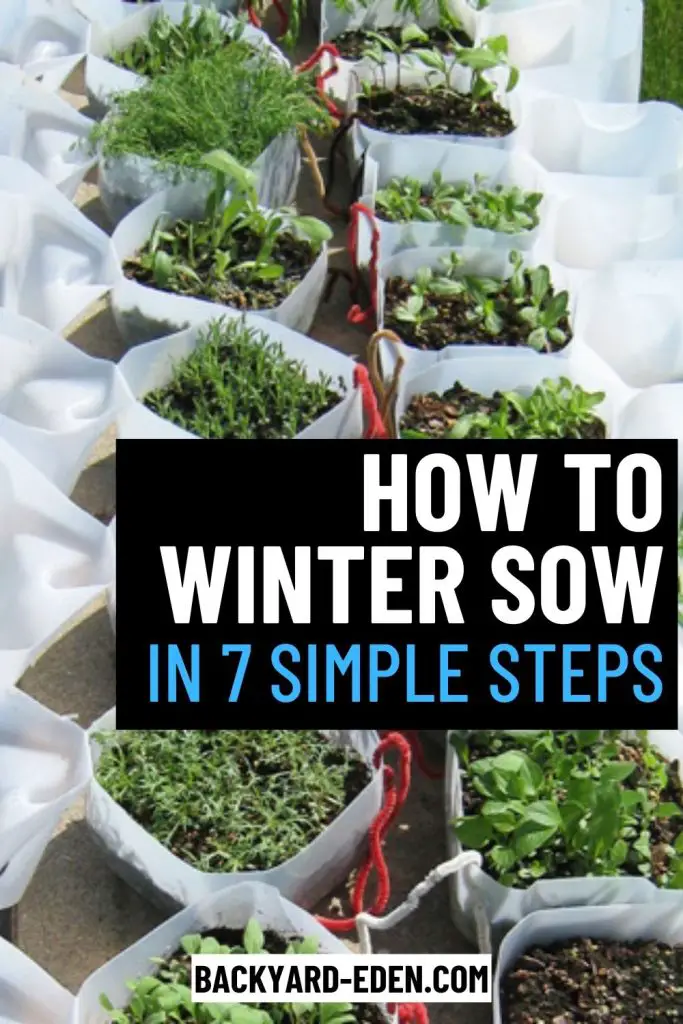
How To Winter Sow Seeds in 7 Simple Steps
To get started winter sowing seeds, you’ll need to follow a few simple steps.
Step 1: Choosing Seeds
Start by selecting the seeds you want to grow during the winter season. This is an important step in your winter sowing journey, as the success of your plants depends on the quality of the seeds you choose. When it comes to choosing seeds, consider the following:
- Variety: Look for seed varieties that are well-suited for winter sowing. Some seeds, like cold-hardy vegetables and winter-flowering annuals, thrive in cooler temperatures.
- Quality: Opt for high-quality seeds from reputable sources. Check for freshness, germination rates, and any specific instructions or recommendations.
- Personal preference: Choose seeds of plants that you love and want to see flourishing in your garden. This will make your winter sowing experience more enjoyable and rewarding.
Step 2: Prepare Your Containers
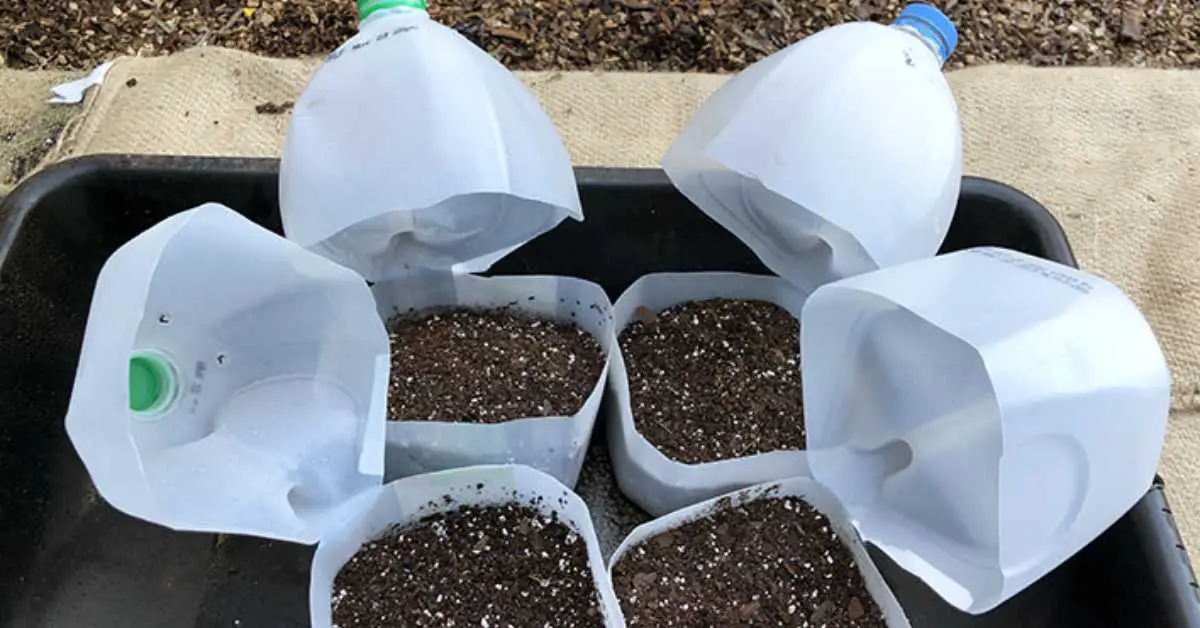
Once you have chosen your seeds, it’s time to move on to preparing your containers for winter sowing. When it comes to container types, you have several options. Plastic containers, such as milk jugs or soda bottles with the tops cut off, are popular choices. These containers are sturdy and provide good insulation for the seeds.
Next, you’ll need to prepare the soil for your containers. Use a high-quality potting mix that’s well-draining. Make sure to moisten the soil before filling the containers.
When it comes to watering techniques, it’s important to keep the soil consistently moist but not waterlogged.
Remember to label your containers with the name and variety of the seeds you’re sowing. This will help you keep track of what you’ve planted.
Lastly, don’t forget that you can reuse containers from previous years, as long as they’re clean and in good condition.
Step 3: Fill and Plant
Get your containers ready by filling them with the moistened potting mix and planting your seeds. Here’s how to get started:
- Container selection: Choose containers that are deep enough for the roots to grow and have drainage holes to prevent waterlogging.
- Soil preparation: Use a high-quality potting mix that’s well-draining and sterile to minimize the risk of disease.
- Seed placement: Follow the instructions on the seed packet for proper depth and spacing. Gently press the seeds into the soil, ensuring good seed-to-soil contact.
- Watering technique: Water the containers thoroughly after planting to settle the soil. Use a gentle watering technique to avoid dislodging the seeds.
- Monitoring progress: Place the containers in a location that receives the right amount of sunlight. Keep the soil consistently moist but not waterlogged. Monitor the containers regularly for germination and growth.
Step 4: Secure the Container
To secure the container, simply attach the lid tightly using tape or rubber bands.
When choosing a container for winter sowing, consider using clear plastic containers like milk jugs, soda bottles, or food containers. These containers allow sunlight to enter and create a mini greenhouse effect. The container size should be large enough to accommodate the plants’ root systems, typically around 1 to 2 gallons.
Place the container in a location that receives adequate sunlight and is protected from strong winds. Proper ventilation is crucial, so make sure to poke holes in the container’s lid or sides to allow for air circulation.
Lastly, consider insulating the container by wrapping it in bubble wrap or placing it inside an insulated box to provide additional protection against cold temperatures.
Step 5: Pick your Location
Choose a suitable location for your winter sowing setup. This step is crucial to ensure the success of your seedlings. Consider the following factors when picking the location:
- Ensuring proper sunlight: Find an area that receives adequate sunlight for your plants to thrive. Position your containers where they can get at least 6 hours of sunlight daily.
- Protecting from extreme weather: Shield your seedlings from harsh weather conditions like frost, wind, or heavy rain. Place them in a sheltered spot, such as against a wall or under a tree canopy.
- Importance of drainage: Ensure that your chosen location has good drainage. Avoid areas prone to flooding to prevent waterlogged soil that can harm the seeds.
Additionally, make sure to stay away from pests and animals that may damage your seedlings.
Step 6: Monitor Your Seedlings
Once you have established a suitable location for your winter sowing setup, it’s time to begin monitoring your seedlings.
Seedling growth is an exciting process to witness, and it’s important to ensure their health and success.
Temperature control is crucial during this stage. Make sure to monitor the temperature inside your setup, adjusting it as needed to provide the optimal conditions for growth.
Additionally, maintaining a consistent watering schedule is essential. Water your seedlings regularly, but be careful not to overwater as it can lead to root rot.
Keep an eye out for any pests that may try to damage your seedlings. Implement pest management techniques to protect them.
Step 7: Transplant
Now it’s time to go ahead and move your seedlings to their new home in the garden. Transplanting your seedlings properly is crucial for their survival and growth. Follow these transplanting techniques and best practices to ensure a successful transition:
- Timing for transplanting: Wait until the seedlings have developed strong roots and sturdy stems before transplanting. This usually takes about 4-6 weeks after germination.
- Best practices for transplanting: Dig a hole in the garden soil that’s slightly larger than the root ball of the seedling. Gently remove the seedling from its container and place it in the hole. Fill the hole with soil, firming it gently around the seedling.
- Common transplanting mistakes to avoid: Avoid damaging the delicate roots of the seedling during transplanting. Also, make sure to water the transplanted seedlings regularly to prevent wilting.
Follow these transplanting tips and tricks to give your seedlings the best chance at thriving in their new garden home.
Frequently Asked Questions
Can Winter Sowing Be Done in All Climate Zones?
Yes, winter sowing can be done in all climate zones. It is a technique that offers many benefits such as natural cold stratification, minimal effort, and cost savings. Compared to traditional seed starting, winter sowing is easier and yields successful results.
Tips and tricks can help you navigate different climates for successful winter sowing.
How Long Does It Usually Take for Winter-Sown Seeds to Germinate?
Germination time for winter-sown seeds varies depending on the type of plant. It can take anywhere from a few days to a few weeks. Ideal temperature for germination is usually between 60-70°F.
Common challenges include mold or fungus growth, which can be prevented by proper ventilation and using sterile soil. Troubleshooting tips include adjusting watering and temperature levels.
Once the seeds have germinated, seedling care involves providing adequate sunlight and gradually acclimating them to outdoor conditions.
Can I Winter Sow Perennial Seeds?
Yes, you can winter sow perennial seeds. It’s important to follow best practices for increased success rates. Consider timing considerations and choose appropriate container options. Winter sowing is a great way to grow a variety of perennial seed varieties.
Are There Any Specific Types of Seeds That Are Not Suitable for Winter Sowing?
Some seeds, such as those with delicate or short-lived germination requirements, may not be suitable for winter sowing. It’s important to consider optimal germination conditions, seed stratification methods, and alternative propagation methods.
Can I Use Regular Potting Soil for Winter Sowing, or Do I Need a Specific Type of Soil?
You’ll want to use the best soil for winter sowing. Regular potting soil may not be the best choice. Consider alternatives and the benefits of using specific soil. Avoid common mistakes and try these tips to improve your soil for successful winter sowing.
Final Thoughts
In conclusion, winter sowing is a simple and effective method for starting seeds during the colder months.
By using recycled containers and utilizing the natural cold stratification process, you can give your seeds a head start and ensure healthy seedlings come springtime.
With just a few supplies and a little bit of patience, you can enjoy the benefits of winter sowing and be well on your way to a successful garden.
So why wait? Give winter sowing a try and see the results for yourself.